-
Prep Time: 15 minutes
-
Cook Time: 45-55 minutes
-
Cooling Time: 1-2 hours
-
Total Time: 1 hour (active) + cooling
-
Recipe Intensity: Easy (This recipe is designed for bakers of all skill levels. The “earthquake” effect happens naturally in the oven!)
-
Recipe Cost: Budget-Friendly to Moderate (Approximately $12-$18, largely dependent on the cost of cream cheese and strawberries)
-
Course: Dessert
-
Cuisine: American
-
Servings: 12-16 people
-
Keywords: Earthquake Cake, Strawberry Cake, Cheesecake, Easy Dessert, Bundt Cake, Potluck Dessert, Marbled Cake, No-Fuss Baking
Ingredients
For the Cake Base:
-
1 box (15.25 oz) strawberry cake mix
-
3 large eggs (or as directed by your cake mix)
-
½ cup vegetable oil (or as directed by your cake mix)
-
1 cup water (or as directed by your cake mix)
-
1 cup fresh or frozen strawberries, finely chopped (if frozen, do not thaw)
For the Cream Cheese Filling & Topping:
-
1 package (8 oz) full-fat cream cheese, softened to room temperature
-
½ cup (1 stick) unsalted butter, softened to room temperature
-
2 cups powdered sugar
-
1 teaspoon vanilla extract
-
1 cup white chocolate chips
-
½ cup sweetened shredded coconut (optional, but recommended for texture)
For the Garnish (Optional):
-
Additional powdered sugar for dusting
-
Sliced fresh strawberries
-
Whipped cream
Equipment You’ll Need
-
9×13 inch metal baking pan
-
Stand mixer or hand mixer
-
Medium mixing bowl (for cake batter)
-
Large mixing bowl (for filling)
-
Spatula
-
Measuring cups and spoons
Step-by-Step Instructions
Step 1: Preheat and Prepare
Preheat your oven to 350°F (175°C). This is a critical first step to ensure even baking from the moment the cake goes in. Do not grease your 9×13 inch pan. This might seem counterintuitive, but a non-greased pan helps the cake batter “climb” the sides as it bakes, contributing to the dramatic earthquake effect. The cake will release easily once cooled due to its high moisture content.
Step 2: Create the Cake Base
In your medium mixing bowl, combine the strawberry cake mix, eggs, oil, and water. Follow the specific mixing instructions on your cake mix box, which typically involve beating with a hand mixer for 2 minutes on medium speed until the batter is smooth. Gently fold in the finely chopped strawberries. This addition of real fruit boosts the strawberry flavor and adds pockets of fruity moisture.
Pour the prepared strawberry cake batter into your ungreased 9×13 inch pan and spread it into a relatively even layer.
Step 3: Whip Up the Cream Cheese Filling
Now, for the star of the show. In your large mixing bowl, combine the softened cream cheese and softened butter. Beat with a mixer on medium speed for 1-2 minutes, until the mixture is completely smooth, pale, and free of any lumps.
Gradually add the powdered sugar, about ½ cup at a time, beating on low speed after each addition to avoid a sugar cloud. Once all the sugar is incorporated, add the vanilla extract and beat on medium-high speed for another 1-2 minutes until the filling is light and fluffy.
Step 4: Assemble for the “Quake”
This is where the magic is set in motion. Drop large, random dollops of the cream cheese filling all over the top of the strawberry cake batter. Do not spread it smooth! The haphazard placement is key to creating the unique marbled pattern.
Evenly sprinkle the white chocolate chips and the shredded coconut (if using) over the entire surface. The coconut will toast as it bakes, adding a wonderful nutty flavor and texture.
Step 5: Bake and Witness the “Earthquake”
Place the pan in the preheated oven and bake for 45-55 minutes. The baking time is crucial here. You are looking for a specific set of clues that the cake is done:
-
The edges of the cake will be deep golden brown and will have pulled away from the sides of the pan.
-
The cream cheese filling will have sunk and cracked dramatically, creating a beautiful, craggy landscape.
-
The center may still look slightly soft and jiggle just a bit when you gently shake the pan—this is okay! It will set as it cools. A toothpick inserted into a cakey section (not a creamy pocket) should come out with moist crumbs, but not wet batter.
Step 6: The Crucial Cool Down
This is the hardest step: patience. Remove the cake from the oven and place the entire pan on a wire cooling rack. Allow it to cool completely in the pan for at least 1-2 hours. As it cools, the liquid components will set, and the structure will firm up, making it possible to slice. Rushing this step will result in a delicious but soupy mess.
Step 7: Serve and Reveal the Beauty
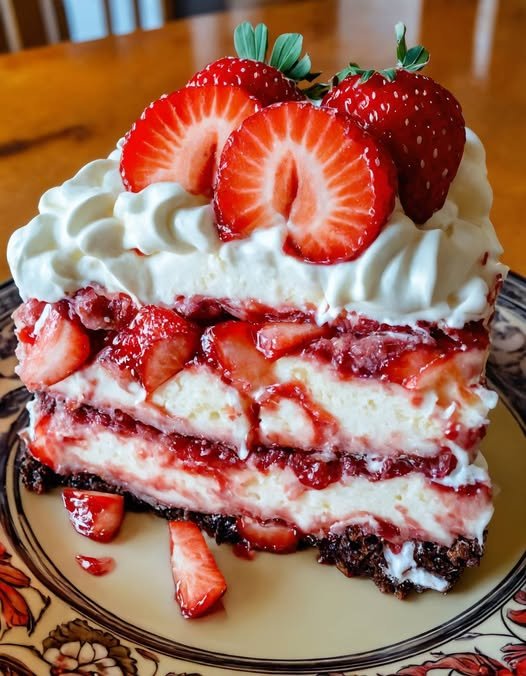
Once completely cool, you can slice and serve the cake directly from the pan. For a beautiful presentation, dust the top generously with powdered sugar just before serving. The white powder will settle into the cracks and craters, highlighting the beautiful “earthquake” topography. Garnish with fresh strawberry slices and a dollop of whipped cream for an extra special touch.
Nutrition Information
(Please note: Nutritional values are estimates and can vary significantly based on the specific brands of cake mix and ingredients used.)
Serving Size: 1 slice (1/12th of the cake)
Calories: 485
Total Fat: 25g
-
Saturated Fat: 12g
-
Trans Fat: 0g
Cholesterol: 75mg
Sodium: 380mg
Total Carbohydrates: 62g -
Dietary Fiber: 1g
-
Sugars: 48g
Protein: 5g
Vitamin D: 0.3mcg | Calcium: 115mg | Iron: 1mg | Potassium: 105mg
Chef’s Notes & Tips for Success
-
Room Temperature is Non-Negotiable: For a smooth, lump-free filling that incorporates easily, your cream cheese and butter must be truly softened. Taking them out of the fridge 1-2 hours before you start is the best insurance for a perfect texture.
-
Embrace the Ungreased Pan: Trust the process! Greasing the pan can cause the cake to slump and not achieve the same dramatic rise and crack effect.
-
Don’t Overbake: The slightly jiggly center is your friend. Overbaking will result in a dry cake. Remember, the residual heat will continue to cook the cake as it cools.
-
Flavor Variations:
-
Chocolate Lovers: Use a devil’s food cake mix and substitute semi-sweet or milk chocolate chips for the white chocolate chips.
-
Lemon Berry: Use a lemon cake mix and fold in raspberries instead of strawberries. The cream cheese filling pairs beautifully with the tart lemon.
-
Tropical Quake: Use a vanilla or coconut cake mix, and add 1 cup of chopped macadamia nuts and crushed pineapple (well-drained) to the batter.
-
-
Storage: Store any leftovers covered tightly with plastic wrap or in an airtight container in the refrigerator for up to 4 days. This cake is also fantastic served cold!
The Strawberry Earthquake Cake is more than a recipe; it’s a baking adventure. It’s a guaranteed conversation starter that proves the most beautiful things can come from a little delicious chaos. Enjoy the cracks, savor the pockets of cream cheese, and relish every bite of this stunning, simple dessert.