Yield: 1 Loaf (approx. 12 slices)
Active Time: 30 minutes
Total Time: 4-6 hours (plus 12-16 hours overnight fermentation)
Difficulty: Intermediate
Author: The Artisan Kitchen
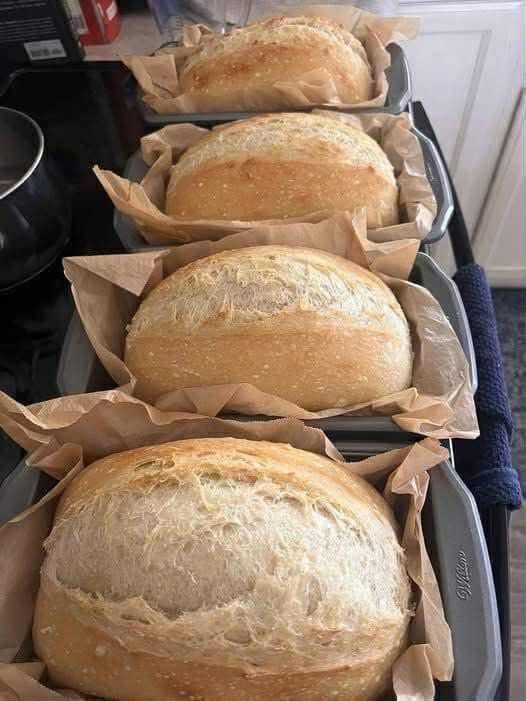
There’s nothing quite like the satisfaction of pulling a golden, crackly-crusted loaf of sourdough bread from your own oven. While crusty boules are wonderful, sometimes you need a soft, sliceable loaf perfect for sandwiches and toast. This Sourdough Sandwich Bread recipe delivers the signature tang of a wild yeast starter in a soft, tender-crumbed, and perfectly structured loaf that holds up to any topping. It’s a game-changer for your lunch routine!
Why You’ll Love This Recipe
-
Perfect for Sandwiches: A soft, tight crumb means no more fillings falling out.
-
Long Fermentation: The overnight rest develops incredible flavor and makes the bread easier to digest.
-
No Commercial Yeast: This loaf is leavened entirely by your active sourdough starter, resulting in a complex, tangy taste.
-
Nutritious & Wholesome: Made with simple, whole ingredients for a nourishing homemade bread.
Recipe Intensity & Timelines
This recipe is rated Intermediate. While the hands-on steps are simple, success relies on understanding the behavior of your sourdough starter. The entire process is a labor of love spread over two days.
Total Commitment: 16-22 hours (mostly hands-off fermentation)
Day 1 Timeline:
-
Morning (8-9 a.m.): Ensure your starter is fed, active, and at its peak.
-
Late Morning (11 a.m.): Mix the dough. This is a short, 10-minute process.
-
Afternoon (11:15 a.m. – 3:00 p.m.): Bulk Fermentation. Let the dough rise for 3-4 hours, with a series of stretch-and-folds.
-
Evening (4-5 p.m.): Shape the dough and place it in the pan.
-
Night (5 p.m. – 9 a.m. next day): Overnight Cold Proof. The loaf rests in the refrigerator for 12-16 hours to develop flavor.
Day 2 Timeline:
-
Morning (9 a.m.): Bake the loaf directly from the fridge.
Ingredients
-
100 g (½ cup) active bubbly sourdough starter
-
350 g (1 ½ cups) warm water (around 85°F/30°C)
-
25 g (2 tbsp) olive oil or melted butter
-
25 g (1 ½ tbsp) honey or maple syrup
-
450 g (3 ¾ cups) bread flour
-
50 g (⅓ cup) whole wheat flour (optional, can use all bread flour)
-
9 g (1 ½ tsp) fine sea salt
Equipment You’ll Need
-
9×5 inch Loaf Pan
-
Stand Mixer with dough hook (optional, but helpful)
-
Kitchen Scale (highly recommended for accuracy)
-
Dough Scraper
-
Plastic wrap or a clean shower cap
Step-by-Step Instructions
Day 1: Mixing, Bulk Fermentation & Shaping
1. Autolyse (Optional but Recommended):
In a large bowl or the bowl of your stand mixer, whisk together the bread flour, whole wheat flour, warm water, honey, and olive oil until no dry bits remain. The dough will be shaggy. Cover and let it rest for 30-60 minutes. This hydrates the flour and develops gluten, making the dough easier to work with.
2. Mix the Dough:
Add the active sourdough starter to the autolysed dough. Mix on low speed with a dough hook, or by hand, for 2-3 minutes until the starter is fully incorporated. Finally, add the salt and mix for another 4-5 minutes on medium-low speed until the dough becomes smoother and starts to pull away from the sides of the bowl. It should be slightly sticky but manageable.
3. Bulk Fermentation:
Transfer the dough to a lightly oiled bowl. Cover it and let it rest in a warm spot (75-78°F / 24-26°C is ideal) for 3-4 hours.
During this time, perform 3-4 sets of “Stretch and Folds”:
-
Every 30 minutes for the first 2 hours, wet your hand, grab one side of the dough, stretch it upwards, and fold it over the center. Rotate the bowl a quarter turn and repeat until you’ve gone around the bowl 4-5 times. This builds strength in the dough without kneading.
4. Shape the Loaf:
Lightly grease your 9×5 inch loaf pan. Turn the dough out onto a lightly floured surface. Gently press it into a rectangle. Fold the right side into the middle, then the left side over that. Now, starting from the top, tightly roll the dough into a log, pinching the final seam shut. Place the dough log, seam-side down, into the prepared loaf pan.
5. Cold Proof:
Cover the pan tightly with plastic wrap or a shower cap and place it in the refrigerator for 12 to 16 hours.
Day 2: Baking to Perfection
1. Preheat the Oven:
The next morning, take the loaf pan directly from the refrigerator. Do not let it come to room temperature. Place a rack in the center of your oven and preheat it to 375°F (190°C).
2. Score the Dough (Optional):
If you like, you can make a shallow slash (about ½ inch deep) down the center of the loaf with a sharp knife or lame. This allows for controlled expansion and a professional look.
3. Bake:
Place the loaf pan in the preheated oven and bake for 40-50 minutes. The bread is done when it has a deep golden-brown crust, sounds hollow when tapped on the bottom, and the internal temperature reads 205-210°F (96-99°C).
4. Cool Completely:
This is the most crucial step for a perfect texture! Immediately remove the bread from the pan and transfer it to a wire rack. Allow it to cool completely for at least 3-4 hours before slicing. Slicing into warm bread will result in a gummy, dense crumb.
Nutrition Information (per slice, estimated)
| Nutrient | Amount |
|---|---|
| Calories | 165 kcal |
| Total Carbohydrates | 32 g |
| Dietary Fiber | 1.5 g |
| Sugars | 2 g |
| Protein | 5 g |
| Total Fat | 2 g |
| Saturated Fat | 0.5 g |
| Sodium | 195 mg |
Note: Nutritional information is an estimate and can vary based on specific ingredients used.
Tips for Success & Troubleshooting
-
Starter is Key: Your starter must be active and bubbly, having doubled in size 4-8 hours after its last feeding. If it’s not peaking, your bread won’t rise properly.
-
Don’t Skip the Cool Down: The long, cold proof is essential for developing the signature sourdough tang and a more open crumb.
-
Trust the Temperature: Using a digital thermometer to check the internal temperature is the most reliable way to know your bread is perfectly baked.
-
My dough didn’t rise enough: This is usually due to a weak starter or a kitchen that was too cold. Ensure your starter is healthy and try to find a warmer spot for bulk fermentation.
-
My bread is too dense: The most common causes are slicing while still warm, under-proofing, or using a starter that wasn’t active enough.
Enjoy the incredible aroma and the even more incredible taste of your homemade Sourdough Sandwich Bread. It’s a testament to the magic of patience and fermentation. Happy baking