Prep Time: 45 minutes (active) | Total Time: 24-36 hours (including fermentation) | Bake Time: 45-50 minutes
Skill Level: Intermediate | Makes: 1 Loaf | Calories per Slice (1/12th): ~160
Recipe Introduction: The Soul of Baking
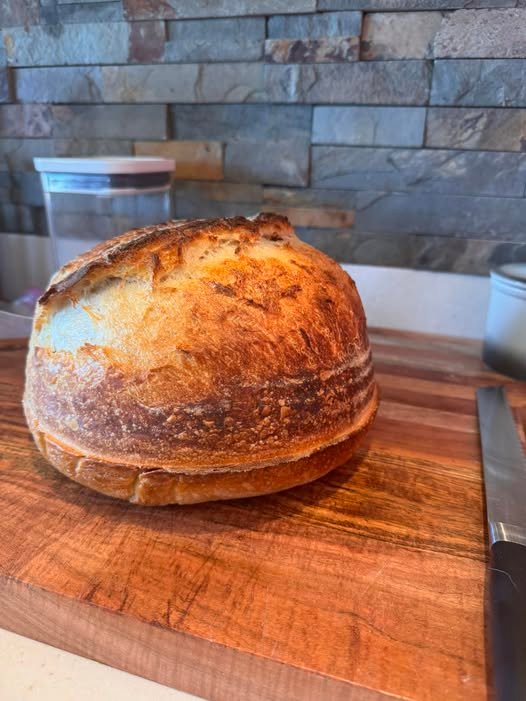
Sourdough is not just bread; it’s a journey. It’s the magic of wild yeast, the alchemy of time, and the reward of patience. This recipe guides you through the process of creating a classic, crusty, open-crumb sourdough loaf with a deeply caramelized crust and a tangy, complex flavor. While the process spans a day or more, the hands-on work is minimal and meditative. The result is a loaf that is profoundly satisfying to make and even better to eat. This is the foundational recipe for your sourdough journey.
Ingredients & Equipment
For the Leaven (The Starter “Boost”):
-
1 tablespoon (20g) active, bubbly sourdough starter
-
75g (⅓ cup) warm water (78-80°F / 25-27°C)
-
75g (½ cup + 1 tbsp) bread flour
For the Final Dough:
-
350g (1 ½ cups) warm water (85°F / 30°C)
-
500g (4 cups + 2 tbsp) bread flour (high-protein, 12-13%)
-
10g (2 teaspoons) fine sea salt
-
Rice flour, for dusting
Special Equipment:
-
Digital kitchen scale (crucial for accuracy)
-
Bench scraper
-
Dough whisk or sturdy spatula
-
Proofing basket (banneton) or bowl lined with a tea towel
-
Dutch oven with lid
-
Razor blade or sharp lame for scoring
Day 1: Create the Leaven & Autolyse
Morning (8:00 AM – 9:00 AM)
-
Build the Leaven: In a small jar or bowl, mix the 1 tbsp active starter, 75g warm water, and 75g bread flour until smooth. Cover loosely and let rest at room temperature (70-75°F / 21-24°C) for 4-6 hours. It is ready when it has doubled in size, is bubbly, and passes the “float test”: a small spoonful dropped in water should float.
Afternoon (1:00 PM – 2:00 PM)
-
Autolyse (The Flour & Water Rest): In a large mixing bowl, combine the 350g warm water and 500g bread flour. Mix with your hands or a dough whisk until no dry flour remains. It will be a shaggy, rough mass. Do not add salt or leaven yet. Cover the bowl and let it rest for 1 hour. This hydrates the flour, develops gluten naturally, and improves dough extensibility.
Day 1: Mix, Bulk Fermentation, & Folds
Mid-Afternoon (2:00 PM – 6:00 PM)
-
Mix the Final Dough: Add the ripe leaven and 10g salt to the autolysed dough. Use wet hands to pinch and fold the ingredients into the dough until fully incorporated. It will be sticky and messy—this is normal.
-
Begin Bulk Fermentation: Cover the bowl tightly. This is the start of bulk fermentation, where flavor and strength develop. It will last 4-5 hours at room temperature.
-
Perform Stretch & Folds: Over the first 2-2.5 hours of bulk fermentation, perform 3-4 sets of “stretch and folds,” spaced 30 minutes apart.
-
How To: With wet hands, grab one side of the dough, stretch it upward, and fold it over the center. Rotate the bowl 90 degrees and repeat 3-4 more times until you’ve folded all sides. This develops gluten structure without kneading.
-
-
Let it Rest: After the final fold, cover the dough and let it finish bulk fermenting undisturbed. The dough is ready when it has increased in volume by 30-50%, looks puffy and aerated, and holds a dimple when you gently poke it with a floured finger.
Day 1: Pre-Shape, Shape, & Cold Proof
Evening (6:00 PM – 7:00 PM)
-
Pre-Shape: Gently turn the dough out onto a lightly floured surface. Using a bench scraper, shape it into a loose round. Let it rest, uncovered, for 20-30 minutes. This is the “bench rest,” which relaxes the gluten for final shaping.
-
Final Shape: Lightly flour the top of the dough. Using your bench scraper, flip it over so the floured side is down. Shape it into a tight boule (round) or batard (oval) using your preferred method. The key is to create surface tension.
-
Prepare for Proofing: Generously dust your proofing basket (banneton) with rice flour (it prevents sticking). Place the shaped dough seam-side up into the basket.
-
Cold Proof (Retard): Place the entire basket inside a plastic bag or cover loosely, and immediately place it in the refrigerator for 12-16 hours (overnight). This slow, cold fermentation deepens the sour flavor and improves the oven spring.
Day 2: Bake
Morning (8:00 AM – 10:00 AM)
-
Preheat: Place your Dutch oven (with the lid on) in the center of your oven. Preheat to 500°F (260°C) for at least 45 minutes.
-
Score the Dough: Carefully remove the basket from the fridge. Place a sheet of parchment paper over the basket, flip it over, and gently lower the dough onto the paper. Using a razor blade (lame), make one confident, swift slash about ½-inch deep across the top. This controls expansion and creates the “ear.”
-
Bake: Using oven mitts, carefully remove the preheated Dutch oven. Lift the dough by the parchment paper “sling” and lower it into the hot pot. Cover with the lid.
-
Bake Covered: Reduce oven temperature to 450°F (230°C). Bake with the lid on for 20 minutes. This creates a steamy environment for maximum oven spring.
-
Bake Uncovered: Remove the lid. The loaf should be pale and puffed. Continue baking, uncovered, for another 20-25 minutes, until the crust is a deep, burnished brown and sounds hollow when tapped on the bottom. An internal temperature of 208-210°F (98-99°C) is ideal.
-
The Final, Critical Rest: Transfer the loaf to a wire cooling rack. You must let it cool completely for at least 3-4 hours before slicing. Cutting into a warm loaf releases steam and results in a gummy crumb. This is the hardest but most important step.
Serving & Pairing Suggestions
-
The Perfect Slice: Thick slices toasted and slathered with high-quality butter and flaky sea salt.
-
Brunch Glory: As the base for exceptional avocado toast or eggs Benedict.
-
Soup’s Best Friend: Alongside a bowl of creamy tomato soup or hearty stew.
-
Charcuterie Companion: As part of a cheese and charcuterie board.
Nutrition Information (Per Slice, 1/12th of Loaf)
-
Calories: ~160
-
Total Fat: 0.5g
-
Saturated Fat: 0g
-
Cholesterol: 0mg
-
Sodium: 325mg
-
Total Carbohydrates: 33g
-
Dietary Fiber: 1g
-
Sugars: 0g
-
Protein: 5g
Nutritional information is an estimate. Sourdough has a lower glycemic index and may be easier to digest for some due to the long fermentation process breaking down gluten and phytic acid.
The Sourdough Baker’s Guide: Troubleshooting & Science
Understanding Your Starter & Environment:
-
Starter Readiness: Your starter must be active and recently fed (peaking 4-12 hours after feeding) to build a strong leaven. A weak starter is the #1 cause of dense loaves.
-
Temperature is King: Fermentation time is entirely dependent on ambient temperature. In a cold kitchen (68°F/20°C), bulk fermentation may take 6-7 hours. In a warm one (78°F/26°C), it may take only 3. Watch the dough, not the clock. The “poke test” is your best guide.
The “Why” Behind the Steps:
-
Autolyse: Allows enzymes to break down starches, simplifying gluten development and improving extensibility (stretch). Skipping this can lead to a tighter crumb.
-
Stretch & Folds: Builds a strong gluten network to trap the CO2 produced by yeast and bacteria, creating an open, airy crumb structure.
-
Cold Proof (Retarding): The lactic acid bacteria thrive in the cold, producing more tangy acetic acid. It also firms up the dough for easier scoring and improves oven spring.
Common Issues & Solutions:
-
Dense, Gummy Crumb: Under-proofed (didn’t ferment long enough) or cut into while still warm. Ensure your starter is strong and bulk ferment until the dough is visibly puffy.
-
Flat Loaf, No Oven Spring: Over-proofed (fermented too long) or weak starter. The dough exhausted its food before baking. Try a shorter bulk fermentation or strengthen your starter feeding routine.
-
Pale, Soft Crust: Not baked long enough or insufficient steam. Ensure your Dutch oven is preheated sufficiently and bake uncovered until deeply colored.
-
Dough Spreading, Not Holding Shape: Under-developed gluten (needs more folds) or over-hydrated for your flour. In humid climates, reduce water by 25g.
Maintenance & Storage:
-
Storing the Bread: Keep the whole loaf, cut-side down, on a cutting board for the first 24 hours for optimal crust. After that, store in a paper bag or bread box for up to 3 days. Do not refrigerate, as it accelerates staling.
-
Freezing: For long-term storage, slice the fully cooled loaf, freeze slices on a tray, then transfer to a freezer bag. Toast directly from frozen.
-
Reviving Stale Bread: Lightly dampen the crust and reheat in a 350°F oven for 10 minutes, or use for outstanding toast, croutons, or bread pudding.