Total Time: ~24-36 hours (mostly hands-off) | Active Time: 45-60 minutes
Difficulty: Intermediate (A patient, rewarding project)
Yield: 1 beautiful round loaf (a boule)
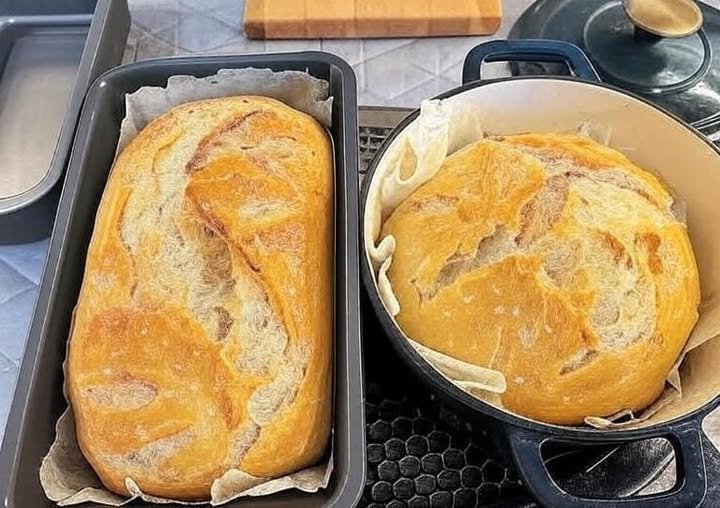
This isn’t just bread; it’s a living creation. This recipe guides you through the timeless, alchemical process of turning just flour, water, and salt into a sourdough loaf with a crackling, blistered crust, an airy, chewy crumb full of irregular holes (the “open crumb”), and a complex, tangy flavor. It’s a weekend project that rewards patience with profound satisfaction and the soul-warming aroma of a true bakery.
The Sourdough Trinity: Understanding the Process
-
The Starter: Your wild yeast culture. It must be active, bubbly, and recently fed (peaking 4-8 hours after feeding). If it doesn’t float in water, it’s not ready. (See FAQ for starter maintenance).
-
Autolyse: The resting period for flour and water. This allows gluten to develop naturally, improving extensibility (stretch) and final texture.
-
Bulk Fermentation: The primary rise where flavor and strength develop through a series of “folds.”
-
Proofing: The final rise, shaping the loaf’s final structure and flavor.
Ingredients & Equipment
Ingredients
-
100g (½ cup) active, bubbly sourdough starter (100% hydration)
-
350g (1 ½ cups) lukewarm water (about 85°F/30°C)
-
500g (4 cups + 2 tbsp) bread flour (high-protein is ideal)
-
10g (2 tsp) fine sea salt
-
Rice flour, for dusting (optional, prevents sticking)
Special Equipment
-
Kitchen scale (non-negotiable for accuracy)
-
Large mixing bowl or proofing bowl
-
Bench scraper
-
Dutch oven with lid (essential for steam)
-
Parchment paper
-
Razor blade or lame (for scoring)
-
Banneton proofing basket (optional but helpful) or a bowl lined with a heavily floured tea towel.
Step-by-Step Schedule (The Baker’s Timeline)
Day 1 – Evening (The Leaven & Autolyse)
-
9:00 PM: Feed your starter so it will be ripe and active for the morning.
-
Day 2 – Morning (Mix & Bulk Fermentation)
-
8:00 AM: Mix dough & begin autolyse (30 min rest).
-
8:30 AM: Add salt and starter. Incorporate thoroughly.
-
9:00 AM – 1:00 PM: Bulk Fermentation (approx. 4 hours). Perform 3-4 sets of stretch & folds.
Day 2 – Afternoon (Shape & Proof)
-
1:00 PM: Pre-shape, rest, then final shape.
-
1:30 PM: Begin cold proof in refrigerator (12-18 hours).
Day 3 – Morning (Bake!)
-
7:00 AM: Preheat oven & Dutch oven (1 hour).
-
8:00 AM: Score and bake (20 min covered, 25 min uncovered).
-
8:45 AM: Cool completely (the hardest part!).
Detailed Instructions
Step 1: The Leaven & Autolyse (8:00 AM)
-
In your large bowl, combine 350g warm water and 100g active starter. Whisk until milky and dissolved.
-
Add 500g bread flour. Mix with your hands or a spatula until no dry bits remain. It will be a shaggy, rough mass. This is perfect.
-
Cover the bowl and let it rest (autolyse) for 30 minutes. This rest hydrates the flour and begins gluten development.
Step 2: Incorporate Salt & Begin Bulk Ferment (8:30 AM)
-
Sprinkle the 10g salt over the dough. Add a tiny splash (~10g) of water to help it incorporate.
-
With wet hands, pinch and fold the dough to fully dissolve and integrate the salt. It will feel messy, then come together.
-
Cover the bowl. Your Bulk Fermentation clock starts now. This will take about 4 hours at a steady 75-78°F (24-26°C). Temperature is key—a colder room means a longer bulk.
Step 3: Stretch & Folds (The Strength Builder) (9:00 AM – 1:00 PM)
You will do 3-4 sets of folds, spaced 30-45 minutes apart.
-
Technique: With wet hands, grab one side of the dough, stretch it gently upward, and fold it over the center. Rotate the bowl a quarter turn and repeat until you’ve gone around the bowl (4-5 folds total).
-
This builds gluten strength without kneading. After each set, re-cover the bowl. You’ll feel the dough transform from loose and sticky to smooth, strong, and aerated.
Step 4: Pre-Shape, Rest & Final Shape (1:00 PM)
-
Pre-shape: Gently turn the dough out onto a barely floured surface. Using a bench scraper, tuck the edges under to create a loose round. Let it rest, uncovered, for 20-30 minutes (the “bench rest”). This relaxes the gluten for final shaping.
-
Final Shape: Lightly flour the top of the dough. Using your bench scraper, flip it over so the floured side is down. Gently stretch the edges and fold them into the center, like an envelope, creating surface tension. Then, using the scraper and your other hand, drag the dough toward you to tighten the skin on top. It should feel like a firm, cohesive ball.
Step 5: Cold Proof (The Flavor Developer) (1:30 PM)
-
Generously dust your banneton or towel-lined bowl with a 50/50 mix of rice flour and all-purpose flour.
-
Place the dough seam-side up into the basket. Cover with a reusable bag or plastic wrap.
-
Place immediately in the refrigerator for a 12-18 hour cold proof. This slow fermentation is where the signature tangy, complex sourdough flavor develops.
Step 6: Score & Bake (Day 3, 8:00 AM)
-
Preheat: Place your Dutch oven with lid inside your oven. Preheat to 450°F (230°C) for a full hour. The vessel must be blazing hot.
-
Score: Carefully remove the hot Dutch oven. Turn your proofed dough out onto a sheet of parchment paper. It should hold its shape. Using a razor blade, make one confident, swift slash about ½-inch deep across the top. This “score” controls where the bread expands (the “oven spring”).
-
Bake: Using the parchment as a sling, lower the dough into the hot Dutch oven. Cover with the lid.
-
Bake Covered: Bake for 20 minutes. The trapped steam creates a humid environment for maximum oven spring and a crisp crust.
-
Bake Uncovered: Remove the lid. Reduce heat to 425°F (220°C). Bake for another 20-25 minutes until the crust is deeply, gloriously golden brown and sounds hollow when tapped.
-
Cool: Transfer the loaf to a wire rack. YOU MUST LET IT COOL COMPLETELY (at least 3-4 hours). Slicing it hot will release steam and turn the beautiful, airy crumb gummy.
Baker’s Notes & FAQ
-
My Starter Isn’t Ready: If your starter doesn’t pass the “float test” (a spoonful floats in water), delay mixing. A weak starter means dense bread. Keep feeding it until it’s vigorous.
-
No Dutch Oven? Create steam by placing a metal pan on the oven’s bottom rack while preheating. Pour 1 cup of boiling water into it when you load the bread, and bake on a preheated pizza stone or baking sheet.
-
Troubleshooting:
-
Dense Bread: Under-proofed (increase bulk time), weak starter, or cut too hot.
-
Flat Loaf: Over-proofed (dough loses structure). Reduce bulk or cold proof time.
-
Pale Crust: Bake uncovered longer for more color.
-
-
Storage: Keep cut-side down on a board for 2-3 days. For longer storage, slice and freeze. Reheat from frozen in a toaster or oven.
Nutrition Information (Per 75g slice, approx. 12 slices per loaf)
| Nutrient | Amount | % Daily Value* |
|---|---|---|
| Calories | 180 | |
| Total Fat | 1g | 1% |
| Saturated Fat | 0g | 0% |
| Sodium | 325mg | 14% |
| Total Carbohydrate | 37g | 13% |
| Dietary Fiber | 2g | 7% |
| Total Sugars | 0g | |
| Protein | 6g | 12% |
*Percent Daily Values are based on a 2,000 calorie diet. Values are estimates.
The Final Loaf: More Than Bread
This sourdough is the culmination of time, microbial life, and your own care. That first crack of the crust, revealing the soft, steaming interior with its wild, irregular alveoli, is a moment of pure triumph. The flavor is deep and wheaty, with a balanced tang that store-bought bread can only imitate.