-
Prep Time: 5 minutes
-
Cook Time: 40 minutes
-
Total Time: 45 minutes
-
Course: Dessert
-
Cuisine: American
-
Diet: Vegetarian
-
Difficulty: Lowest Intensity – The easiest dessert imaginable. Perfect for beginners, kids helping in the kitchen, or anyone needing a foolproof treat.
-
Servings: 9
-
Yield: One 8×8 or 9×9 inch baking dish
Equipment
-
8×8 inch or 9×9 inch Square Baking Pan
-
Can Opener
-
Measuring Cups
Ingredients
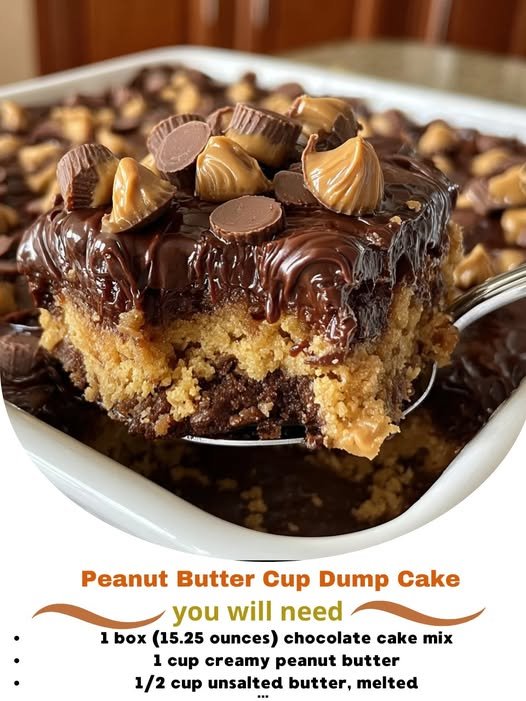
For the Cake Base & Topping:
-
1 (15.25 oz) box chocolate fudge cake mix (DO NOT prepare the cake mix—use the dry powder straight from the box)
-
1 (21 oz) can chocolate fudge pie filling (or 1 can of hot fudge sauce, slightly warmed to be pourable)
-
1 cup (2 sticks) unsalted butter
For the Peanut Butter Layer:
-
1 (12-16 oz) jar of creamy peanut butter (not natural/oily style)
For Serving (Highly Recommended):
-
Vanilla ice cream
-
Whipped cream
-
Chopped Reese’s Peanut Butter Cups for garnish
Instructions
Part 1: The “Dump” – Layering the Chocolate Base
-
Preheat Oven: Begin by preheating your oven to 350°F (175°C). No need to grease the baking pan; the generous amount of butter in the recipe will prevent sticking.
-
First Layer – Chocolate Fudge: Open the can of chocolate fudge pie filling and pour it directly into the bottom of the baking dish. Use a spatula to spread it into a smooth, even layer that covers the entire bottom of the pan. If using hot fudge sauce, warm it slightly in the microwave for 20-30 seconds to make it easier to spread.
Part 2: The Star – Adding the Peanut Butter
-
Create the Peanut Butter Layer: Dollop large spoonfuls of creamy peanut butter evenly over the layer of chocolate fudge. Space the dollops about an inch apart. You should use about 3/4 of the jar for this layer.
-
Reserve for Swirling: Set aside 2-3 tablespoons of peanut butter for the final topping.
Part 3: The “Cake” – Creating the Crust and Topping
-
Third Layer – Cake Mix: Sprinkle the entire box of dry, unprepared chocolate fudge cake mix directly over the chocolate and peanut butter layers. Do not stir. Use your hands or the back of a spoon to spread the powder into a uniform, even layer, covering everything completely.
-
The Butter Layer – The Key to Crispiness: This is the most crucial step for achieving the perfect texture. Take the two sticks of cold butter and slice them into 16-20 thin pats. Arrange the butter pats evenly over the entire surface of the cake mix, placing them close together like tiles. Try to cover as much of the dry powder as possible.
Part 4: The Final Touch and The Bake
-
Add the Swirl: Take the reserved 2-3 tablespoons of peanut butter and dollop it lightly over the butter and cake mix layer.
-
Bake to Perfection: Place the baking dish in the preheated oven and bake for 35-45 minutes. The cake is done when the top is set, looks dry and crumbly, and is a deep, dark brown color. The edges should be actively bubbling with hot fudge and peanut butter.
-
Cool Slightly: Remove the dump cake from the oven and place it on a wire rack. Allow it to cool for at least 15-20 minutes before serving. This resting period is essential as it allows the thick, bubbling fudge filling to set slightly, making it safer to eat and easier to serve. It will be served warm, not scalding hot.
Serving and Presentation
Scoop the warm dump cake into bowls. The ideal serving includes some of the fudgy base, the molten peanut butter, and the crisp cake topping. Top with a generous scoop of vanilla ice cream, which will begin to melt deliciously into the warm cake. Garnish with chopped Reese’s Peanut Butter Cups for an extra-special touch.
Nutrition Information
Please note: This is an estimate provided by an online nutrition calculator. Actual values will vary based on specific brands of ingredients used. This is a rich, indulgent dessert.
Serving Size: 1/9 of the recipe (without ice cream)
Calories: ~710
Total Fat: 40g (51% DV)
-
Saturated Fat: 18g (90% DV)
Cholesterol: 55mg (18% DV)
Sodium: 630mg (27% DV)
Total Carbohydrates: 85g (31% DV) -
Dietary Fiber: 4g (14% DV)
-
Sugars: 55g
Protein: 10g
Vitamin D: 0.5mcg (3% DV)
Calcium: 120mg (10% DV)
Iron: 3mg (17% DV)
Potassium: 380mg (8% DV)
Chef’s Notes & Tips for Success
-
Don’t Mix!: The beauty of a dump cake is in the layers. Resist the urge to stir the ingredients together. The layered approach is what creates the distinct textural contrast between the fudgy bottom, the peanut butter pockets, and the cake-like top.
-
Butter Coverage is Crucial: For a perfectly cooked topping, try to get as much of the cake mix covered with butter as possible. Any dry patches of powder will remain uncooked and floury. If you notice a few dry spots after baking, you can drizzle a little more melted butter over them and return the dish to the oven for 5 minutes.
-
Peanut Butter Choice: Use a standard, shelf-stable creamy peanut butter like Jif or Skippy. Avoid natural peanut butters that separate, as their oil content can make the dessert greasy.
-
Get Creative with Flavors: This recipe is a fantastic template for endless variations.
-
Peanut Butter & Jelly: Use a vanilla cake mix and a layer of strawberry or grape jam instead of the chocolate fudge.
-
S’mores Dump Cake: Use a chocolate cake mix, a layer of chocolate pudding, dollops of marshmallow fluff, and graham cracker crumbs mixed with the cake mix.
-
Salted Caramel: Use a vanilla cake mix, a layer of apple pie filling, and dollops of salted caramel sauce instead of peanut butter.
-
-
Why is it Called a Dump Cake?: The name comes from the incredibly simple preparation method—you just “dump” the ingredients into the pan without any mixing or complicated steps. It’s a testament to how easy this dessert is to make!
-
Storage: Cover any leftover dump cake with plastic wrap or transfer it to an airtight container. It can be stored at room temperature for 1 day or in the refrigerator for up to 4 days. Reheat individual portions in the microwave for 20-30 seconds