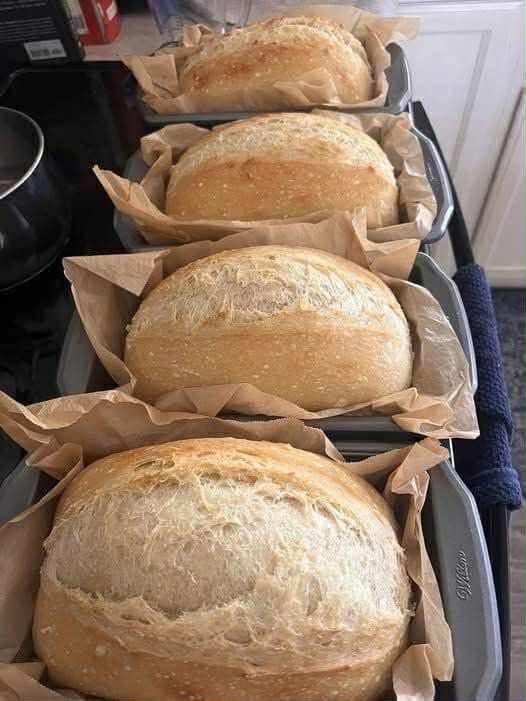
Yields: 1 large, rustic loaf
Prep time: 15 minutes (active)
Rise time: 12-18 hours (mostly hands-off)
Bake time: 45-55 minutes
Total time: 13 to 19 hours
Intensities
-
Difficulty: Very Easy (1/5 – technique is simple, patience is required)
-
Time Commitment: Low (1/5 – 99% is hands-off waiting)
-
Prep Intensity: Minimal (1/5 – mixing and shaping only)
-
Cleanup: Low (1/5 – one bowl and your hands)
Equipment
-
1 Large Mixing Bowl
-
Plastic Wrap or a damp kitchen towel
-
1 Dutch Oven (or a heavy, oven-safe pot with a tight-fitting lid)
-
Parchment Paper (highly recommended)
Ingredients
-
3 cups (360g) All-Purpose Flour or Bread Flour (see note below)
-
1 ½ cups (350g) Warm Water (about 100°F / 38°C)
-
1 ¼ teaspoons (7g) Kosher Salt or Sea Salt
-
¼ teaspoon (1g) Instant or Active Dry Yeast
The Flour Note
-
Bread Flour: Will yield a chewier crumb and a slightly taller rise due to its higher protein content. This is the ideal choice.
-
All-Purpose Flour: Produces a slightly more tender and open crumb and works beautifully. It is a perfectly acceptable and fantastic substitute.
Instructions
Step 1: The Simple Mix (Day 1, 5:00 PM Example)
In your large mixing bowl, whisk together the flour, salt, and yeast. This ensures the salt and yeast are evenly distributed without touching directly.
Pour in the warm water. Using a wooden spoon or your hand, mix until you have a shaggy, sticky, and somewhat lumpy dough. There should be no dry spots of flour. This will not look like a smooth, traditional bread dough—that is perfectly correct.
Step 2: The Long Wait (The Magic)
Cover the bowl tightly with plastic wrap or a damp kitchen towel. Place it in a warm, draft-free spot in your kitchen. Let the dough rest for 12 to 18 hours. The longer the fermentation, the more complex the flavor and the more open the crumb. The dough is ready when its surface is dotted with small bubbles and it has more than doubled in size.
Step 3: The Gentle Shape (Day 2, 10:00 AM Example)
After the long rest, the dough will be wet, bubbly, and stringy. Generously flour a work surface and your hands. Use a spatula or bowl scraper to gently tip the dough out onto the surface. It will pool and spread.
With floured hands, gently pull the edges of the dough toward the center, folding it over itself about 4-6 times to form a loose, rustic ball. This is not kneading; it’s simply coaxing it into a shape that will hold.
Step 4: The Second Rise
Place a large piece of parchment paper on a small plate or bowl (this will be your “sling” for lowering the dough). Place the shaped dough, seam-side down, onto the parchment paper. Dust the top lightly with flour and cover loosely with the plastic wrap or towel.
Let it rise for another 1 to 2 hours. The dough is ready when it looks puffy and has expanded, and it holds a slight indentation when you poke it gently with a floured finger.
Step 5: Preheat and Score
About 30 minutes before the second rise is complete, place your empty Dutch oven, with its lid on, into your oven. Preheat the oven to 450°F (230°C).
When the dough is ready, carefully remove the screaming-hot Dutch oven from the oven and take off the lid. Using the parchment paper as a sling, carefully lower the dough into the pot. The parchment paper stays in.
Using a sharp razor blade, lame, or very sharp knife, make one or two swift, confident slashes about ½-inch deep across the top of the dough. This “scoring” allows the bread to expand fully and beautifully in the oven without tearing.
Step 6: The Steam-Baked Bake
Immediately cover the pot with the hot lid and place it back in the oven.
-
Bake covered: 30 minutes. The lid traps the steam from the dough, creating a moist environment for optimal oven spring and a crisp crust.
-
Bake uncovered: Remove the lid and continue baking for another 15-25 minutes, until the crust is a deep, golden brown and the loaf sounds hollow when you tap the bottom. The internal temperature should read 205-210°F (96-99°C) if you have a thermometer.
Step 7: The Crucial Cool
This is the baker’s ultimate test of will. Use the parchment paper to lift the bread out of the pot and transfer it to a wire cooling rack. You must let the bread cool completely—for at least 2-3 hours—before slicing. The bread is still cooking internally as it cools, and cutting it warm will result in a gummy, sticky crumb.
Storage & Reheating
-
Storage: Store the completely cooled bread at room temperature, unwrapped, cut-side down on a cutting board for up to 2 days. For longer storage, place in a paper bag. Do not store in a plastic bag, as it will make the crust soft.
-
Freezing: This bread freezes perfectly. Wrap the completely cooled loaf tightly in plastic wrap and then in foil. Freeze for up to 3 months. Thaw at room temperature.
-
Reheating: To revive the crust, place the whole loaf or a slice directly on the oven rack in a 350°F (175°C) oven for 5-10 minutes.
Customization & Tips
-
The Schedule is Flexible: This recipe is incredibly forgiving on timing. A 10-hour rise in a very warm kitchen or a 20-hour rise in a cool cellar will both work. Adjust to your schedule.
-
Add-Ins: After the initial mix, you can incorporate ½ cup of chopped olives, nuts, seeds, or dried herbs for a custom loaf.
-
Whole Wheat Variation: Substitute 1 cup of all-purpose flour with 1 cup of whole wheat flour for a heartier flavor. You may need to add an extra tablespoon or two of water.
-
The Sound: You will know your bread is done when you tap the bottom and it sounds hollow, like a drum.
Nutrition Information
Disclaimer: The following nutritional information is an estimate provided by an online nutrition calculator. Actual values may vary based on specific ingredients used.
-
Serving Size: 1 slice (1/12th of the loaf)
-
Servings Per Recipe: 12
-
Calories: ~110
-
Total Fat: 0.5g
-
Saturated Fat: 0g
-
Cholesterol: 0mg
-
Sodium: 240mg
-
Total Carbohydrates: 23g
-
Dietary Fiber: 1g
-
Sugars: 0g
-
-
Protein: 3g
No-Knead Bread is more than a recipe; it’s a revelation. It proves that the highest-quality ingredients—flour, water, salt, and yeast—when treated with respect and time, can create something truly extraordinary. It empowers the home cook to achieve bakery-level results with breathtaking ease. So, mix your dough tonight, and wake up to the promise of the most rewarding, and delicious, baking project of your life.