Yields: 22-24 balls
Prep Time: 30 minutes
Chill Time: 1 hour 30 minutes (minimum)
Total Time: 2 hours (largely inactive)
Intensity: Easy – This is a beginner-friendly, no-bake recipe that requires no special equipment beyond a mixer and a baking sheet. It’s a fantastic project for cooking with kids.
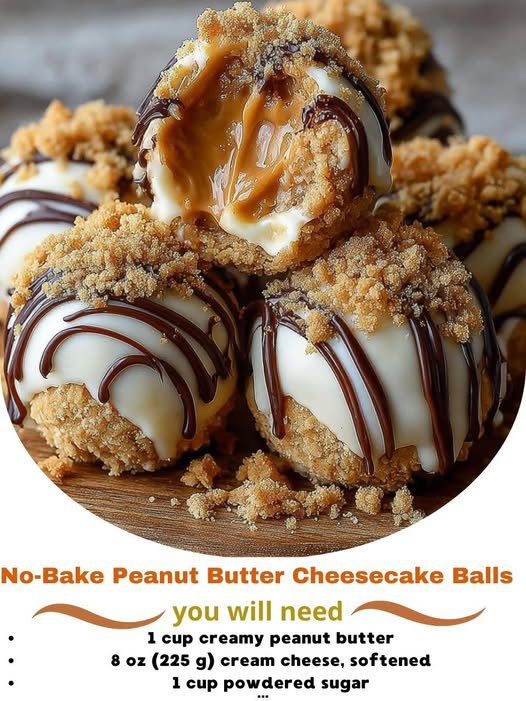
Ingredients
For the Cheesecake Filling:
-
1 (8 oz) block full-fat cream cheese, softened to room temperature
-
1 cup creamy peanut butter (not natural or oily)
-
½ cup (1 stick) unsalted butter, softened to room temperature
-
3 cups powdered sugar, sifted
-
1 teaspoon vanilla extract
-
¼ teaspoon salt
For the Coating & Assembly:
-
1 ½ cups graham cracker crumbs (about 10-12 full sheets)
-
2 cups semi-sweet or milk chocolate chips
-
1 tablespoon coconut oil (or shortening)
-
Flaky sea salt (e.g., Maldon), for garnish (optional)
Equipment You’ll Need
-
Stand mixer or a hand mixer and a large bowl
-
Baking sheet
-
Parchment paper or a silicone baking mat
-
Medium-sized mixing bowls
-
Whisk or fork
-
Measuring cups and spoons
-
Toothpicks or a dipping fork
Instructions
Step 1: Create the Creamy Cheesecake Base
-
Cream the Foundations: In the bowl of a stand mixer fitted with the paddle attachment (or using a hand mixer in a large bowl), combine the softened cream cheese, softened butter, and creamy peanut butter. Beat on medium speed for 2-3 minutes, until the mixture is completely smooth, pale, and free of any lumps. Scrape down the bowl and beater thoroughly. This initial step is crucial for a silky texture.
-
Incorporate Dry Ingredients: Reduce the mixer speed to low and gradually add the sifted powdered sugar, about ½ cup at a time. Once the sugar is incorporated, add the vanilla extract and salt. Increase the speed to medium-high and beat for another 1-2 minutes until the mixture is very thick, smooth, and holds its shape. It should resemble a very stiff, pipeable frosting.
Step 2: Chill and Shape the Balls
-
Initial Chill: For easier handling, cover the bowl with plastic wrap and refrigerate the peanut butter mixture for at least 30 minutes. This firms up the fat, making the dough less sticky and much easier to roll.
-
Prepare the Pan: While the mixture chills, line a standard baking sheet with parchment paper or a silicone mat. Place the graham cracker crumbs in a shallow bowl or plate.
-
Roll the Balls: Using a tablespoon-sized cookie scoop or a heaping tablespoon, portion out the chilled dough. Roll each portion between your palms to form a smooth, compact 1-inch ball. If the dough becomes too sticky to handle, simply wash and dry your hands or chill the dough for another 15 minutes.
-
Add the “Crust” Layer: Roll each ball in the graham cracker crumbs, ensuring it’s evenly coated. This step is optional but highly recommended, as it provides the classic cheesecake crust flavor and a lovely textural contrast. Place each finished ball on the prepared baking sheet.
-
Final Firm-Up: Once all balls are shaped and coated, place the entire baking sheet in the freezer for at least 1 hour. Do not skip this step. The balls must be completely frozen solid to ensure a smooth, successful chocolate coating.
Step 3: The Chocolate Coating
-
Melt the Chocolate: When the balls are almost frozen, create a double boiler. Fill a small saucepan with an inch of water and bring to a simmer. Place a heatproof bowl on top, ensuring the bottom of the bowl does not touch the water. Add the chocolate chips and coconut oil to the bowl. Stir continuously with a spatula until the chocolate is completely melted and smooth. The coconut oil is essential for thinning the chocolate, creating a perfectly thin, snappy shell.
-
Dip the Balls: Remove the baking sheet with the frozen balls from the freezer. Using a toothpick or a dipping fork, spear a frozen ball and carefully dip it into the melted chocolate, swirling to coat it completely.
-
Drain and Place: Lift the ball out of the chocolate, allowing any excess to drip back into the bowl. Gently slide the ball off the toothpick and back onto the parchment-lined baking sheet. If you used a toothpick, you can use a second toothpick to gently hold the ball in place while you remove the first one, then use a small spoon to drizzle a tiny bit of chocolate over the hole to cover it.
-
Garnish: If desired, immediately sprinkle a tiny pinch of flaky sea salt on top of the chocolate-coated ball before the shell sets. The salt cuts through the sweetness and enhances the peanut butter flavor beautifully.
-
Repeat: Continue dipping and garnishing the remaining balls, working relatively quickly. If the chocolate begins to thicken, return the bowl to the double boiler for a minute to re-liquify.
Step 4: Set and Serve
-
Set the Shell: Once all balls are coated, place the baking sheet back in the refrigerator for at least 15-20 minutes to allow the chocolate shell to set completely. You’ll know they’re ready when the chocolate is firm to the touch and doesn’t give under light pressure.
-
Serve and Enjoy: Arrange the set cheesecake balls on a platter and serve chilled. Store any leftovers properly (see below).
The Last of the Recipe: Storage & Reheating
-
Storing Leftovers: Store these cheesecake balls in a single layer in an airtight container in the refrigerator for up to 1 week. For longer storage, they are an excellent candidate for freezing.
-
Freezing: Place the fully set balls in a single layer on a baking sheet and “flash freeze” for 1 hour. Then, transfer the frozen balls to a freezer-safe zip-top bag or container. They will keep for up to 3 months. Thaw in the refrigerator for 30-60 minutes before serving.
-
Reheating: These are meant to be served cold straight from the fridge or freezer. Do not reheat.
Nutrition Information
Please note: The following nutrition information is an estimate provided by an online nutrition calculator. Actual values may vary based on specific ingredients and brands used.
-
Serving Size: 1 cheesecake ball
-
Calories: ~245 kcal
-
Total Fat: 16g
-
Saturated Fat: 7g
-
Cholesterol: 15mg
-
Sodium: 115mg
-
Total Carbohydrates: 24g
-
Dietary Fiber: 1g
-
Sugars: 20g
-
Protein: 4g
Chef’s Notes & Customizations
-
Room Temperature is Key: Using properly softened cream cheese and butter is non-negotiable for a lump-free, smooth filling. Plan ahead and take them out of the fridge at least an hour before you start.
-
Peanut Butter Choice: For the best texture and consistency, use a standard, shelf-stable creamy peanut butter like Jif or Skippy. Natural peanut butters tend to be too oily and can prevent the balls from setting firmly.
-
Prevent Cracking: The single most important tip for a perfect chocolate shell is to ensure the peanut butter balls are completely frozen solid before dipping. A frozen center prevents the fat from seeping into the chocolate and causing it to crack as it sets.
-
Flavor Twists:
-
Cookie Dough: Replace the graham cracker crumbs with crushed Nilla wafers or Biscoff cookie crumbs.
-
White Chocolate: Use white chocolate chips for dipping and drizzle with melted peanut butter.
-
Nutty Crunch: Roll the finished balls in finely chopped peanuts for an extra crunch.
-
Double Chocolate: Add ¼ cup of unsweetened cocoa powder to the filling mixture for a chocolate-peanut butter version.
-