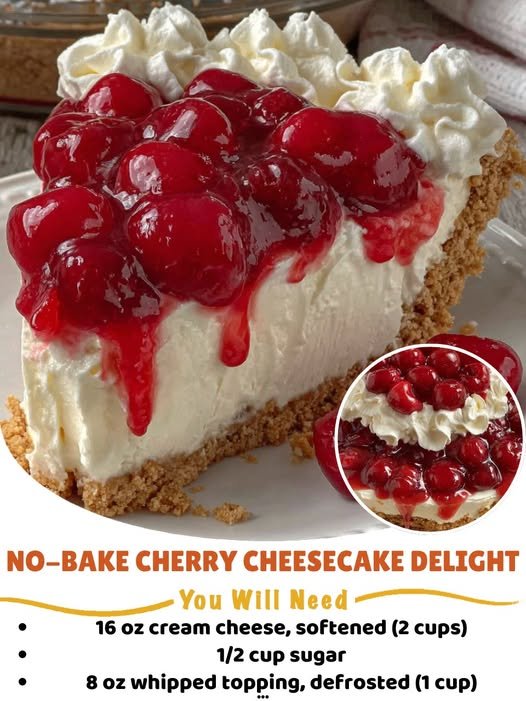
Recipe Name: No-Bake Cherry Cheesecake Delight
Total Time: 6 hours 30 minutes (includes chilling)
Active Prep: 25 minutes
Chill Time: 6+ hours
Difficulty: Easy
Yield: One 9×13 pan (about 15 generous servings)
Calories per serving: Approximately 310 kcal
A Slice of Nostalgia, Without the Oven
Some recipes are more than instructions; they are time capsules of flavor and memory. This No-Bake Cherry Cheesecake Delight is one of those treasures—a dessert that has graced countless potlucks, family reunions, and holiday tables for generations. It’s the perfect marriage of a creamy, dreamy cheesecake filling and the sweet-tart burst of cherry pie filling, all layered over a buttery graham cracker crust. The magic? Not a single minute of bake time. This is the quintessential make-ahead dessert for hot summer days, busy holidays, or any moment you crave something spectacular without the fuss of the oven. With its vibrant red topping, cloud-like filling, and irresistible texture, it’s a showstopper that promises and delivers pure, unadulterated joy. Find it scribbled on cards with “DON’T LOSE THIS” at the top for a reason—it’s a guaranteed crowd-pleaser that belongs in your permanent collection.
Ingredients
For the Graham Cracker Crust:
-
2 cups graham cracker crumbs (about 16 full sheets)
-
½ cup (1 stick) unsalted butter, melted
-
¼ cup granulated sugar
-
Pinch of salt
For the Creamy Cheesecake Layer:
-
2 (8 oz) blocks full-fat cream cheese, softened to room temperature
-
1 cup powdered sugar, sifted
-
1 teaspoon pure vanilla extract
-
1 (8 oz) tub frozen whipped topping (like Cool Whip), thawed in the refrigerator
For the Stabilized Whipped Cream Layer:
-
1 cup heavy whipping cream, very cold
-
2 tablespoons powdered sugar
-
½ teaspoon pure vanilla extract
For the Topping & Garnish:
-
2 (21 oz) cans cherry pie filling (or one 42 oz can, for a generous layer)
-
Optional garnish: Fresh mint sprigs, white chocolate shavings, or additional graham cracker crumbs
Equipment
-
9×13-inch baking dish (glass or ceramic is ideal for presentation)
-
Medium and large mixing bowls
-
Hand mixer or stand mixer
-
Rubber spatula
-
Measuring cups and spoons
-
Small saucepan (for melting butter)
-
Food processor or zip-top bag and rolling pin (for making crumbs)
Instructions
Part 1: The Buttery, No-Bake Crust (Time: 10 minutes | Intensity: Low)
-
Prepare the Pan: No greasing needed. Have your 9×13-inch dish ready.
-
Make the Crumbs: If starting from whole crackers, pulse them in a food processor or place in a zip-top bag and crush with a rolling pin until you have fine, even crumbs.
-
Combine Crust Ingredients: In a medium bowl, mix the graham cracker crumbs, melted butter, granulated sugar, and salt until the mixture resembles wet sand and holds together when pinched.
-
Press and Set: Pour the crumb mixture into the baking dish. Using the bottom of a measuring cup or glass, press firmly and evenly to create a compact crust layer covering the entire bottom of the dish. For the best texture, press it slightly up the sides (about ¼ inch).
-
Chill: Place the crust in the refrigerator to set while you prepare the filling. This helps it hold its shape.
Part 2: The Luxurious, No-Cook Filling (Time: 15 minutes | Intensity: Medium-Low)
-
Whip the Cream Cheese Base: In a large mixing bowl, beat the softened cream cheese with a hand mixer on medium-high speed for 1-2 minutes until completely smooth and lump-free. Scrape down the sides of the bowl.
-
Sweeten and Flavor: Add the sifted powdered sugar and vanilla extract. Beat on medium speed until fully incorporated and smooth, another 1-2 minutes. Scrape the bowl again.
-
Fold in the Whipped Topping: Using a rubber spatula, gently fold in the entire tub of thawed whipped topping. Use a folding motion (cut down through the center, scoop up and over) until no white streaks remain. Be gentle to keep the mixture light and airy.
-
Assemble the First Layers: Retrieve the chilled crust from the refrigerator. Spoon the creamy cheesecake filling over the crust. Using an offset spatula or the back of a spoon, spread it into a perfectly smooth, even layer, reaching all corners. Return the entire dish to the refrigerator.
Part 3: The Stabilized Whipped Cream Layer (Time: 5 minutes | Intensity: Medium)
-
Chill Everything: Ensure your mixing bowl and beaters are cold (place in the freezer for 10 minutes if possible). Pour the cold heavy cream into the chilled bowl.
-
Whip to Perfection: Beat on medium-high speed until soft peaks form, about 2 minutes. Add the 2 tablespoons of powdered sugar and vanilla. Continue beating on medium-high until stiff peaks form—when you lift the beaters, the cream should hold a sharp point without drooping. Do not overbeat into butter.
-
Create the Final Barrier: Carefully spread the homemade whipped cream over the chilled cheesecake layer. This layer acts as a protective barrier, preventing the cherry topping from bleeding into the creamy filling and adding a wonderfully light, fresh texture.
Part 4: The Crown of Cherries & The Crucial Chill (Time: 5 minutes + 6 hours | Intensity: Very Low)
-
The Grand Finale: Open the cans of cherry pie filling. Spoon the cherries and their glossy glaze evenly over the whipped cream layer. Gently spread them to cover the surface completely.
-
The Non-Negotiable Chill: This is the most critical step. Cover the dish tightly with plastic wrap or a lid. Refrigerate for at least 6 hours, but ideally overnight (8-12 hours). This extended chilling time is non-negotiable for three reasons: it allows the crust to become perfectly firm, the cheesecake layer to set up so it slices cleanly, and all the flavors to meld into harmonious delight. Rushing this step will result in a soupy, messy dessert.
Serving & The Moment of Truth
-
Slice and Serve: Use a sharp knife, wiping it clean between cuts for beautiful slices. A thin metal spatula or pie server helps lift pieces out neatly.
-
Garnish: Add a small sprig of fresh mint or a sprinkle of white chocolate shavings to each plate for an elegant touch.
-
Temperature: Serve chilled directly from the refrigerator. The contrast between the cool, creamy layers and the fruity topping is perfection.
Recipe Notes & Pro-Tips for Success
-
Cream Cheese is Key: Full-fat cream cheese is essential for flavor and structure. Ensure it is truly softened to room temperature to avoid lumps.
-
Whipped Topping vs. All Whipped Cream: Using the frozen whipped topping in the filling guarantees a stable, foolproof set. You can make the entire dessert with homemade whipped cream, but the texture will be softer. If substituting, whip 2 additional cups of heavy cream with ¼ cup powdered sugar and fold into the cream cheese mixture.
-
Crust Variations: Use chocolate graham crackers, vanilla wafers, or even crushed pretzels for a sweet-and-salty twist.
-
Topping Flexibility: Blueberry, strawberry, or apple pie filling are fantastic alternatives. For a fresh twist, use 3-4 cups of fresh macerated berries (tossed with 2 tbsp sugar and 1 tsp lemon juice).
-
Make-Ahead Magic: This dessert is designed to be made 1-2 days ahead, making it the ultimate stress-free party dessert.
-
Storage: Keep covered in the refrigerator for up to 4 days. It does not freeze well due to the whipped layers.
Nutrition Information (Per serving, 1/15th of recipe)
-
Calories: 310 kcal
-
Total Carbohydrates: 35g
-
Dietary Fiber: 1g
-
Sugars: 25g
-
Protein: 3g
-
Total Fat: 18g
-
Saturated Fat: 11g
-
Cholesterol: 55mg
-
Sodium: 150mg
Nutritional information is an estimate. Values will vary based on specific brands of cream cheese, pie filling, and whipped topping used.
Final Word: This No-Bake Cherry Cheesecake Delight is the epitome of a perfect potluck dessert: visually stunning, universally loved, and deceptively simple to create. It captures the essence of a classic cheesecake while removing every ounce of baking anxiety. It’s a recipe that builds confidence and creates memories. So, print it, save it, share it with your daughter, your neighbor, your best friend. But heed the wisdom passed down with it: Don’t LOSE this Recipe. Its place in your repertoire is guaranteed for life.