Total Time: 35 minutes (15 minutes prep, 20 minutes cook) | Difficulty: Easy | Serves: 4 (2 wedges each)
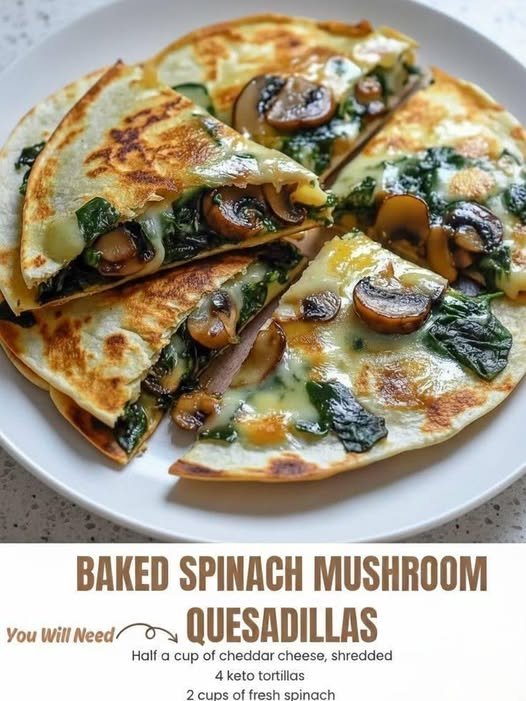
Recreate the gooey, crispy magic of a quesadilla without the carb-heavy tortilla. These Keto Baked Spinach & Mushroom Quesadillas use a simple, pliable cheese “shell” that bakes into a golden, crispy vessel for a rich, garlicky mushroom and spinach filling. Baked not fried, they are surprisingly sturdy, endlessly customizable, and deliver that essential satisfying crunch with zero gluten or grains.
Ingredients
For the Crispy Cheese Shells:
-
2 cups (8 oz / 225g) shredded low-moisture mozzarella cheese
-
1 cup (4 oz / 115g) shredded sharp cheddar cheese
-
⅓ cup (1.5 oz / 45g) grated Parmesan cheese
-
½ teaspoon garlic powder
-
¼ teaspoon smoked paprika
For the Garlicky Spinach & Mushroom Filling:
-
1 tablespoon avocado oil or olive oil
-
8 oz (225g) cremini or button mushrooms, thinly sliced
-
3 cloves garlic, minced
-
5 oz (140g) fresh baby spinach
-
4 oz (115g) full-fat cream cheese, softened
-
½ teaspoon kosher salt
-
¼ teaspoon black pepper
-
¼ teaspoon ground nutmeg (optional, but highly recommended)
For Assembly & Garnish:
-
Avocado oil spray or olive oil spray
-
Optional toppings: Sour cream, salsa verde (check carbs), sliced jalapeños, fresh cilantro, diced avocado
Equipment
-
Two large rimmed baking sheets
-
Parchment paper (essential)
-
Large skillet
-
Mixing bowls
-
Spatula
Instructions
Step 1: Create & Bake the Cheese Shells
-
Time: 15 minutes | Intensity: Medium (Active/Precision)
-
Preheat your oven to 400°F (200°C). Line two large baking sheets with parchment paper.
-
In a medium bowl, combine all three shredded cheeses, garlic powder, and smoked paprika. Toss well to distribute the spices evenly.
-
For each quesadilla shell, scoop a heaped ⅓ cup of the cheese mixture onto a prepared baking sheet. Using your fingers or the back of a spoon, press and spread the cheese into a thin, even circle, about 6-7 inches (15-18cm) in diameter. Ensure the edges are relatively even and there are no major holes. You should form 4 circles total, spaced well apart (2 per baking sheet).
-
Bake on the middle rack for 8-10 minutes, or until the shells are fully melted, golden brown around the edges, and the center is no longer translucent. They will bubble vigorously. Do not overbake, or they will become too brittle to fold.
-
Remove from the oven and let cool on the baking sheet for exactly 1 minute—just until they are set enough to handle but still very pliable.
Step 2: Sauté the Filling
-
Time: 8 minutes | Intensity: Medium-High Heat (Active)
-
While the shells bake, heat the avocado oil in a large skillet over medium-high heat. Add the sliced mushrooms and sauté for 5-6 minutes, without stirring too often, to allow them to brown and release their moisture.
-
Reduce heat to medium. Add the minced garlic and sauté for 30 seconds until fragrant.
-
Add the entire container of fresh spinach and the salt, pepper, and nutmeg. Toss continuously until the spinach is fully wilted, about 1-2 minutes.
-
Remove the skillet from heat. Immediately add the softened cream cheese to the hot vegetable mixture. Stir vigorously until the cream cheese is completely melted and coats every piece, creating a creamy, cohesive filling. Set aside.
Step 3: Fill & Fold the Quesadillas
-
Time: 3 minutes | Intensity: Low (Careful)
-
Timing is critical here: Your baked cheese shells should now be just cool enough to handle. Working quickly, spoon one-quarter of the filling (about ⅓ cup) onto one half of each cheese circle, leaving a ½-inch border.
-
Using a thin spatula to assist, carefully fold the bare half of the cheese circle over the filling to create a half-moon shape. Gently press the edges together. The residual heat will seal them. If a shell becomes too stiff to fold, return the baking sheet to the warm oven for 30 seconds to soften.
Step 4: Second Bake to Crisp & Set
-
Time: 5-7 minutes | Intensity: Medium (Passive/Oven)
-
Once all four quesadillas are folded on the baking sheets, lightly spray the tops with avocado oil (this promotes even browning).
-
Return them to the 400°F (200°C) oven for 5-7 minutes, until the exteriors are deeply golden brown and crispy. Watch closely to prevent burning.
Step 5: Cool & Serve
-
Time: 5 minutes | Intensity: Low (Passive/Critical)
-
Remove from the oven and let the quesadillas cool on the baking sheet for at least 5 minutes. This cooling period allows the cheese shell to fully crisp up and set, transforming from pliable to perfectly crunchy. If you try to move or cut them too soon, they may crack or the filling may spill.
-
Using a sharp pizza cutter or knife, slice each quesadilla into 2 or 3 wedges.
-
Serve immediately with your chosen low-carb toppings.
Serving Suggestions & Flavor Variations
-
Classic Pairing: Serve with a side of chunky guacamole and a dollop of full-fat sour cream.
-
Add Protein: Mix ½ cup of shredded rotisserie chicken or cooked, crumbled chorizo into the filling with the cream cheese.
-
Southwest Style: Add ¼ teaspoon cumin and a handful of diced green chiles to the filling. Top with pico de gallo (in moderation).
-
“Everything Bagel” Twist: Add 1 tablespoon of Everything Bagel seasoning to the cheese mixture before baking. Fill with a simple scallion cream cheese mixture.
-
Dipping Sauces: Sugar-free marinara, a creamy cilantro-lime crema (sour cream + lime zest + cilantro), or a spicy mayo.
Expert Tips for Success
-
Low-Moisture Cheese is Mandatory: Pre-shredded cheese often contains anti-caking agents that can hinder melting. For best results, shred a block of cheese yourself.
-
Parchment Paper is Non-Negotiable: Do not use a silicone mat or foil; the cheese will stick. Parchment allows for easy release.
-
Spread Evenly: An even, thin cheese layer (no thicker than ⅛ inch) is key for a foldable, crispy shell. Thick spots will stay chewy.
-
The 1-Minute Window: The cheese shells transition from pliable to brittle quickly after baking. Have your filling ready and work with confidence.
-
Re-soften if Needed: If a shell hardens before folding, a brief 30-second return to the oven will make it workable again.
Make-Ahead & Storage Instructions
These are best served fresh but can be partially prepped.
-
Prep Components: The filling can be made and stored in an airtight container in the refrigerator for up to 2 days. Reheat gently before assembling. The cheese mixture can be pre-shredded and kept refrigerated.
-
Storing Leftovers: Cooled quesadillas can be stored in an airtight container in the refrigerator for up to 2 days. Note: The shells will soften from moisture in the fridge but can be re-crisped.
-
Freezing: Assemble and bake quesadillas completely. Cool, then freeze in a single layer on a baking sheet before transferring to a freezer bag. Freeze for up to 1 month.
-
Reheating (To Restore Crispness):
-
Air Fryer (Best): Reheat at 375°F (190°C) for 3-4 minutes.
-
Oven: Place on a parchment-lined sheet at 375°F (190°C) for 8-10 minutes.
-
Skillet: Reheat in a dry non-stick skillet over medium-low heat for 2-3 minutes per side.
-
Microwave: Not recommended, as it will make the shell soggy.
-
Nutrition Information
Per serving (1 quesadilla, 2 wedges, without toppings). Values are estimates.
-
Calories: ~490 kcal
-
Total Fat: 40g
-
Saturated Fat: 22g
-
Cholesterol: 115mg
-
Sodium: ~950mg
-
Total Carbohydrates: 8g
-
Dietary Fiber: 2g
-
Sugars: 3g
-
Net Carbs: ~6g
-
Protein: 26g
Nutrition Note: This is a high-fat, moderate-protein, very low-carb meal ideal for ketogenic diets. It is rich in calcium from the cheese and provides vitamin K and iron from the spinach. For a lower sodium version, use less salt and choose cheeses with lower sodium content. The net carbs come primarily from the vegetables and dairy.