Recipe Name: Grandma’s Chocolate Pie
Total Time: 4 hours 30 minutes (includes chilling)
Active Prep: 25 minutes
Cook Time: 10 minutes
Chill Time: 4 hours minimum
Difficulty: Intermediate
Yield: One 9-inch pie (8 servings)
Calories per serving: Approximately 420 kcal
A Legacy in a Pie Tin
Some recipes are instructions. This one is an heirloom. “Grandma’s Chocolate Pie” isn’t merely a dessert; it’s a slice of memory, a testament to the timeless alchemy of cocoa, sugar, and love. Written in looping cursive on a stained index card with a firm “DON’T LOSE THIS!” scrawled in the margin, this recipe represents the pinnacle of old-fashioned comfort. It’s the pie that ended countless Sunday dinners, celebrated simple victories, and soothed childhood woes. Unlike modern pies reliant on instant puddings, this is the real deal—a rich, velvety, from-scratch chocolate custard poured into a flaky, blind-baked shell and crowned with clouds of homemade whipped cream. Each bite is pure nostalgia. Handle this recipe with care, for you are not just making a pie; you are preserving a legacy.
Ingredients
For the Flaky Pie Crust:
-
1 ¼ cups all-purpose flour, plus more for dusting
-
½ teaspoon salt
-
½ teaspoon granulated sugar
-
½ cup (1 stick) cold unsalted butter, cut into small cubes
-
3-4 tablespoons ice-cold water
For the Chocolate Filling:
-
1 ½ cups granulated sugar
-
⅓ cup cornstarch
-
⅓ cup high-quality unsweetened cocoa powder (like Hershey’s or Droste)
-
¼ teaspoon salt
-
3 large egg yolks, beaten (save the whites for another use)
-
3 cups whole milk
-
3 tablespoons unsalted butter
-
1 ½ teaspoons pure vanilla extract
For the Whipped Cream Topping:
-
1 cup heavy whipping cream, very cold
-
2 tablespoons powdered sugar
-
½ teaspoon pure vanilla extract
-
Chocolate shavings or a dusting of cocoa powder, for garnish
Equipment
-
9-inch pie plate
-
Rolling pin
-
Parchment paper and pie weights (or dried beans)
-
Medium saucepan
-
Whisk
-
Heatproof spatula
-
Fine-mesh sieve (optional but recommended)
-
Mixing bowls
-
Hand mixer or stand mixer
Instructions
Part 1: The Perfect Flaky Crust (Time: 1 hour 15 minutes | Intensity: Medium)
-
Mix Dry Ingredients: In a large bowl, whisk together the 1 ¼ cups flour, ½ teaspoon salt, and ½ teaspoon sugar.
-
Cut in Butter: Add the cold, cubed butter. Using a pastry cutter, two forks, or your fingertips, work the butter into the flour until the mixture resembles coarse meal with some pea-sized butter pieces remaining. These chunks are the secret to flakiness.
-
Add Water: Sprinkle 3 tablespoons of ice water over the mixture. Gently stir with a fork until the dough begins to clump. Add the final tablespoon of water only if needed. The dough should hold together when pinched, but not be wet.
-
Form & Chill: Gather the dough into a disk, wrap tightly in plastic wrap, and refrigerate for at least 1 hour. This relaxes the gluten and firms the butter.
-
Roll & Blind Bake: Preheat oven to 375°F (190°C). On a floured surface, roll the chilled dough into a 12-inch circle. Carefully transfer it to your pie plate, trim and crimp the edges. Prick the bottom all over with a fork. Line with parchment paper and fill with pie weights or dried beans.
-
Bake: Bake for 15 minutes. Carefully remove the parchment and weights, then bake for another 10-15 minutes, until the crust is lightly golden and dry to the touch. Set aside to cool completely. Reduce oven to 350°F (175°C) for the filling step.
Part 2: The Velvet Chocolate Custard (Time: 20 minutes | Intensity: Medium-High)
-
Combine Dry Ingredients: In a medium saucepan, whisk together the sugar, cornstarch, cocoa powder, and salt until no lumps remain.
-
Temper the Eggs: In a separate bowl, whisk the egg yolks. Gradually whisk in about ½ cup of the milk until smooth. This tempers the yolks and prevents scrambling.
-
Create the Base: Whisk the remaining milk into the dry ingredients in the saucepan until smooth. Place over medium heat.
-
Cook to Thick: Cook, whisking constantly, until the mixture becomes very thick and begins to bubble slowly, about 8-10 minutes. Once bubbling, cook for 1 full minute more, whisking vigorously.
-
Temper & Combine: Slowly pour about 1 cup of the hot chocolate mixture into the egg-milk mixture, whisking constantly. Then, pour the entire egg mixture back into the saucepan. Return to medium heat and cook, whisking constantly, for 2 more minutes until luxuriously thick.
-
Finish: Remove from heat. Whisk in the butter and vanilla extract until fully incorporated and glossy.
-
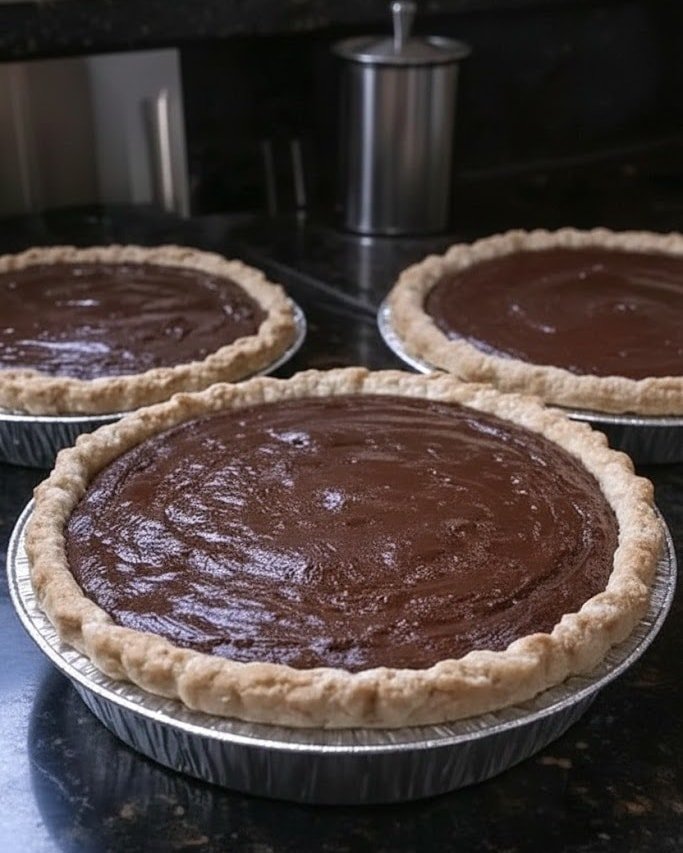
Strain & Pour (The Grandma Trick): For an impossibly smooth filling, strain the hot custard through a fine-mesh sieve directly into the cooled pie shell. This catches any tiny bits of cooked egg or starch.
-
Prevent a Skin: Press a piece of plastic wrap directly onto the surface of the hot filling. This is crucial for that perfect, skinless top.
Part 3: The Patient Chill (Time: 4+ hours | Intensity: Very Low)
-
The Non-Negotiable Step: Transfer the pie to the refrigerator. Let it chill, undisturbed, for at least 4 hours, but preferably overnight. This allows the custard to set firmly, achieving the ideal sliceable yet creamy texture. Rushing this step is the only way to fail this recipe.
Part 4: The Finishing Touch (Time: 5 minutes | Intensity: Low)
-
Just before serving, make the whipped cream. In a chilled bowl, beat the heavy cream, powdered sugar, and vanilla on medium-high speed until stiff peaks form.
-
Remove the plastic from the pie. Pile the whipped cream onto the center of the chilled pie and spread it decoratively to the edges, or pipe it on for elegance.
-
Garnish with chocolate shavings or a light dusting of cocoa powder.
Recipe Notes & Grandma’s Wisdom
-
Crust Shortcut: In a pinch, a high-quality, pre-baked store-bought pie shell can be used. But the homemade crust is a soulful part of the experience.
-
Cocoa is Key: Use a standard American-style unsweetened cocoa powder for the authentic, classic flavor. Dutch-process will work but will taste different.
-
Constant Whisking: Do not leave the custard unattended on the stove. Constant whisking prevents lumps and scorching on the bottom.
-
The Skin Myth: Pressing plastic wrap directly on the surface is the foolproof trick to a perfect, silky top. Don’t skip it.
-
Storage: Keep pie covered in the refrigerator for up to 3 days. The whipped cream is best added the day of serving.
Nutrition Information (Per Serving, 1/8 of pie)
-
Calories: 420 kcal
-
Total Carbohydrates: 45g
-
Dietary Fiber: 2g
-
Sugars: 28g
-
Protein: 6g
-
Total Fat: 25g
-
Saturated Fat: 15g
-
Cholesterol: 120mg
-
Sodium: 220mg
Nutritional information is an estimate based on available ingredients and serving size. Values may vary depending on specific brands and measurements used.
Final Word: This pie demands patience and care—from the chill of the crust to the vigilant whisking of the custard and the long, quiet set in the fridge. But this ritual is where the love is baked in. The result is a masterpiece of contrasts: a crisp, buttery shell giving way to a filling that is simultaneously dense and cloud-soft, profoundly chocolatey yet not overly sweet. It’s a dessert that commands respect and evokes memories with every forkful. Share it with people you love, pass the recipe to the next generation, and for heaven’s sake… don’t lose this recipe. It’s a piece of history worth saving.