Prep Time: 15 minutes
Cook Time: 50-70 minutes
Cooling Time: 3 hours (minimum)
Total Time: 4+ hours (mostly hands-off)
Yields: One 9-inch cheesecake (10-12 servings)
Skill Level: Easy
Author: [Your Website/Blog Name]
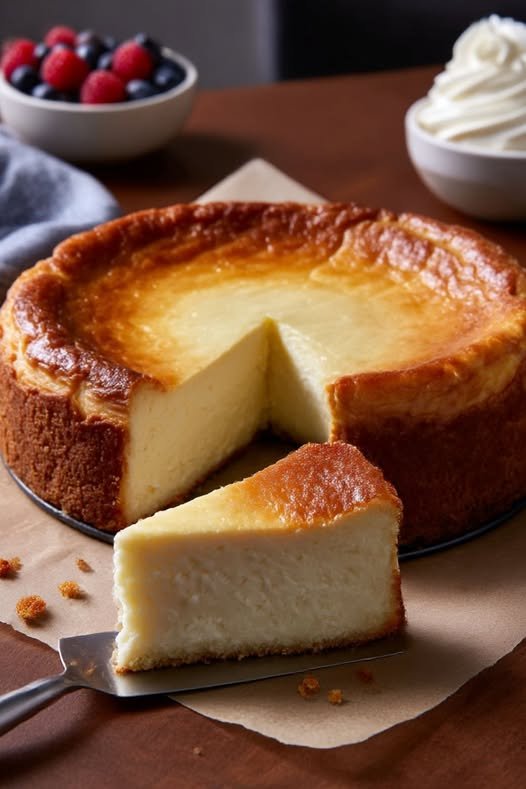
The Beautifully Imperfect Cheesecake
In the world of desserts, perfection is often measured in smooth tops, flawless edges, and meticulous presentation. Then, there is the Basque Burnt Cheesecake—a glorious rebellion. Hailing from the La Viña restaurant in Spain’s Basque Country, this cheesecake is a study in beautiful contrasts. It boasts a top that is intentionally dark, cracked, and caramelized, while its interior remains impossibly jiggly, creamy, and rich. This is not a baking error; it is the very essence of the dessert.
What makes this cheesecake so beloved, besides its phenomenal flavor, is its breathtaking simplicity. There is no water bath to fuss with, no crust to pre-bake, and no fear of cracks—because the cracks are part of its rustic charm. It is a dessert that empowers the novice baker and delights the seasoned pro. The result is a complex-tasting cake with notes of toffee, vanilla, and rich cream cheese that is far greater than the sum of its simple parts. This is the cheesecake that will shatter all your preconceptions and become your new go-to showstopper.
Why This Recipe is Foolproof and Fantastic
-
No-Fuss, No-Crust: By eliminating the need for a graham cracker crust, we remove an entire step, making the process quicker and the texture uniquely uniform.
-
Embraces Imperfection: The high-heat baking method guarantees a dark, “burnt” top and rustic cracks. There is no pressure to achieve a “perfect” look, making it the most stress-free cheesecake you’ll ever bake.
-
Incredible Flavor Depth: The caramelization of the top and edges creates a sophisticated, slightly bitter note that perfectly balances the sweet, creamy interior in a way a traditional cheesecake cannot.
-
A Single-Bowl Wonder: The entire batter comes together quickly in one bowl, meaning less cleanup and more time to enjoy the incredible aroma filling your kitchen.
Ingredients
-
32 oz (904 g) full-fat cream cheese, completely softened at room temperature
-
1 ½ cups (300 g) granulated sugar
-
5 large eggs, at room temperature
-
2 cups (480 ml) heavy cream, at room temperature
-
1 teaspoon vanilla extract
-
½ teaspoon fine sea salt
-
⅓ cup (43 g) all-purpose flour
Equipment You’ll Need
-
9-inch springform pan
-
Parchment paper
-
Electric hand mixer or stand mixer
-
Large mixing bowl
-
Rubber spatula
-
Fine-mesh sieve
Instructions
Step 1: Prepare the Pan and Oven
-
Preheat the Oven: Position a rack in the center of your oven and preheat it to 400°F (200°C). The high initial temperature is crucial for achieving the signature caramelized top.
-
Prepare the Springform Pan: Take a large sheet of parchment paper and crumple it into a tight ball. Then, carefully uncrumple it. This wilting process makes the paper more pliable and allows it to conform to the pan’s curves easily.
-
Line the Pan: Press the crumpled-and-smoothed parchment paper into the 9-inch springform pan, allowing the excess to hang generously over the sides. There is no need to grease the pan or the paper. The overhanging parchment is your handle for removing the delicate cake later. Don’t worry about making it look neat—the rustic folds add to the charm.
Step 2: Make the Batter (The One-Bowl Method)
-
Cream the Cheese and Sugar: In your large mixing bowl, combine the completely softened cream cheese and granulated sugar. Using an electric mixer on medium speed, beat them together for 2-3 minutes, until the mixture is completely smooth, creamy, and free of any lumps. Scrape down the sides and the bottom of the bowl with a spatula to ensure everything is incorporated.
-
Incorporate the Eggs, One at a Time: Add the room-temperature eggs, one at a time, beating well after each addition until just combined. Before adding the next egg, scrape down the bowl again. Mixing the eggs in one by one ensures they emulsify properly into the batter, creating a smooth texture.
-
Add Cream, Vanilla, and Salt: Pour in the heavy cream, vanilla extract, and salt. Mix on low speed until the batter is homogenous and smooth. It will be quite liquid at this stage.
-
Incorporate the Flour: Place your fine-mesh sieve over the bowl and sift the all-purpose flour directly into the batter. This prevents lumps of flour from forming. Mix on low speed for just 15-20 seconds, until the flour has disappeared. Do not over-mix. A few small streaks are better than developing the gluten in the flour, which can lead to a denser texture.
Step 3: Bake to “Burnt” Perfection
-
Pour and Tap: Pour the finished batter through the sieve into the prepared parchment-lined pan. This is a final insurance policy against any tiny lumps of cream cheese or flour, guaranteeing a silky-smooth texture. Tap the pan firmly on the counter a few times to release any large air bubbles.
-
Bake: Place the pan in the preheated 400°F (200°C) oven. Bake for 50 to 70 minutes. This wide time range is critical. The cake is done when it is deeply, darkly browned on top—even blackened around the edges—and the center still has a pronounced, dramatic jiggle when you gently shake the pan. It should look underbaked in the middle. If the top is browning too quickly, you can tent it loosely with foil for the last 10-15 minutes, but embrace the dark color!
Step 4: The Crucial Cool Down
-
Cool Completely: Once baked, remove the cheesecake from the oven. It will deflate significantly—this is normal and expected. Let it cool completely in the pan on a wire rack. As it cools, the center will firm up, transforming from jiggly to creamy.
-
Chill (Optional but Recommended): For the cleanest slices, once the cake is at room temperature, cover the pan and transfer it to the refrigerator to chill for at least 3 hours, or preferably overnight. This extended rest allows the flavors to meld and the texture to become perfectly sliceable while remaining creamy.
Step 5: Serve and Savor
-
Unmold: Carefully release the clasp of the springform pan and peel away the parchment paper.
-
Slice: Use a sharp, thin-bladed knife to slice the cheesecake. For the cleanest cuts, dip the knife in hot water and wipe it dry between each slice.
-
Serve: Enjoy the cheesecake chilled, at cool room temperature, or slightly warmed. It needs no accompaniment, but a sprinkle of flaky sea salt or a few fresh berries on the side are lovely complements.
Serving Suggestions
-
Pure and Simple: Serve it plain to truly appreciate the complex contrast between the bitter, caramelized top and the sweet, creamy interior.
-
With Fresh Fruit: A side of fresh raspberries, macerated strawberries, or a tangy berry compote provides a bright, acidic counterpoint.
-
For the Decadent: A drizzle of dark chocolate sauce or a dollop of freshly whipped cream takes it to another level of indulgence.
-
With a Digestif: Pair a slice with a glass of sherry, a dessert wine, or a cup of strong black coffee for a truly authentic Spanish experience.
Customization Ideas
-
Citrus Zest: Add the zest of one lemon or orange to the batter for a bright, aromatic twist.
-
Spiced Version: Incorporate a teaspoon of cinnamon or a pinch of nutmeg into the batter for a warm, cozy flavor.
-
Chocolate Basque Cheesecake: Replace ⅓ cup of the sugar with ½ cup of dark cocoa powder, sifting it in with the flour.
Nutrition Information (Approximate, per serving based on 12 servings)
-
Calories: 545 kcal
-
Total Carbohydrates: 32g
-
Dietary Fiber: 0g
-
Sugars: 28g
-
Protein: 9g
-
Total Fat: 43g
-
Saturated Fat: 26g
-
Cholesterol: 195mg
-
Sodium: 380mg
Nutrition information is an estimate and can vary based on the specific brands of ingredients used. Values calculated using full-fat Philadelphia cream cheese.