Prep Time: 25 minutes
Setting Time: 4 hours (minimum) or overnight
Total Time: 4 hours 25 minutes (mostly inactive)
Serves: 12 generous bars
Difficulty: Easy
Intensity: Low (simple layering, no baking)
Ingredients
For the Oat Almond Crust:
-
1 ½ cups (150g) old-fashioned rolled oats (certified gluten-free if needed)
-
1 cup (120g) raw almonds (or almond flour for a finer texture)
-
¼ cup (60ml) pure maple syrup or honey
-
3 tbsp coconut oil, melted (or unsalted butter)
-
¼ tsp fine sea salt
-
½ tsp almond extract (optional, but recommended)
For the Raspberry Chia Jam:
-
12 oz (340g) fresh or frozen raspberries (do not thaw if frozen)
-
3 tbsp pure maple syrup or honey
-
2 tbsp fresh lemon juice
-
3 tbsp chia seeds
For the Greek Yogurt Layer:
-
2 cups (500g) plain, full-fat Greek yogurt (for maximum creaminess)
-
⅓ cup (80ml) pure maple syrup, honey, or agave nectar
-
1 tsp pure vanilla extract
-
1 tsp unflavored gelatin OR 1 tbsp cornstarch (for stabilization, see note)
-
2 tbsp cold water (for gelatin, if using)
For Assembly & Garnish:
-
Reserved Raspberry Chia Jam (about ⅓ cup)
-
Fresh raspberries, for topping
-
Sliced almonds, for garnish
-
Optional drizzle: 2 tbsp white chocolate, melted
Instructions
Part 1: The Toasted Oat Almond Crust
-
Line the Pan: Line an 8×8 inch (20×20 cm) baking pan with parchment paper, leaving an overhang on two sides to form a “sling” for easy removal. Lightly grease the exposed sides.
-
Toast the Oats & Almonds: In a large, dry skillet over medium heat, add the rolled oats and whole almonds. Toast, stirring frequently, for 5-7 minutes until the oats are fragrant and lightly golden, and the almonds are toasted. Watch closely to prevent burning. Transfer to a food processor.
-
Process into Crumbs: Pulse the toasted oats and almonds until they form a coarse meal with some texture remaining—you don’t want a fine flour. A few larger almond pieces are perfect for crunch.
-
Bind the Crust: To the food processor, add the melted coconut oil, maple syrup, salt, and almond extract. Pulse 5-7 times until the mixture is evenly moistened and starts to clump together.
-
Press & Set: Pour the crust mixture into the prepared pan. Using the bottom of a measuring cup or your fingers, press it firmly and evenly into the bottom of the pan. Ensure it is compact; this is the foundation of your bars. Place the pan in the refrigerator to chill while you prepare the jam.
Part 2: The Simple Raspberry Chia Jam
-
Cook the Raspberries: In a medium saucepan, combine the raspberries, maple syrup, and lemon juice. Cook over medium heat, stirring and mashing the berries with a fork or spoon, for 5-8 minutes until the berries have broken down and the mixture is bubbling.
-
Activate the Chia Seeds: Remove the pan from heat. Stir in the chia seeds immediately. Let the mixture sit, stirring once or twice, for 10-15 minutes until it thickens to a jam-like consistency. It will continue to thicken as it cools. Set aside to cool completely (you can speed this up by placing it in the refrigerator).
Part 3: The Stabilized Greek Yogurt Layer
-
Prepare the Gelatin (If Using): In a small microwave-safe bowl, sprinkle the unflavored gelatin over the 2 tbsp of cold water. Let it “bloom” for 5 minutes until it absorbs the water and becomes spongy. Microwave for 15-20 seconds until it becomes a clear liquid. Set aside to cool slightly. (If using cornstarch, skip to next step and see note below).
-
Whisk the Yogurt Filling: In a large bowl, whisk together the Greek yogurt, maple syrup, and vanilla extract until completely smooth and silky.
-
Temper & Combine: While whisking the yogurt mixture constantly, slowly drizzle in the slightly cooled, liquid gelatin (or cornstarch slurry—1 tbsp cornstarch mixed with 2 tbsp cold water). Whisk vigorously for 1 minute to ensure it is fully incorporated. This step is crucial for creating a firm, sliceable yogurt layer that won’t weep.
Part 4: Assembly & The Magic Swirl
-
First Layer – Jam: Retrieve the chilled crust. Spread about ⅔ of the cooled raspberry chia jam evenly over the crust, leaving a thin border.
-
Second Layer – Yogurt: Carefully pour the prepared Greek yogurt mixture over the jam layer. Use an offset spatula to gently spread it into a smooth, even layer, covering the jam completely.
-
The Artistic Swirl: Dollop the remaining raspberry jam randomly over the top of the yogurt layer. Using a toothpick or the tip of a knife, gently swirl the jam into the yogurt to create a beautiful marbled effect. Do not over-swirl.
-
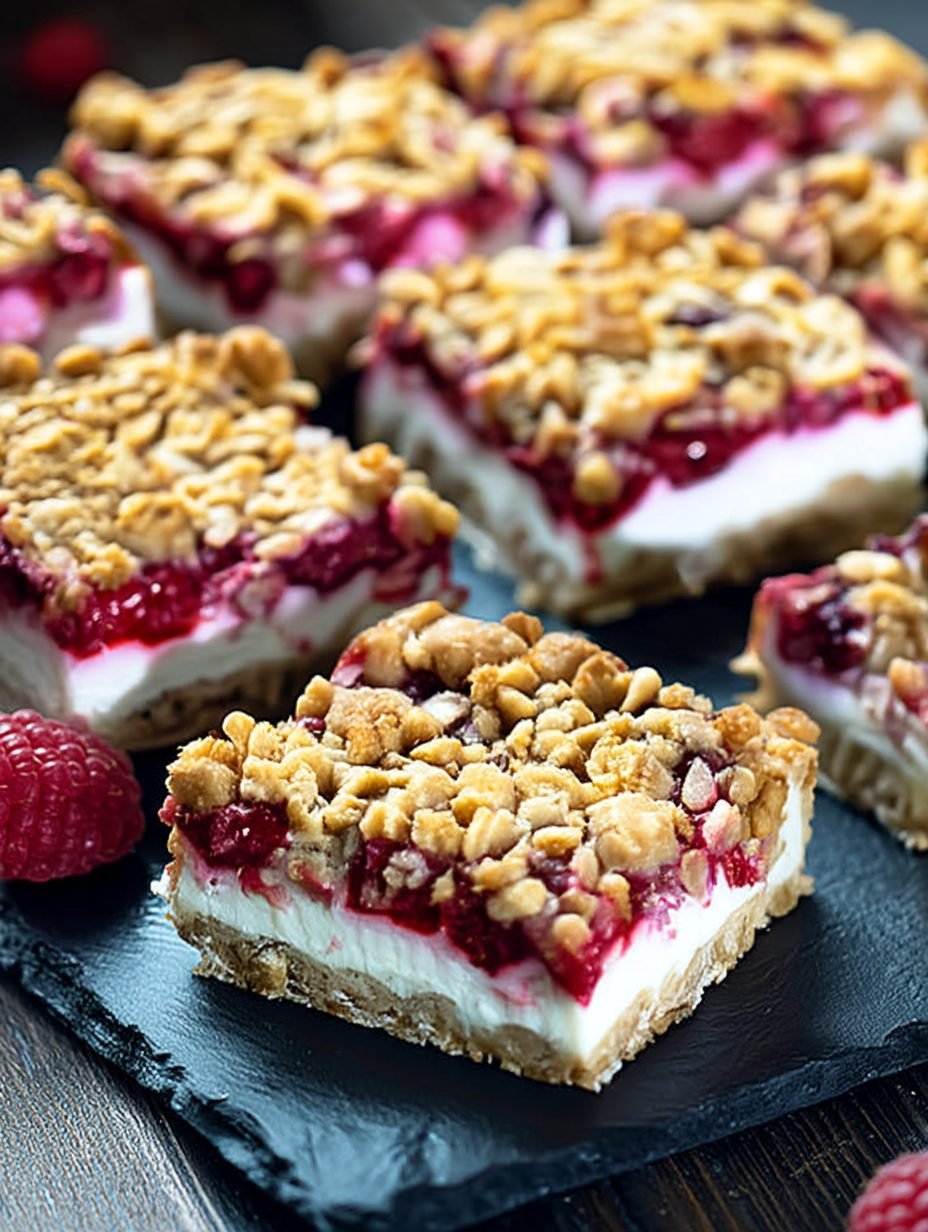
Final Garnish: Press a few fresh raspberries and sliced almonds into the top for visual appeal and extra crunch.
Part 5: The Patient Chill & Slice
-
The Long Chill: This is the most important step. Cover the pan tightly with plastic wrap and refrigerate for a minimum of 4 hours, but ideally overnight (8-12 hours). This allows all layers to set firmly, the flavors to meld, and ensures you will get clean, perfect slices.
-
Slice & Serve: Using the parchment paper sling, lift the entire block of bars out of the pan and onto a cutting board. With a sharp knife dipped in hot water and wiped dry between cuts, slice into 12 even bars or 16 smaller squares.
-
Storage: Store bars in a single layer in an airtight container in the refrigerator for up to 5 days. They can also be individually wrapped and frozen for up to 2 months. Thaw in the refrigerator before enjoying.
Chef’s Notes & Recipe Science
-
The Stabilizer (Gelatin vs. Cornstarch):
-
Gelatin: Creates a beautifully firm, clean, and sliceable yogurt layer with a very clean taste. It is the professional choice.
-
Cornstarch: A vegetarian alternative. It firms the yogurt but can result in a slightly less clean mouthfeel and may cause a tiny bit of weeping over time. For cornstarch, create a slurry with 1 tbsp cornstarch and 2 tbsp cold water, microwave for 45 seconds until thick and translucent, cool slightly, then whisk into the yogurt mixture.
-
-
Yogurt is Key: Full-fat Greek yogurt is non-negotiable for the creamiest texture and best flavor. Low-fat or regular yogurt will release too much water and result in a runny, icy layer.
-
Sweetener Flexibility: Maple syrup, honey, and agave all work beautifully. Honey will give a stronger floral note, while maple syrup offers a more neutral, rounded sweetness.
-
Make-Ahead Perfection: These bars are the ultimate make-ahead treat. Prepare them completely 1-2 days before you need them. The flavor improves, and they become even easier to slice.
-
Berry Swap: Feel free to use blackberries, blueberries, or a mixed berry blend. Adjust sweetener in the jam to taste based on berry tartness.
Nutritional Information (Per Bar, based on 12 servings):
-
Calories: ~240 kcal
-
Total Fat: 11g
-
Saturated Fat: 4g
-
-
Cholesterol: 5mg
-
Sodium: 65mg
-
Total Carbohydrates: 27g
-
Dietary Fiber: 5g
-
Sugars: 17g (primarily natural from fruit and maple syrup)
-
-
Protein: 9g
-
Excellent Source of: Protein, Fiber, Calcium, Vitamin C
Nutritional information is an estimate provided by a third-party application and will vary based on specific brands and ingredient choices.