Total Time: 45 minutes
Active Prep Time: 20 minutes
Cooking Time: 25 minutes
Intensity: Medium – A fun, multi-step recipe perfect for a hearty weekend lunch or casual dinner.
Yield: 4 large wraps
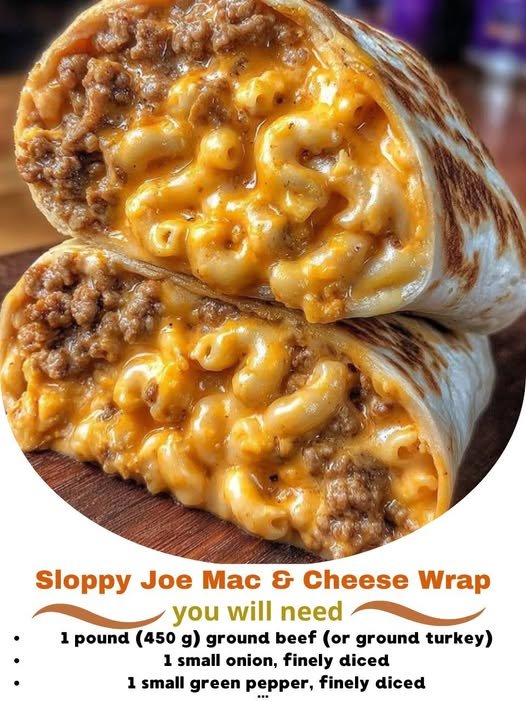
A Comfort Food Fusion Masterpiece
The Sloppy Joe Mac & Cheese Wrap is the ultimate hug-in-a-handheld. We’ve taken two iconic, beloved comfort food classics—the tangy, savory Sloppy Joe and the rich, creamy indulgence of macaroni and cheese—and wrapped them snugly in a warm, toasted tortilla. The result is a brilliantly messy, utterly satisfying meal that’s surprisingly easy to make. It’s a crowd-pleaser for game days, family dinners, or whenever you need a delicious dose of nostalgia with a clever twist.
Ingredients
For the Sloppy Joe Filling:
-
1 tablespoon olive oil
-
1 medium yellow onion, finely diced
-
1 green bell pepper, finely diced
-
2 cloves garlic, minced
-
1 pound lean ground beef (90/10)
-
1 cup tomato sauce
-
¼ cup ketchup
-
2 tablespoons tomato paste
-
1 tablespoon brown sugar
-
1 tablespoon Worcestershire sauce
-
1 teaspoon yellow mustard
-
1 teaspoon chili powder
-
½ teaspoon smoked paprika
-
Salt and freshly ground black pepper to taste
For the Simple Stovetop Mac & Cheese:
-
8 ounces (about 2 cups) elbow macaroni or small shell pasta
-
2 tablespoons unsalted butter
-
2 tablespoons all-purpose flour
-
1 ½ cups whole milk, warmed
-
2 cups freshly shredded sharp cheddar cheese (pre-shredded cheese contains anti-caking agents that can make the sauce grainy)
-
¼ teaspoon garlic powder
-
Pinch of nutmeg (optional)
-
Salt and white pepper to taste
For Assembly:
-
4 large burrito-size flour tortillas (10-inch)
-
1 tablespoon softened butter (for toasting)
-
½ cup shredded Monterey Jack or mozzarella cheese (for melting on top)
-
Optional for serving: pickle spears, extra ketchup, hot sauce, or a simple side salad.
Equipment
-
Large pot for boiling pasta
-
Large skillet or sauté pan
-
Medium saucepan
-
Whisk
-
Grater (if shredding cheese from a block)
-
Cutting board & chef’s knife
Instructions
Step 1: Cook the Pasta & Start the Sloppy Joes (Simultaneous Steps)
-
Boil the Pasta: Bring a large pot of generously salted water to a boil. Cook the elbow macaroni according to package directions until al dente. Drain and set aside. Do not rinse.
-
Sauté Aromatics: While the pasta water heats, prepare the Sloppy Joe filling. In a large skillet over medium heat, add the olive oil. Sauté the diced onion and bell pepper for 5-6 minutes, until softened. Add the minced garlic and cook for another 1 minute until fragrant.
Step 2: Brown the Beef & Build the Sauce
-
Cook the Beef: Increase the heat to medium-high and add the ground beef to the skillet with the vegetables. Cook, breaking it up with a spoon, until no pink remains, about 5-7 minutes. Drain any excess fat if necessary.
-
Combine Sauces: Reduce heat to medium-low. To the beef mixture, add the tomato sauce, ketchup, tomato paste, brown sugar, Worcestershire sauce, mustard, chili powder, and smoked paprika. Stir thoroughly to combine.
-
Simmer: Let the mixture simmer gently for 10-15 minutes, stirring occasionally, until thickened and flavorful. Season with salt and pepper to taste. Remove from heat and cover to keep warm.
Step 3: Make the Cheese Sauce
-
Create a Roux: While the Sloppy Joe mixture simmers, make the mac and cheese. In the medium saucepan over medium heat, melt the 2 tablespoons of butter. Whisk in the flour and cook for 1-2 minutes, until it forms a pale blonde paste (this is a roux).
-
Whisk in Milk: Slowly pour in the warm milk, whisking constantly to prevent lumps. Continue to cook, whisking frequently, until the mixture thickens enough to coat the back of a spoon, about 5-7 minutes.
-
Cheese Please!: Remove the saucepan from the heat. Gradually add the shredded cheddar cheese, a handful at a time, whisking until each addition is fully melted and smooth before adding the next. Stir in the garlic powder and nutmeg (if using). Season with salt and white pepper.
-
Combine Pasta & Cheese: Add the drained cooked pasta to the cheese sauce and stir until every noodle is luxuriously coated. Cover to keep warm.
Step 4: Assemble & Toast the Wraps
-
Warm Tortillas: Heat a clean, large skillet or griddle over medium-low heat. Warm each tortilla for about 20 seconds per side to make them pliable.
-
Layer It Up: On the lower third of a warmed tortilla, place a generous scoop (about ¾ cup) of the mac and cheese. Spread it horizontally, leaving a 2-inch border on the sides. Top the mac and cheese with a similar amount of the Sloppy Joe filling.
-
Fold and Roll: Fold the sides of the tortilla in over the ends of the filling. Starting from the bottom edge closest to you, tightly roll the tortilla up, enclosing the filling completely.
-
Toast to Perfection: Spread the softened butter lightly on the outside of the seam-side of the wrap. Place the wrap, seam-side down, in the preheated skillet (you can use the same one from warming). Cook for 2-3 minutes per side, or until the tortilla is golden brown, crisp, and sealed. Press down gently with a spatula. Repeat with remaining wraps.
Step 5: Serve & Enjoy!
-
Optional Melt: For extra decadence, in the last 30 seconds of toasting, sprinkle the top of each wrap with a little Monterey Jack cheese and cover the skillet briefly to let it melt.
-
Serve Immediately: Transfer each finished wrap to a cutting board. Let rest for 1 minute (this helps the filling set slightly), then slice in half on a diagonal. Serve immediately with pickle spears, hot sauce, or any of your favorite sides. Warning: Delicious messiness is guaranteed!
Nutrition Information (Per Wrap, approximate)
-
Calories: ~820 kcal
-
Total Fat: 38g
-
Saturated Fat: 18g
-
Cholesterol: 125mg
-
Sodium: 1350mg
-
Total Carbohydrates: 75g
-
Dietary Fiber: 4g
-
Sugars: 15g
-
Protein: 45g
Note: Nutritional values are estimates calculated using online nutritional software and can vary based on specific ingredient brands, portion sizes, and any modifications made. For precise dietary needs, consult a nutritionist or use a dedicated calculator with your exact ingredients.