Yields: One 8×8-inch cake (9 generous servings)
Prep Time: 25 minutes
Bake Time: 40-50 minutes
Cooling Time: 2 hours (minimum)
Total Time: 3 hours 15 minutes (mostly inactive)
Recipe Intensity: Intermediate (requires precision)
Ingredients
Wet Ingredients:
-
4 large eggs, separated and at room temperature
-
1 teaspoon vanilla extract
-
¾ cup (150g) granulated sugar
-
½ cup (113g) unsalted European-style butter, melted and slightly cooled
-
3 tablespoons cool water
-
2 cups (480ml) whole milk, lukewarm
Dry Ingredients:
-
¾ cup (94g) all-purpose flour, sifted
-
A pinch of salt
Finishing Touch:
-
Powdered sugar, for dusting
Step-by-Step Instructions
Phase 1: The Foundation – Preparing the Components
Step 1: Separate and Conquer
This is the most critical prep step. Carefully separate the 4 eggs, placing the whites in a perfectly clean, grease-free bowl of a stand mixer (or a large bowl for a hand mixer). Place the yolks in a separate, medium-sized bowl. Room temperature eggs are non-negotiable; they whip to a greater volume and incorporate more easily.
Step 2: Gently Warm the Milk
In a saucepan or the microwave, gently warm the 2 cups of milk until it is just lukewarm (about 100°F / 38°C). Do not let it get hot. Warm milk integrates into the batter more smoothly without seizing the butter.
Step 3: Melt and Cool the Butter
Melt the ½ cup of butter and set it aside to cool slightly. It should be liquid but not hot to the touch.
Phase 2: The Alchemy – Creating the Batter
Step 4: Whip the Egg Whites to Stiff Peaks
Using the whisk attachment, beat the 4 egg whites on high speed until they form stiff, glossy peaks. This means when you lift the whisk, the peak stands straight up without falling over. Set the whipped whites aside. Do not skimp on this step; this is the primary leavening agent.
Step 5: Cream the Yolks and Sugar
In the bowl with the egg yolks, add the ¾ cup of sugar. Using the same whisk (no need to wash it), beat the yolks and sugar on high speed for 2-3 minutes until the mixture is pale yellow, thick, and falls from the whisk in a ribbon-like pattern.
Step 6: Incorporate Butter, Water, and Vanilla
With the mixer on low, slowly stream in the slightly cooled, melted butter, followed by the 3 tablespoons of cool water and the 1 teaspoon of vanilla extract. Mix until just combined.
Step 7: Add the Flour and Salt
Switch to a spatula. Gradually fold the sifted flour and pinch of salt into the yolk mixture. Mix until the flour is just incorporated; the batter will be very thick and paste-like at this stage.
Step 8: The Delicate Addition of Milk
Now, slowly and in 3-4 additions, begin adding the lukewarm milk to the batter, folding gently with the spatula after each addition. It will look curdled and strange at first—this is normal. Keep adding and folding until the milk is fully incorporated and the batter is thin and liquid.
Step 9: The Final Fold – Incorporating the Whites
This step requires a light touch. Add about one-third of the whipped egg whites to the thin batter. Fold vigorously to lighten the base. Now, gently fold in the remaining two-thirds of the whites. Do not overmix. It is perfectly fine—in fact, ideal—to have some streaks and pockets of white remaining. The batter will be very fluid, like pancake batter.
Phase 3: The Transformation – Baking and Cooling
Step 10: Bake Low and Slow
Preheat your oven to 325°F (160°C). Line an 8×8-inch baking pan with parchment paper, leaving an overhang on two sides for easy removal.
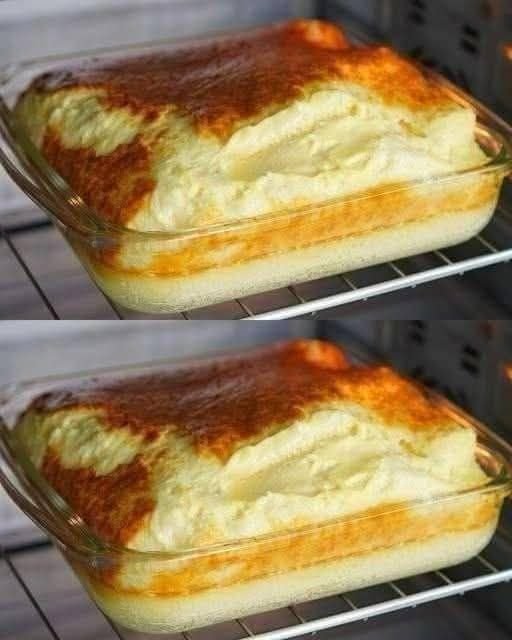
Pour the thin, bubbly batter into the prepared pan. It will only come about halfway up the sides. Bake for 40-50 minutes. The cake is done when the top is a deep, golden brown and the center has a very slight, firm jiggle (like a set custard). It should not be liquidy.
Step 11: The Crucial Cool Down
This is where the layers fully set. Place the entire pan on a wire rack and let it cool completely to room temperature. This will take at least 2 hours. Do not attempt to cut it while warm, as the custard layer will not have set.
Phase 4: The Revelation – Serving the Magic
Step 12: Chill, Dust, and Serve
Once at room temperature, cover the pan with plastic wrap and refrigerate for at least 1 hour, or overnight, for the cleanest slices.
Use the parchment paper to lift the entire cake out of the pan. Place it on a cutting board. Dust the top generously with powdered sugar.
Using a sharp, thin-bladed knife, wipe the blade clean between each cut to create pristine slices. Reveal the beautiful, distinct layers and serve.
Baker’s Notes & Troubleshooting
-
Why European Butter? European-style butter has a higher fat content (82-85%) than American butter (80%), resulting in a richer flavor and more stable emulsion.
-
My Batter Was Thick, Then Curdled: This is the expected process. The initial flour mixture is thick, and adding liquid to a thick, flour-based paste often causes a temporary curdled look. Persist with gentle folding; it will become smooth.
-
My Layers Didn’t Form:
-
Egg Whites: The most common culprit. They must be whipped to stiff peaks.
-
Mixing: Overmixing after adding the final egg whites deflates the batter, ruining the layers.
-
Oven Temperature: An oven that runs too hot will cook the top too quickly, preventing proper layer separation. Use an oven thermometer.
-
-
The Top is Too Dark: Tent the cake loosely with aluminum foil for the last 10-15 minutes of baking.
Storage
Store the cake, covered, in the refrigerator for up to 3 days. The powdered sugar topping will be absorbed over time, so re-dust before serving if desired.
Nutrition Information
(Please note: The following is an estimate and can vary based on specific ingredients.)
Serving Size: 1/9 of the cake
-
Calories: ~280
-
Total Fat: 15g
-
Saturated Fat: 9g
-
Cholesterol: 125mg
-
Sodium: 75mg
-
Total Carbohydrates: 31g
-
Dietary Fiber: 0g
-
Sugars: 23g
-
Protein: 6g
Dietary Note: This recipe contains gluten, dairy, and eggs. It is not suitable for vegan, gluten-free, or dairy-free diets. For a gluten-free version, a 1:1 gluten-free flour blend may work, but results can vary due to the precise nature of the recipe.