-
Prep Time: 25 minutes
-
Chill Time: 4 hours (or overnight)
-
Total Time: 4 hours 25 minutes (mostly inactive)
-
Recipe Intensity: Easy (Perfect for bakers of all levels. The most complex step is waiting for them to chill!)
-
Recipe Cost: Moderate (Approximately $18-$25 total, depending on brand choices for cream cheese and strawberries)
-
Course: Dessert
-
Cuisine: American
-
Servings: 24 bites
-
Keywords: No-Bake Cheesecake, Strawberry Crunch, Dessert Bites, Easy Dessert, No-Bake Dessert, Party Food, Make-Ahead, Gluten-Free Option
Ingredients
For the Crunch Topping:
-
1 (11-12 oz) bag of Golden Oreos or similar vanilla sandwich cookies
-
1 cup freeze-dried strawberries
-
4 tablespoons unsalted butter, melted
-
1 tablespoon granulated sugar
-
A pinch of salt
For the Cheesecake Filling:
-
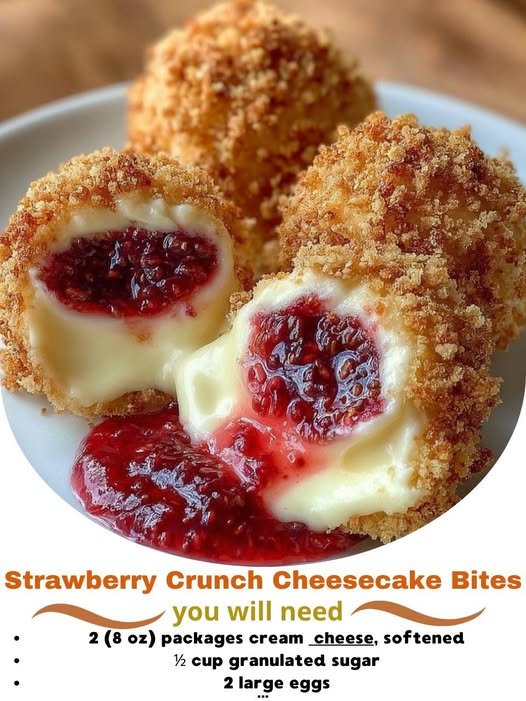
16 ounces (two 8 oz blocks) full-fat cream cheese, softened to room temperature
-
1 cup powdered sugar, sifted
-
1 teaspoon pure vanilla extract
-
1 cup heavy whipping cream, cold
For the Strawberry Layer:
-
1 cup finely chopped fresh strawberries
-
½ cup high-quality strawberry jam or preserves
For Garnish (Optional):
-
4-5 whole strawberries, thinly sliced
-
Fresh mint leaves
Equipment You’ll Need
-
Muffin tin (standard 12-cup)
-
24 cupcake liners
-
Food processor or high-speed blender
-
Stand mixer or hand mixer
-
Large mixing bowls
-
Spatula
-
Measuring cups and spoons
-
Small saucepan
Step-by-Step Instructions
Step 1: Prepare the Pan and Topping
Line your muffin tin with 24 cupcake liners. This is crucial for easy removal and a beautiful presentation.
Now, let’s make the iconic crunch! In the bowl of a food processor, combine the entire bag of Golden Oreos (creme filling and all) and the freeze-dried strawberries. Pulse until the mixture forms fine crumbs. You should see lovely speckles of red from the strawberries.
Transfer the crumb mixture to a medium bowl. Pour the melted butter over the crumbs and use a fork to mix until the mixture is evenly moistened and resembles wet sand. It should hold together when pinched. Stir in the pinch of salt. Set this aside while you prepare the filling.
Step 2: Whip the Cheesecake Filling
In the bowl of a stand mixer fitted with the paddle attachment (or using a hand mixer in a large bowl), beat the softened cream cheese on medium speed until it is completely smooth and free of lumps. This should take about 2 minutes. Scrape down the sides of the bowl.
Add the sifted powdered sugar and vanilla extract. Beat on low speed initially to incorporate the sugar, then increase to medium-high and beat for another 1-2 minutes until the mixture is smooth and creamy. Scrape down the bowl again to ensure everything is combined.
Step 3: Add the Whipped Cream
In a separate, clean, chilled bowl, whip the cold heavy whipping cream on medium-high speed until stiff peaks form. Be careful not to over-whip it into butter.
Using a spatula, gently fold about one-third of the whipped cream into the cream cheese mixture. This will lighten the base. Then, carefully fold in the remaining whipped cream until no white streaks remain. The filling should be thick, smooth, and airy.
Step 4: Create the Strawberry Swirl
In your small saucepan, combine the chopped fresh strawberries and the strawberry jam. Heat over low heat, stirring constantly, for 3-4 minutes until the jam has melted and the strawberries have softened slightly, creating a chunky sauce. Remove from heat and let it cool for 5 minutes.
Step 5: Assemble the Bites (The Layering Magic!)
This is where we build our masterpiece.
-
The Crust Base: Spoon about 1 heaping tablespoon of the prepared strawberry crunch mixture into the bottom of each cupcake liner. Use the back of a spoon or a small glass to press it down firmly into an even layer.
-
The Cheesecake Layer: Spoon or pipe the cheesecake filling over the crust, dividing it evenly among the 24 liners, filling them almost to the top. Smooth the tops with a spoon or offset spatula.
-
The Strawberry Swirl: Dollop about ½ teaspoon of the slightly cooled strawberry sauce onto the center of each cheesecake bite. Use a toothpick to gently swirl the strawberry mixture into the cheesecake filling, creating a beautiful marbled effect.
-
The Final Crunch: Generously sprinkle the remaining strawberry crunch topping over each bite, pressing it down gently so it adheres.
Step 6: The Chill (The Test of Patience)
Cover the muffin tin tightly with plastic wrap and transfer it to the refrigerator. Chill for at least 4 hours, but for best results, let them set overnight. This extended chilling time is non-negotiable—it allows the filling to firm up perfectly, making them easy to eat and allowing the flavors to fully develop.
Step 7: Serve and Enjoy!
Once fully set, carefully remove the cheesecake bites from the muffin tin. Peel away the liners for a cleaner presentation, or serve them as is. Garnish with a thin slice of fresh strawberry and a tiny mint leaf for a professional, elegant finish right before serving.
Nutrition Information
(Please note: Nutritional values are estimates and can vary based on specific ingredients and brands used.)
Serving Size: 1 cheesecake bite
Calories: 245
Total Fat: 16g
-
Saturated Fat: 9g
-
Trans Fat: 0g
Cholesterol: 40mg
Sodium: 115mg
Total Carbohydrates: 24g -
Dietary Fiber: 1g
-
Sugars: 17g
Protein: 3g
Vitamin D: 6mcg | Calcium: 35mg | Iron: 1mg | Potassium: 85mg
Chef’s Notes & Tips for Success
-
The Secret to Smooth Filling: Ensuring your cream cheese is truly at room temperature is the single most important step for a lump-free, silky filling. Take it out of the fridge at least 1-2 hours before you start.
-
Don’t Over-mix the Filling: Once you add the whipped cream, fold gently. Over-mixing can deflate the air you whipped in, resulting in a denser final product.
-
Gluten-Free Adaptation: This recipe is easily made gluten-free! Simply use your favorite gluten-free vanilla sandwich cookies (like Glutino or Goodie Girl) for the crunch topping.
-
Make-Ahead Marvel: These bites are the ultimate make-ahead dessert. They can be stored in an airtight container in the refrigerator for up to 3 days. The crunch topping may soften slightly but will still be delicious.
-
Freezing Instructions: For longer storage, arrange the set bites on a baking sheet and “flash freeze” for 1 hour until solid. Then, transfer them to a freezer-safe bag or container. They will keep for up to 2 months. Thaw in the refrigerator for a few hours before serving.
-
Flavor Twists:
-
Lemon Bliss: Substitute the freeze-dried strawberries with freeze-dried raspberries and add 1 tablespoon of lemon zest to the cheesecake filling.
-
Chocolate Covered: Drizzle the finished, chilled bites with melted white or dark chocolate for an extra-decadent touch.
-
We hope these Strawberry Crunch Cheesecake Bites transport you back to your favorite childhood summer memories while impressing every guest at your table. They are proof that the best desserts are often a perfect blend of nostalgia and innovation. Enjoy