Yields: 4 Wraps
Prep Time: 20 minutes
Cook Time: 15 minutes
Total Time: 35 minutes
Recipe Intensity: Easy
Ingredients
For the Crispy Chicken:
-
1 lb boneless, skinless chicken breasts
-
2 tablespoons all-purpose flour
-
1 teaspoon garlic powder
-
1 teaspoon paprika
-
½ teaspoon onion powder
-
½ teaspoon salt
-
¼ teaspoon black pepper
-
2 tablespoons olive oil or avocado oil
For the Homemade Ranch Sauce:
-
½ cup mayonnaise
-
¼ cup sour cream or plain Greek yogurt
-
2 tablespoons buttermilk (or 2 tbsp milk + ¼ tsp lemon juice)
-
1 tablespoon fresh parsley, finely chopped
-
1 teaspoon fresh dill, finely chopped (or ¼ tsp dried dill)
-
½ teaspoon garlic powder
-
½ teaspoon onion powder
-
¼ teaspoon salt
-
⅛ teaspoon black pepper
-
1 tablespoon fresh chives, chopped (for garnish)
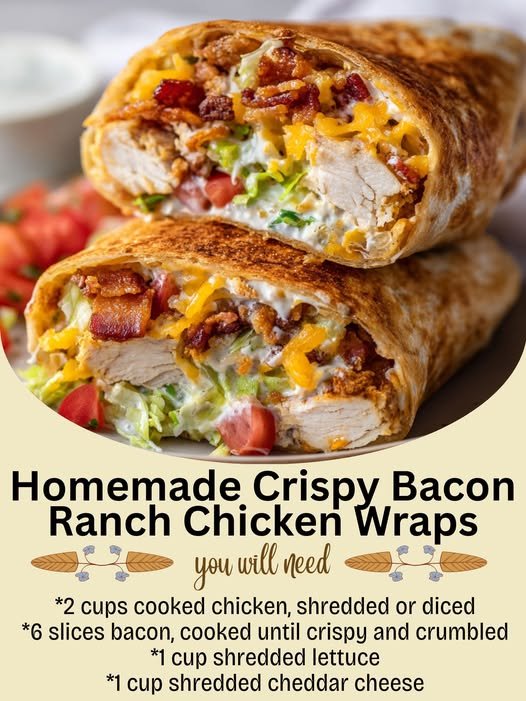
For Assembly:
-
4 large (10-inch) flour tortillas (spinach or sun-dried tomato add great color!)
-
8 slices bacon, cooked until crispy
-
2 cups romaine lettuce, shredded
-
1 large tomato, diced
-
1 cup shredded cheddar or Monterey Jack cheese
Step-by-Step Instructions
Step 1: Prepare the Chicken and Homemade Ranch
Begin by preparing the chicken. Place the chicken breasts between two pieces of plastic wrap and gently pound them to an even ½-inch thickness using a meat mallet or rolling pin. This ensures they cook quickly and evenly. Slice the pounded chicken into ½-inch wide strips.
In a medium bowl or a resealable plastic bag, combine the flour, garlic powder, paprika, onion powder, salt, and pepper. Add the chicken strips and toss until they are evenly coated in the seasoning mixture.
While the chicken rests, make the quick homemade ranch sauce. In a small bowl, whisk together the mayonnaise, sour cream, buttermilk, fresh parsley, dill, garlic powder, onion powder, salt, and pepper until smooth. Set aside. (This can be made a day ahead for even more developed flavor).
Step 2: Cook the Bacon and Crispy Chicken
Cook the bacon in a large skillet over medium heat until crispy. Transfer to a paper towel-lined plate to drain. Once cool, crumble or break into pieces.
Important: Carefully pour the bacon grease out of the skillet, but do not wipe it clean. The residual fat will add incredible flavor to the chicken. Add the 2 tablespoons of olive oil to the same skillet and heat over medium-high heat.
Working in batches to avoid overcrowding, add the seasoned chicken strips to the hot skillet. Cook for 3-4 minutes per side, until the chicken is golden brown, crispy on the outside, and cooked through. Transfer the cooked chicken to a clean plate.
Step 3: Warm the Tortillas
To make the wraps pliable and enhance their flavor, warm the tortillas. You can do this by heating them one at a time in a dry skillet over medium heat for 15-20 seconds per side, or by wrapping all four in a damp paper towel and microwaving for 20-30 seconds.
Step 4: Assemble the Wraps
Lay each warm tortilla flat on a clean surface. Spread a generous two tablespoons of the homemade ranch sauce down the center of each tortilla, leaving a 2-inch border at the top and bottom.
On top of the sauce, layer the ingredients in the following order:
-
A handful of shredded romaine lettuce.
-
A quarter of the crispy chicken strips.
-
A quarter of the crumbled bacon.
-
A sprinkle of diced tomato.
-
A generous handful of shredded cheese.
Step 5: The Art of the Tight Wrap
Folding a wrap properly is key to preventing spillage. Follow these steps for the perfect hold:
-
Fold the Sides: Bring the left and right sides of the tortilla inward over the filling.
-
Roll from the Bottom: Tightly roll the bottom flap of the tortilla up and over the filling, tucking it under the ingredients as you go.
-
Complete the Roll: Continue rolling firmly until the wrap is sealed. For a neat presentation, you can slice it in half on a sharp diagonal.
Step 6: Serve and Enjoy!
Serve immediately while the chicken is still warm and crispy. These wraps are a complete meal on their own, but they pair wonderfully with a side of sweet potato fries, a simple side salad, or some fresh fruit.
Chef’s Notes & Recipe Variations
-
Meal Prep Pro-Tip: You can be a lunchtime hero by prepping all the components ahead of time. Store the cooked chicken, bacon, chopped veggies, and ranch sauce in separate airtight containers in the fridge. Assemble the wraps fresh each morning for the best texture.
-
Customize Your Wrap: This recipe is a perfect canvas for your favorite ingredients. Add sliced avocado, red onion, black beans, or roasted corn. Swap the cheddar for pepper jack for a spicy kick.
-
Crispy Chicken Shortcut: For a super-quick version, use high-quality, pre-cooked breaded chicken strips. Heat them according to the package directions before assembling.
-
Keeping it Crisp: If you’re packing these for later, consider packing the crispy chicken separately and assembling just before eating to prevent the tortilla from getting soggy.
-
Dietary Swaps: Use gluten-free flour and tortillas for a gluten-free version. For a lighter option, use Greek yogurt in the ranch and low-carb tortillas.
Storage and Reheating
These wraps are best enjoyed immediately. However, if you have a leftover assembled wrap, wrap it tightly in plastic wrap or foil and refrigerate for up to 24 hours. Note that the tortilla may soften from the sauce and the chicken will lose some of its crispness.
We do not recommend reheating an assembled wrap, as it will become soggy. If you have leftover components, reheat the chicken in an air fryer or toaster oven to recrisp before assembling a fresh wrap.
Nutrition Information
(Please note: The following nutrition information is an estimate and can vary significantly based on specific ingredients and brands used.)
Serving Size: 1 Wrap
-
Calories: ~680
-
Total Fat: 45g
-
Saturated Fat: 13g
-
Cholesterol: 115mg
-
Sodium: 1250mg
-
Total Carbohydrates: 35g
-
Dietary Fiber: 3g
-
Sugars: 5g
-
Protein: 35g
Dietary Note: This recipe is high in sodium and saturated fat, primarily due to the bacon, cheese, and seasoning. To reduce sodium, use low-sodium seasonings and bacon. It is not suitable for gluten-free or dairy-free diets as written, but can be adapted with the swaps mentioned above.