Yields: 10-12 muffins
Prep Time: 30 minutes (active)
Fermentation/Rise Time: 8-14 hours (largely hands-off)
Cook Time: 15 minutes
Total Time: 9 to 15 hours (mostly unattended)
Intensity: Intermediate – This recipe requires a basic understanding of handling an active sourdough starter and a long, slow fermentation. The process is simple but demands patience and timing.
Equipment You’ll Need
-
Active, bubbly sourdough starter
-
Large mixing bowl
-
Bench scraper (highly recommended)
-
Rolling pin
-
3- to 3.5-inch round cutter (a wide-mouth jar ring or a sharp glass works)
-
Cast iron skillet or electric griddle
-
Parchment paper
-
Baking sheet
Ingredients
For the Dough:
-
1 cup (240g) active, bubbly sourdough starter (100% hydration)
-
1 cup (240g) warm whole milk (or milk of choice)
-
2 tablespoons (25g) granulated sugar
-
2 tablespoons (28g) unsalted butter, softened, plus more for greasing
-
1 large egg
-
3 ½ cups (420g) bread flour, plus more for dusting
-
1 ½ teaspoons (9g) fine sea salt
-
Semolina flour or fine cornmeal, for dusting
Instructions
Part 1: The Overnight Fermentation (The Key to Flavor)
-
Combine the Wet Ingredients: In your large mixing bowl, whisk together the active sourdough starter, warm milk, sugar, softened butter, and the egg until the mixture is relatively smooth and the butter has broken down into small pieces.
-
Incorporate the Dry Ingredients: Add the 3 ½ cups of bread flour and the salt to the bowl. Use a sturdy spatula or your hands to mix until a shaggy, sticky dough forms and no dry streaks of flour remain.
-
The Rest and Stretch: Cover the bowl with a damp kitchen towel or plastic wrap and let the dough rest for 30 minutes. This autolyse period allows the flour to fully hydrate, making the next step easier. After resting, perform a set of stretch and folds: wet your hand, grab one side of the dough, stretch it upwards, and fold it over the center. Rotate the bowl a quarter turn and repeat 3-4 more times until you’ve gone around the entire dough.
-
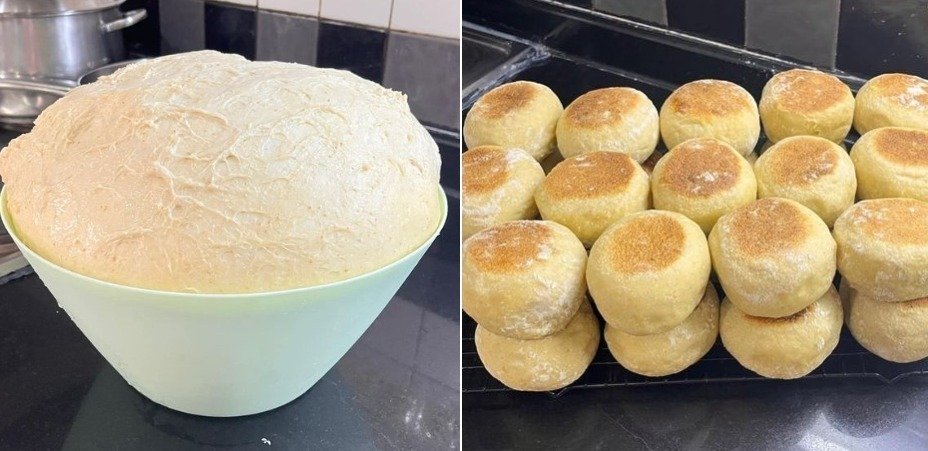
Bulk Fermentation: Cover the bowl again and let the dough rise at room temperature (68-72°F is ideal) for 8-12 hours, or until the dough has roughly doubled in size and is full of air bubbles. The timing is highly dependent on the strength of your starter and the warmth of your kitchen.
Part 2: Shaping and Final Proof
-
Prepare for Shaping: Once the dough is ready, generously dust a clean work surface with a mixture of all-purpose and semolina flour. The semolina will prevent sticking and create that classic, gritty texture on the outside.
-
Turn and Roll: Gently turn the dough out onto the floured surface. It will be soft and airy. Handle it delicately to preserve the gas bubbles. Using a rolling pin, roll the dough out to a thickness of about ¾ to 1 inch.
-
Cut the Rounds: Dip your round cutter in flour and cut out rounds from the dough. Press straight down without twisting for the best rise. Gather the scraps, re-roll them gently, and cut out more muffins until all the dough is used.
-
The Final Proof: Place the cut muffins onto a baking sheet that has been generously dusted with semolina flour, leaving an inch or two between them. Sprinkle the tops with more semolina. Cover them lightly with a towel and let them proof for 45-90 minutes. They are ready when they look puffy and a finger gently pressed into the side leaves a small indent that slowly springs back.
Part 3: The Griddle Bake
-
Preheat the Skillet: Preheat your cast iron skillet or electric griddle over low to medium-low heat. This is crucial! Too hot, and the outsides will burn before the insides are cooked. You want a steady, gentle heat.
-
Cook the Muffins: Carefully transfer a few muffins to the dry, ungreased preheated skillet, leaving space between them. Cook for 6-8 minutes on the first side, until the bottom is a deep, golden brown.
-
Flip and Finish: Flip the muffins and cook for another 6-8 minutes on the second side. The goal is a dark brown, crisp crust with fully cooked, fluffy insides. To ensure they are done, you can check the internal temperature with a thermometer; it should read about 200°F (93°C).
-
Cool Completely: Transfer the cooked muffins to a wire cooling rack. This is the most difficult step: you must let them cool completely, for at least one hour, before splitting and toasting. Cutting into them warm will result in a gummy, dense interior and crush all those beautiful nooks and crannies you worked so hard to create.
Part 4: Serve and Enjoy
-
The Fork-Split: Use a fork, not a knife, to split the cooled muffins. Puncture the sides all the way around and gently pry them apart. This creates the iconic nooks and crannies.
-
Toast and Top: Toast the halves until golden brown and slather with generous amounts of butter, jam, or use them as the foundation for the best eggs Benedict of your life.
The Last of the Recipe: Storage & Reheating
-
Storing Leftovers: Once completely cool, store the muffins in a paper bag at room temperature for 2-3 days for the best texture. For longer storage, place them in an airtight container or plastic bag, which will soften the crust but keep them fresh for up to 5 days.
-
Freezing: These muffins freeze magnificently. Place cooled muffins in a single layer on a baking sheet to freeze solid, then transfer to a freezer-safe bag for up to 3 months.
-
Reheating: For the best results, always toast frozen or refrigerated muffins straight from the freezer or fridge. There is no need to thaw. The toaster will revive the crisp exterior and warm, soft interior perfectly.
Nutrition Information
Please note: The following nutrition information is an estimate provided by an online nutrition calculator. Actual values may vary based on specific ingredients and brands used.
-
Serving Size: 1 muffin
-
Calories: ~190 kcal
-
Total Fat: 3.5g
-
Saturated Fat: 2g
-
Cholesterol: 25mg
-
Sodium: 300mg
-
Total Carbohydrates: 33g
-
Dietary Fiber: 1g
-
Sugars: 4g
-
Protein: 7g
Chef’s Notes & Customizations
-
Starter Vitality: Your starter must be active and recently fed to provide the necessary leavening power. If it doesn’t float in water, it’s not quite ready.
-
Patience with Heat: Low and slow on the griddle is the golden rule. If your muffins are browning too quickly, reduce the heat. The long cook time is what ensures the inside is fully done without burning the outside.
-
The Cool-Down is Non-Negotiable: The structure of the crumb sets as it cools. Resisting the urge to cut one open early is a test of will, but one you must pass for the perfect texture.
-
Flavor Twists:
-
Whole Wheat: Substitute up to 1 cup of the bread flour with whole wheat flour for a nuttier flavor and more fiber.
-
Cinnamon Raisin: Knead 1 teaspoon of cinnamon and ½ cup of raisins into the dough during the shaping phase.
-
Everything Bagel: Before the final proof, brush the tops with water and sprinkle generously with everything bagel seasoning.
-