Prep Time: 5 minutes
Cook Time: 45-50 minutes
Total Time: 50-55 minutes
Yields: 12 servings
Skill Level: Super Easy
Author: [Your Website/Blog Name]
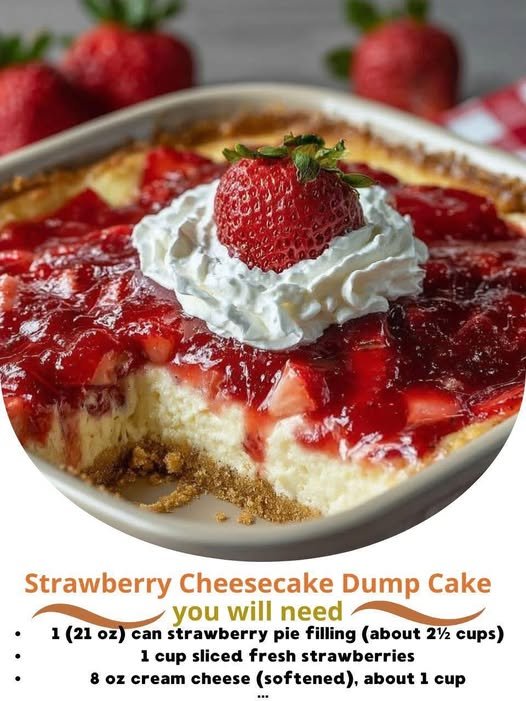
The Easiest, Most Impressive Dessert You’ll Ever Make
In a world of complicated baking techniques and fussy recipes, sometimes the simplest creations bring the most joy. Enter the Strawberry Cheesecake Dump Cake – a dessert that defies all expectations of what “from scratch” baking should be. This magical creation delivers all the creamy, fruity, indulgent flavors of a strawberry cheesecake without the stress of water baths, worrying about cracks, or hours of chilling time.
The name might sound humble, but the result is nothing short of spectacular. Imagine a bubbling layer of sweet strawberry filling, swirled with pockets of creamy cheesecake, all topped with a golden, buttery cake crumb that bakes up crisp and tender. It’s the dessert equivalent of a warm hug – comforting, familiar, and guaranteed to make everyone at your table smile. Whether you’re hosting a last-minute gathering, need a quick weeknight treat, or simply want to satisfy your sweet tooth with minimal effort, this dump cake is your new best friend in the kitchen.
Why This Recipe Will Become Your Go-To Dessert
-
5-Minute Prep: Literally dump and bake! The active prep time is faster than preheating your oven.
-
Minimal Ingredients: Using just 5 simple ingredients means you can likely make this right now without a trip to the store.
-
Foolproof Technique: There’s no way to mess this up – no mixing, no folding, no complicated steps.
-
Crowd-Pleasing Flavor: Combining the classic appeal of strawberry cheesecake with warm, comforting cake makes this a hit with all ages.
-
Versatile Base Recipe: Once you master this version, you can create endless variations with different fruit fillings and cake mixes.
Ingredients
For the Fruit Layer:
-
2 (21 oz) cans strawberry pie filling
-
1 teaspoon vanilla extract
-
1 teaspoon lemon juice (optional, but brightens the flavor)
For the Cheesecake Layer:
-
1 (8 oz) package cream cheese, softened and cut into small cubes
For the Topping:
-
1 (15.25 oz) box yellow cake mix*
-
1 cup (2 sticks) unsalted butter, melted
-
Optional: ½ cup white chocolate chips or sliced almonds for topping
Pro Tip: Don’t use cake mixes that include pudding in the mix, as they can create a denser texture. A basic yellow cake mix works perfectly.
Equipment You’ll Need
-
9×13 inch baking dish
-
Measuring spoons
-
Small knife for cutting cream cheese
-
Spoon for spreading
Instructions
Step 1: Prepare the Fruit Base
-
Preheat and Prepare: Preheat your oven to 350°F (175°C). No need to grease your baking dish – the butter in the recipe will prevent sticking.
-
Create Strawberry Layer: Pour both cans of strawberry pie filling directly into the 9×13 inch baking dish. Spread it evenly across the bottom using the back of a spoon.
-
Add Flavor Boost: Drizzle the vanilla extract and lemon juice (if using) over the strawberry layer. Use the spoon to gently swirl these ingredients into the fruit filling.
Step 2: Add the Cheesecake Element
-
Prepare Cream Cheese: Take your softened cream cheese and cut it into small, ½-inch cubes. The smaller the cubes, the more they’ll melt and create creamy pockets throughout the cake.
-
Distribute Evenly: Scatter the cream cheese cubes evenly over the strawberry layer. Try to space them out so every serving gets some of the creamy cheesecake goodness.
Step 3: Create the Cake Topping
-
Add Dry Cake Mix: Sprinkle the entire box of dry yellow cake mix directly over the fruit and cream cheese layers. Do not stir! Just spread it evenly with your hands or a spoon, breaking up any large clumps.
-
Drizzle with Butter: Slowly pour the melted butter over the dry cake mix, trying to cover as much surface area as possible. Use a spoon to gently spread the butter if needed, but again – no stirring!
-
Add Optional Toppings: If using white chocolate chips or sliced almonds, sprinkle them evenly over the top at this point.
Step 4: Bake to Perfection
-
Bake: Place the baking dish in the preheated oven and bake for 45-50 minutes. The cake is done when the topping is golden brown and the fruit filling is bubbling around the edges.
-
Check for Doneness: You should see visible bubbling around the sides, and the topping should look crisp and cooked through. A toothpick inserted into the cake mix portion should come out clean.
Step 5: Serve and Enjoy
-
Cool Slightly: Remove the dump cake from the oven and let it cool for 15-20 minutes before serving. This allows the fruit filling to set slightly so it’s not too runny.
-
Serving Suggestion: Scoop warm portions into bowls. This dessert is fantastic on its own, but for extra indulgence, top with vanilla ice cream or whipped cream.
-
Storage: Cover and store any leftovers in the refrigerator for up to 5 days. Reheat individual portions in the microwave for 30-45 seconds.
Serving Suggestions
-
A La Mode Style: Serve warm with a scoop of vanilla bean ice cream – the contrast between warm cake and cold ice cream is heavenly.
-
Breakfast Treat: Enjoy a small portion at room temperature with your morning coffee – it’s not too sweet and makes a special breakfast.
-
Elegant Presentation: For parties, serve in individual ramekins with a dollop of freshly whipped cream and a fresh strawberry on top.
-
Potluck Perfect: This travels well and can be served at room temperature, making it ideal for picnics and gatherings.
Customization Ideas
The beauty of dump cakes is their adaptability. Try these delicious variations:
-
Blueberry Cheesecake: Use blueberry pie filling instead of strawberry
-
Cherry Delight: Substitute cherry pie filling and use chocolate cake mix
-
Apple Cinnamon: Use apple pie filling and spice cake mix, adding a teaspoon of cinnamon to the fruit layer
-
Peach Perfection: Try peach pie filling with vanilla cake mix and add a sprinkle of nutmeg
-
Triple Berry: Mix raspberry, blueberry, and strawberry pie fillings for a berry medley
Troubleshooting Tips
-
If topping seems dry: Drizzle with an additional 2-3 tablespoons of melted butter before baking
-
If fruit isn’t bubbling: Bake for an additional 5-10 minutes until you see active bubbling around the edges
-
For crispier topping: Bake for the full 50 minutes, or until deep golden brown
-
For softer topping: Cover with foil during the last 15 minutes of baking
Nutrition Information (Approximate, per serving)
-
Calories: 420 kcal
-
Total Carbohydrates: 58g
-
Dietary Fiber: 2g
-
Sugars: 38g
-
Protein: 3g
-
Total Fat: 21g
-
Saturated Fat: 13g
-
Cholesterol: 55mg
-
Sodium: 320mg
Nutrition information is an estimate and will vary based on specific ingredient brands and portions used. Values calculated using name-brand pie filling and cake mix.