Prep Time: 20 minutes
Chill Time: 4 hours (minimum)
Total Time: 4 hours 20 minutes (mostly inactive)
Yield: One 9×13 inch pan (12-15 servings)
Difficulty: ⭐☆☆☆☆ (Beginner)
In the realm of no-bake desserts, few creations strike the perfect balance between nostalgic charm and effortless elegance quite like the Jello Whipped Cream Dessert. It’s not quite a mousse, not quite a Jello salad, but something entirely its own: a light, airy, and meltingly smooth cloud that dissolves on the tongue in a burst of fruity flavor. This dessert is a testament to the magic that happens when simple, affordable ingredients are combined with a little know-how.
Often referred to as “Jello Fluff” or “Cloud Salad,” this dessert is a guaranteed crowd-pleaser at potlucks, family gatherings, and summer barbecues. Its brilliance lies in its versatility. With a simple change of Jello flavor, it can transform from a vibrant raspberry dream to a sunny peach paradise or a refreshing lime cloud. However, the path to this ethereal treat can be fraught with kitchen pitfalls—a soupy mixture or a gritty texture. This recipe is your foolproof guide, explaining the crucial “why” behind each step to ensure you create a dessert that is consistently stable, creamy, and dreamily light.
The Science of the Fluff: Understanding the Emulsion
The success of this dessert hinges on a simple scientific principle: temperature control. Combining hot Jello with cold whipped cream too quickly will cause the cream to melt and the dessert to separate, resulting in a watery, grainy mess. Our method introduces a stabilizing “buffer” to ensure a perfect, homogenous emulsion every time.
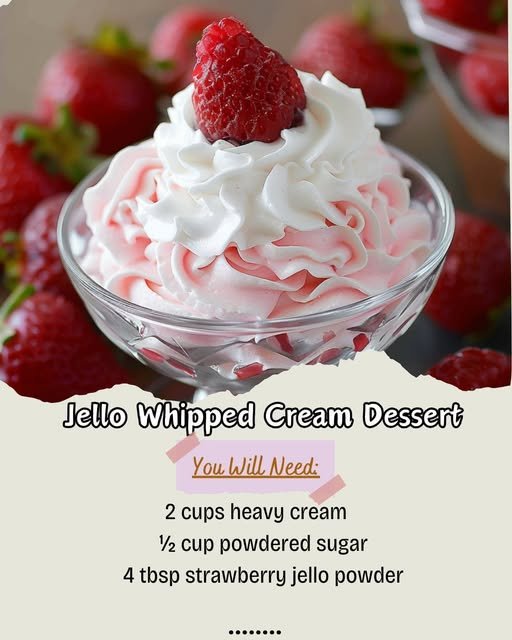
Ingredients
The Foundation:
-
2 (3 oz) packages of Jello, any flavor (Strawberry, Raspberry, and Lime are classics)
-
2 cups Boiling Water
-
1 (8 oz) container of Frozen Whipped Topping (like Cool Whip), THAWED or 2 cups of Freshly Whipped Cream (see Pro-Tip below)
The Creamy Buffer Layer:
-
1 (8 oz) block of Cream Cheese, softened to room temperature
-
½ cup Granulated Sugar
-
1 tsp Pure Vanilla Extract
Optional Add-Ins & Crust:
-
1 pre-made Graham Cracker Crust (for a pie variation)
-
1-2 cups Fresh Fruit (sliced strawberries, blueberries, mandarin oranges – if using canned fruit, ensure it is well-drained)
-
½ cup Mini Marshmallows
Essential Equipment
-
Stand Mixer or Electric Hand Mixer
-
9×13 inch Baking Dish or a Large Mixing Bowl
-
Medium Heatproof Bowl
-
Spatula
Step-by-Step Instructions
Part 1: Laying the Foundation (Time: 15 minutes | Intensity: Medium)
Step 1: Dissolve the Jello Completely
This is the most critical step for a smooth texture. Empty the 2 packages of Jello powder into a medium, heatproof bowl. Pour the 2 cups of freshly boiled water over the powder.
Whisk vigorously for a full 2 minutes, or until you are absolutely certain that not a single grain of Jello powder remains. Incomplete dissolution is a primary cause of gritty texture.
Step 2: Create the Cream Cheese Buffer
While the Jello is still hot, place the softened cream cheese, ½ cup of sugar, and 1 teaspoon of vanilla extract in the bowl of your stand mixer. Using the whisk attachment, beat on medium-high speed for 2-3 minutes, scraping down the sides as needed, until the mixture is completely smooth, lump-free, and slightly fluffy.
Step 3: The Tempering Technique
With the mixer running on low speed, slowly and carefully drizzle about ½ cup of the hot, liquid Jello into the cream cheese mixture. This step, called tempering, gently warms the cream cheese without shocking it, preventing lumps and creating a stable base.
Once incorporated, gradually pour in the remaining hot Jello. Increase the mixer speed to medium and whisk for another minute until the mixture is fully combined and uniform.
Part 2: The Chill & The Fold (Time: 10 minutes | Intensity: Low)
Step 4: The Crucial First Chill
At this stage, you have a thin, liquid base. You must now chill it until it is the consistency of raw, unbeaten egg whites. This typically takes 45 minutes to 1 hour and 15 minutes in the refrigerator.
Stir the mixture every 15-20 minutes to ensure even cooling. It is ready when it has thickened significantly and, when you lift the whisk or a spoon, it drips slowly back into the bowl in a thick ribbon. Rushing this step is the #1 mistake. If the base is too thin, it will deflate the whipped cream.
Step 5: The Gentle Fold
Once the Jello base has properly thickened, it’s time to add the air. If you are using the thawed frozen whipped topping, simply scoop it into the bowl. If you are using freshly whipped cream (see pro-tip below), have it ready.
Using a large spatula, gently fold the whipped cream into the Jello mixture. “Folding” is a specific technique: cut through the center of the mixture with the edge of the spatula, sweep along the bottom of the bowl, and fold it over the top. Rotate the bowl a quarter turn and repeat. This preserves the air bubbles you worked so hard to create. Continue just until no white streaks remain.
Step 6: Add Mix-Ins and Assemble
If you are using any optional add-ins like fresh fruit or mini marshmallows, now is the time to gently fold them in.
Pour the finished fluffy mixture into your 9×13 inch dish (or a graham cracker crust for a pie version). Smooth the top with your spatula.
Part 3: The Final Set (Time: 4+ hours | Intensity: Very Low)
Step 7: The Unskippable Final Chill
Cover the dessert with plastic wrap, ensuring it touches the surface to prevent a skin from forming. Refrigerate for at least 4 hours, but ideally overnight.
This long, slow chill is non-negotiable. It allows the Jello to set the entire structure, transforming your fluffy mixture into a sliceable, scoopable cloud. The flavor also deepens and melds beautifully during this time.
Step 8: Serve and Enjoy
When ready to serve, scoop into bowls or slice into squares. For a beautiful presentation, garnish with a dollop of extra whipped cream and a piece of fresh fruit that corresponds with your Jello flavor.
Storage, Pro-Tips & Customization
-
Storage: This dessert must be kept refrigerated, covered, for up to 3-4 days. It does not freeze well, as the texture becomes icy and grainy upon thawing.
-
Pro-Tip: Fresh Whipped Cream Option
For a richer flavor, substitute the frozen topping with 2 cups of heavy whipping cream, ¼ cup of powdered sugar, and 1 tsp of vanilla. Chill your bowl and beaters, then whip until stiff peaks form. The stabilized cream cheese base helps support the fresh cream, making it a superior, though slightly less stable, alternative. -
Troubleshooting:
-
Watery or Separated: The Jello base was not chilled long enough before folding in the whipped cream, or the whipped cream was over-whipped/not stable.
-
Grainy Texture: The Jello powder was not fully dissolved in the boiling water, or the cream cheese had lumps.
-
Too Soft: The dessert needs more chilling time. Overnight is always best.
-
-
Customizations:
-
Rainbow Cloud: Divide the Jello base after step 3 and tint with different food colorings. Layer them in the pan after each has been folded with whipped cream and chilled to a thick state.
-
Pina Colada: Use Pineapple Jello, fold in 1 cup of well-drained crushed pineapple, and substitute 1 teaspoon of coconut extract for the vanilla.
-
Nutrition Information
*(Approximate values per serving, based on 12 servings without add-ins, using sugar-free Jello and light cream cheese.)*
-
Calories: ~180 kcal
-
Total Fat: 10g
-
Saturated Fat: 7g
-
Cholesterol: 25mg
-
Sodium: 150mg
-
Total Carbohydrates: 20g
-
Dietary Fiber: 0g
-
Sugars: 18g
-
Protein: 2g
Note: Nutritional information is an estimate and can vary dramatically based on the specific brands of Jello (regular vs. sugar-free), whipped topping, and cream cheese used.