Prep Time: 5 minutes (plus optional 30-minute brining)
Cook Time: 20 minutes
Resting Time: 5 minutes
Total Time: 30 minutes
Yield: 4 servings
Difficulty: ⭐⭐☆☆☆ (Easy to Intermediate)
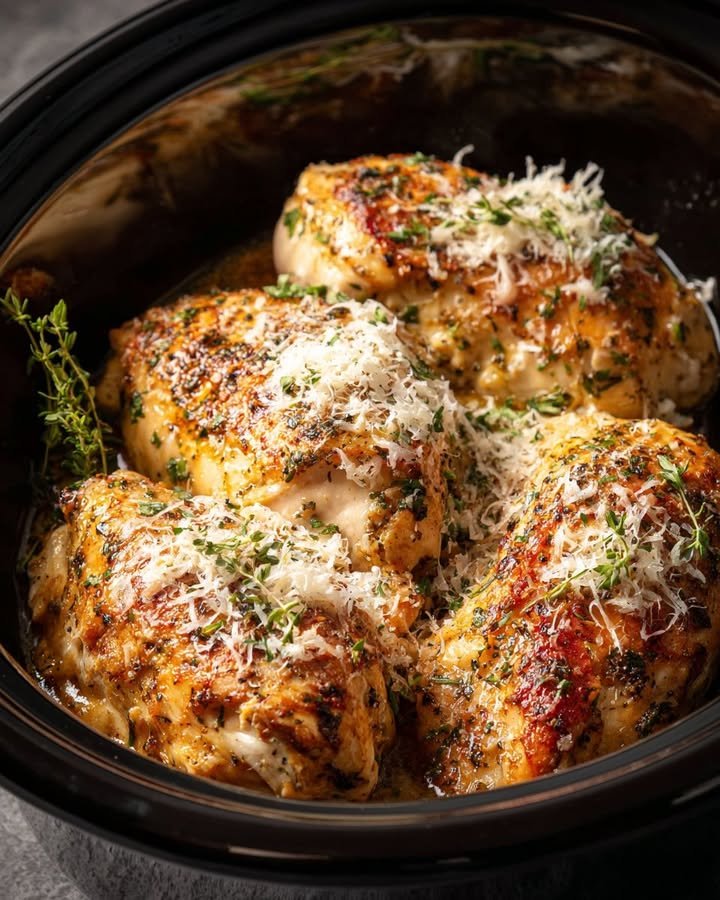
In the world of weeknight cooking, the humble chicken thigh is an undisputed champion. While chicken breasts often steal the spotlight, they can easily become dry and bland. Chicken thighs, with their higher fat content and richer flavor, are far more forgiving and consistently delicious. When cooked correctly, they transform into something truly sublime: a shatteringly crisp, golden-brown skin giving way to impossibly juicy, flavorful meat.
This recipe is not just a list of ingredients; it is a masterclass in technique. We will focus on the pan-searing method, which reliably produces that restaurant-quality crispy skin while keeping the dark meat succulent. The key lies in understanding the anatomy of the chicken thigh, the importance of drying the skin, and the patience to let the pan do its work. By the end of this guide, you will have a foundational skill that can be adapted with countless herbs, spices, and sauces, making this simple cut the most versatile player in your culinary repertoire.
The Secret to Crispy Skin & Juicy Meat: A Tale of Fat and Patience
The magic of a perfect chicken thigh lies in its fat content. The skin is a layer of fat that, when rendered slowly and thoroughly, becomes crispy, while the fat within the meat bastes it from the inside, ensuring juiciness. Our entire method is designed to maximize this natural potential.
Ingredients
The Core Components:
-
4-6 Bone-In, Skin-On Chicken Thighs (about 1.5 – 2 lbs total): The bone and skin are non-negotiable for the best flavor and texture.
-
1 tbsp High-Heat Oil (Avocado, Grapeseed, or Vegetable Oil)
-
Kosher Salt and Freshly Cracked Black Pepper
The Flavor Foundation (The Holy Trinity):
-
1 tsp Garlic Powder
-
1 tsp Onion Powder
-
½ tsp Smoked Paprika (adds a subtle, smoky depth)
Optional for a Pan Sauce:
-
2 cloves Garlic, minced
-
½ cup Chicken Broth
-
2 tbsp Fresh Herbs (like thyme, rosemary, or parsley)
-
2 tbsp Unsalted Butter
-
1 tbsp Fresh Lemon Juice
Essential Equipment
-
10-12 inch Cast Iron Skillet or Heavy-Bottomed Oven-Safe Skillet
-
Tongs
-
Instant-Read Thermometer (Highly Recommended)
-
Plate for resting
Step-by-Step Instructions
Part 1: The Crucial Preparation (Time: 5-35 minutes | Intensity: Low)
Step 1: The Dry Brine (The #1 Pro Tip)
For the crispiest skin imaginable, moisture is the enemy. At least 30 minutes before cooking (or up to 24 hours, uncovered, in the fridge), pat the chicken thighs completely dry with paper towels. Be ruthless—you want the skin bone-dry.
Season both sides of the thighs generously with kosher salt and black pepper. The salt will not only season the meat but will also draw out moisture from the skin, further aiding in crisping. Leave them uncovered on a wire rack set over a plate in the refrigerator.
Step 2: Season and Bring to Temperature
Just before cooking, remove the chicken from the fridge. Season both sides with the garlic powder, onion powder, and smoked paprika. Let the chicken sit at room temperature for 15-20 minutes. Cooking cold chicken straight from the fridge can cause the skin to render unevenly and the meat to cook unevenly.
Part 2: The Perfect Pan-Sear (Time: 20 minutes | Intensity: Medium-High)
Step 3: Preheat the Pan
Place your dry, heavy-bottomed skillet over medium heat for 2-3 minutes. Add the 1 tablespoon of high-heat oil and swirl to coat. The pan and oil need to be properly hot before the chicken touches the surface. A drop of water should sizzle and dance upon contact.
Step 4: The Sear – Presentation Side Down
Carefully place the chicken thighs in the hot pan, skin-side down. Arrange them so they are not touching, working in batches if necessary. Crowding the pan will steam the chicken, preventing crispy skin.
Once you place the chicken in the pan, DO NOT move it for a full 6-8 minutes. This is the test of your willpower. The chicken will stick at first, but as the skin renders and crisps, it will naturally release from the pan. Peeking and poking will tear the beautiful skin you’re working to create.
Step 5: Render the Fat and Flip
After 6-8 minutes, the skin should be a deep, golden brown and release easily from the pan. Use tongs to flip the thighs over so they are now skin-side up.
Reduce the heat to medium-low and continue to cook for another 8-12 minutes. The total cooking time will be around 14-20 minutes, depending on the size of the thighs.
Step 6: Check for Doneness
The most reliable way to know if chicken is done is with an instant-read thermometer. Insert it into the thickest part of the thigh, avoiding the bone. The chicken is perfectly cooked and safe to eat when it reaches an internal temperature of 165°F (74°C). The dark meat will remain incredibly juicy even at this temperature.
Part 3: The Final, Non-Negotiable Step (Time: 5 minutes | Intensity: Low)
Step 7: The Rest
Once the chicken thighs have reached temperature, transfer them to a clean plate or cutting board, skin-side up. Let them rest for at least 5 minutes.
This rest period is critical. It allows the muscle fibers, which have tightened during cooking, to relax and reabsorb the juices that have been driven to the center. If you cut into the chicken immediately, those precious juices will spill out, leaving the meat drier. Resting ensures every bite is moist and flavorful.
Part 4: Optional – Create a Simple Pan Sauce (Time: 5 minutes | Intensity: Medium)
Step 8: Deglaze and Build Flavor
While the chicken rests, you can make a quick, flavorful sauce in the same skillet. Pour off all but about 1 tablespoon of the rendered chicken fat.
Return the skillet to medium heat. Add the 2 minced garlic cloves and cook for 30 seconds until fragrant. Pour in the ½ cup of chicken broth, using a wooden spoon to scrape all the browned, flavorful bits (the “fond”) from the bottom of the pan.
Let the broth reduce by half, about 2-3 minutes. Turn off the heat and stir in the 2 tablespoons of cold butter, 1 tablespoon of lemon juice, and fresh herbs, swirling the pan until the butter melts and emulsifies into a lightly thickened sauce. Season with salt and pepper to taste.
Pour the sauce over the rested chicken thighs to serve.
Serving, Storage & Customization
-
Serving Suggestions: These thighs are incredibly versatile. Serve them alongside:
-
Creamy Mashed Potatoes or Crispy Roasted Potatoes
-
Steamed Rice or Quinoa to soak up the pan sauce.
-
Simple Steamed Green Beans, Asparagus, or Broccoli.
-
-
Storage: Cool completely and store in an airtight container in the refrigerator for up to 3 days. Reheat gently in a skillet over low heat or in a 300°F (150°C) oven to help retain crispness.
-
Customizations:
-
Spicy: Add cayenne pepper or chili powder to the dry rub.
-
Herby: Use dried oregano, thyme, or an Italian herb blend.
-
Glazed: In the last 5 minutes of cooking, brush with BBQ sauce, teriyaki, or honey mustard and finish under the broiler for a minute.
-
Nutrition Information
(Approximate values per serving, based on one large chicken thigh with skin.)
-
Calories: ~250 kcal
-
Total Fat: 18g
-
Saturated Fat: 5g
-
Cholesterol: 105mg
-
Sodium: 350mg
-
Total Carbohydrates: 0g
-
Dietary Fiber: 0g
-
Sugars: 0g
-
Protein: 22g
Note: Nutritional information is an estimate and can vary based on the exact size of the chicken thigh and the amount of salt used.