Prep Time: 25 minutes
Chill Time: 2 hours (minimum)
Total Time: 2 hours 25 minutes (mostly inactive)
Yield: One 9×13 inch dish (12-15 servings)
Difficulty: ⭐☆☆☆☆ (Beginner-Friendly)
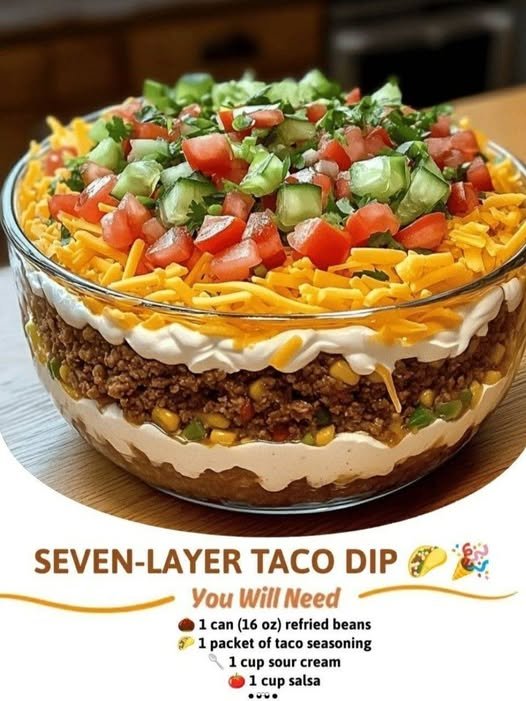
In the pantheon of party appetizers, few dishes have achieved the iconic, never-fail status of the Seven-Layer Taco Dip. It’s a vibrant, shareable centerpiece that promises—and delivers—a fiesta of textures and flavors in every scoop. But what separates a good layered dip from a truly legendary one? It’s all in the technique. A haphazard pile of ingredients becomes a muddy, soggy mess, while a carefully constructed dip offers a distinct experience of cool, creamy, crisp, and spicy in every single bite.
This recipe is your blueprint for dip perfection. We will go beyond simply listing ingredients and delve into the “why” behind each step. You’ll learn how to create barriers to protect your base from moisture, how to maximize flavor in every layer, and the secrets to a presentation that wows before the first chip even dives in. This is more than a recipe; it’s a strategy for creating the most requested appetizer you’ll ever make.
The Architecture of a Perfect Dip: Layering for Flavor and Texture
The order of operations in a seven-layer dip is not arbitrary. It is a carefully considered structure designed to support weight, prevent sogginess, and create a harmonious flavor profile from the bottom up.
The Seven Layers (In Order of Assembly):
-
Refried Beans: The hearty, savory foundation.
-
Guacamole: A cool, creamy barrier that protects the beans from the moist layers above.
-
Sour Cream Mixture: The tangy, rich center layer that binds everything together.
-
Salsa: The juicy, acidic kick.
-
Shredded Cheese: The melty, salty blanket.
-
Toppings (Tomatoes & Olives): The fresh, colorful finish.
-
Garnishes (Green Onions & Cilantro): The final pop of flavor and aroma.
Ingredients & The Science of Each Layer
Layer 1: The Foundation
-
2 (16 oz) cans Refried Beans: Traditional or black bean refried beans work perfectly.
-
1 tsp Ground Cumin & 1/2 tsp Chili Powder: Stirring these into the beans adds a critical depth of flavor that elevates the entire dip.
Layer 2: The Moisture Barrier
-
3 large, ripe Avocados
-
2 tbsp fresh Lime Juice
-
1/4 cup finely diced Red Onion
-
2 tbsp fresh Cilantro, chopped
-
Salt to taste
-
Why we mash our own: Pre-made guacamole often contains preservatives and fillers that can water out. Making it fresh ensures a thick, robust layer that effectively seals the beans.
Layer 3: The Tangy Binder
-
2 cups (16 oz) Sour Cream: Full-fat provides the best texture and flavor.
-
1 (1 oz) packet Taco Seasoning: This is the flavor powerhouse of the dip. Mixing it with the sour cream, rather than sprinkling it dry, ensures even distribution.
Layer 4: The Juicy Acidity
-
1 ½ cups Chunky Salsa (medium): PLEASE NOTE: This is the most critical step for a non-soggy dip. You must use a colander to drain the excess liquid from the salsa thoroughly. This prevents the entire dip from becoming a runny mess.
Layer 5: The Salty Blanket
-
2 cups Shredded Mexican Cheese Blend: A pre-shredded blend of cheddar and Monterey Jack is convenient and melts beautifully.
Layers 6 & 7: The Fresh Finish
-
1 cup Roma Tomatoes, seeded and diced: Seeding the tomatoes removes excess water and seeds, preventing diluteness.
-
1/2 cup sliced Black Olives
-
1/2 cup sliced Green Onions
-
1/4 cup fresh Cilantro, chopped
Essential Equipment
-
9×13 inch Baking Dish or a similar-sized serving platter
-
Mixing bowls (various sizes)
-
Colander or fine-mesh strainer
-
Spatula and spoons
-
Fork and knife for the avocados
Step-by-Step Assembly Instructions
Part 1: Preparation is Key (Time: 15 minutes | Intensity: Low)
Step 1: Prepare the Individual Components
A successful assembly line requires prepped ingredients. Do not attempt to layer straight from the containers.
-
Beans: In a bowl, mix the two cans of refried beans with the cumin and chili powder until smooth and well-combined.
-
Guacamole: In a separate bowl, halve and pit the avocados. Scoop the flesh into the bowl and mash with a fork to your desired consistency (slightly chunky is ideal). Immediately stir in the lime juice, red onion, cilantro, and salt. The lime juice is crucial for preventing browning.
-
Sour Cream Mixture: In another bowl, whisk the sour cream and the entire packet of taco seasoning together until uniform and smooth.
-
Salsa: Place the chunky salsa in a colander over the sink and let it drain for at least 5-10 minutes, pressing gently with a spoon to release the liquid.
-
Toppings: Dice the tomatoes, slice the olives and green onions, and chop the cilantro. Have your shredded cheese measured and ready.
Part 2: The Strategic Assembly (Time: 10 minutes | Intensity: Low)
The following sequence is designed for structural integrity. Spread each layer evenly to the edges to create distinct, visible stripes.
Layer 1: Refried Beans
Transfer the seasoned refried bean mixture to your clean, dry 9×13 inch dish. Using a spatula, spread it into a smooth, uniform layer that completely covers the bottom of the dish. This is your foundation; make it level.
Layer 2: Guacamole
Carefully spoon the fresh guacamole over the bean layer. Use the back of a spoon to gently spread it to the edges, creating a complete seal over the beans. This layer acts as a protective barrier, preventing the liquid from the upper layers from seeping down and making the bean layer soggy.
Layer 3: Sour Cream Mixture
Dollop the taco-seasoned sour cream over the guacamole. Spreading sour cream directly can lift the guacamole. Instead, place dollops across the surface and then gently spread them together with a spatula for a clean, even layer.
Layer 4: Drained Salsa
Sprinkle the thoroughly drained salsa over the sour cream layer. The draining step you did earlier pays off here, allowing you to distribute the flavorful tomato and pepper chunks without adding a pool of liquid.
Layer 5: Shredded Cheese
Sprinkle the shredded Mexican cheese blend evenly over the salsa.
Layers 6 & 7: Toppings & Garnish
Now, artfully arrange the final layers. Scatter the diced tomatoes, followed by the sliced black olives. Just before serving, finish with a vibrant sprinkle of green onions and fresh cilantro.
Part 3: The Crucial Chill (Time: 2+ hours | Intensity: Very Low)
Step 3: Let the Magic Happen
Once assembled, cover the dish tightly with plastic wrap and refrigerate for a minimum of 2 hours, but ideally 4-6 hours or overnight.
This is the non-negotiable step for flavor and structure. The chilling time allows the flavors to meld beautifully and, just as importantly, it firms up the layers. A firm dip is a scoopable dip. Skipping this step will result in a runny, messy presentation.
Serving, Storage & Pro Tips
-
Serving: Serve the dip directly from the refrigerator. Provide a sturdy chip for scooping, such as restaurant-style tortilla chips or Fritos Scoops.
-
Storage: Keep any leftovers covered in the refrigerator for up to 2 days. Note that the guacamole will slowly begin to oxidize and brown, so it’s best consumed within 24 hours for peak freshness and color.
-
Customizations:
-
Spicy: Add a layer of pickled jalapeños between the salsa and cheese, or mix a few tablespoons of hot sauce into the sour cream layer.
-
Protein: Add a cooked, seasoned layer of ground beef or turkey between the beans and guacamole.
-
Lighter: Use Greek yogurt in place of sour cream and reduced-fat cheese.
-
Nutrition Information
(Approximate values per serving, based on 12 servings.)
-
Calories: ~285 kcal
-
Total Fat: 20g
-
Saturated Fat: 8g
-
Cholesterol: 35mg
-
Sodium: 750mg
-
Total Carbohydrates: 18g
-
Dietary Fiber: 6g
-
Sugars: 4g
-
Protein: 9g
Note: Nutritional information is an estimate and can vary significantly based on the specific brands and ingredients used.