Prep Time: 10 minutes
Cook Time: 45 minutes
Cooling Time: 1-2 hours (highly recommended)
Total Time: 55 minutes (plus cooling)
Yield: 1 loaf (approx. 12 slices)
Difficulty: ⭐☆☆☆☆ (Beginner)
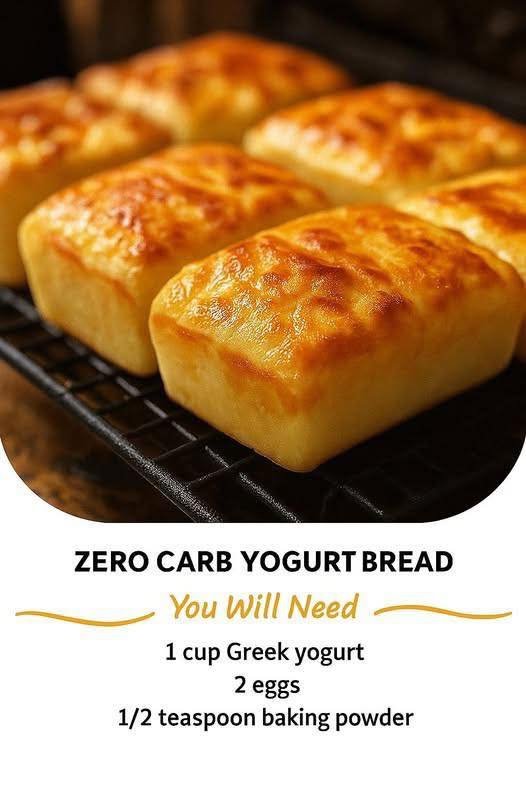
For anyone navigating a low-carb, keto, or gluten-free lifestyle, the craving for a simple slice of bread is a familiar battle. Store-bought alternatives are often packed with unfamiliar ingredients and can have a disappointing texture. This Zero Carb Yogurt Bread is the revolutionary solution you’ve been waiting for.
The magic lies in its stunning simplicity. With just four core ingredients and no finicky techniques, this recipe leverages the power of protein to create a beautifully risen, soft, and sliceable loaf. It requires no yeast, meaning there is no lengthy rising process. You can go from craving to craving-satisfied in under an hour. The result is a neutral-tasting, versatile bread that toasts beautifully, holds up to sandwich fillings, and provides a satisfying, protein-packed base for any meal.
A Note on “Zero Carb”
While this bread is exceptionally low in carbohydrates, the term “zero carb” is used here to align with common recipe naming conventions. The net carbs are negligible, primarily coming from the baking powder and yogurt. For individuals following a strict ketogenic diet, this bread is an excellent choice, but always check your specific yogurt’s nutritional label for the most accurate macro count.
Ingredients & The Science Behind Them
Each ingredient in this recipe plays a critical role. For best results, we strongly recommend using a digital kitchen scale for precision.
-
340g (1 ½ cups) Plain Greek Yogurt: Must be full-fat and thick. The protein in Greek yogurt (whey and casein) denatures and sets during baking, providing the primary structure for the bread. The thickness is crucial; a runny yogurt will make the batter too wet. The fat content contributes to a tender crumb.
-
2 Large Eggs: Acts as a binder and provides additional lift and richness. The eggs help create a stable emulsion, ensuring a uniform texture.
-
180g (1 ½ cups) Vital Wheat Gluten: This is the essential ingredient. Vital wheat gluten is the pure protein extracted from wheat. It provides the chewy, elastic structure that mimics traditional bread, but without the starch found in regular flour. Do not substitute this with any other flour.
-
12g (3 tsp) Baking Powder: This is our leavening agent. It creates the necessary rise and airiness, giving the bread its light, open crumb. Ensure your baking powder is fresh for the best lift.
-
5g (1 tsp) Fine Sea Salt: For flavor enhancement.
Optional Add-Ins
-
1-2 tbsp Everything Bagel Seasoning (mixed into the dough or sprinkled on top)
-
1 tbsp Granulated Sweetener (e.g., Erythritol, Allulose) for a slightly sweeter loaf
-
1 tsp Garlic Powder or Onion Powder for a savory twist
-
2 tbsp Sunflower Seeds or Pumpkin Seeds for extra crunch and nutrients
Equipment
-
Medium-sized mixing bowl
-
Whisk and spatula
-
Digital kitchen scale
-
9×5 inch Loaf Pan
-
Parchment paper
Step-by-Step Instructions
Part 1: Preparing the Dough (Time: 5-7 minutes | Intensity: Low)
Step 1: Prepare the Pan and Preheat
Begin by preheating your oven to 375°F (190°C). This is a quick-bread method, so a hot oven is essential for immediate lift. Line your 9×5 inch loaf pan with a sling of parchment paper. This isn’t just for easy cleanup; it ensures you can remove the delicate, hot loaf without it breaking.
Step 2: Combine the Wet Ingredients
In your mixing bowl, combine the 340g of thick Greek yogurt and the 2 large eggs. Whisk them together until the mixture is completely smooth, homogeneous, and pale yellow. There should be no streaks of egg white or yogurt visible. A smooth base is key to an even-textured bread.
Step 3: Incorporate the Dry Ingredients
It’s time to add the structure. To the wet ingredients, add the 180g of vital wheat gluten, 12g of baking powder, and 5g of salt. If you are using any optional add-ins like everything bagel seasoning, add them now.
Step 4: Mix to Form a Dough
Using a spatula or a sturdy spoon, begin to mix the ingredients. You will notice the mixture coming together very quickly into a shaggy, sticky, and elastic ball. This is normal! The vital wheat gluten is hydrating and forming its protein network. Switch to your hands if needed, and knead the dough right in the bowl for about 60-90 seconds, just until all the dry ingredients are fully incorporated. Do not over-knead. Overworking the dough can make the bread tough.
Part 2: Baking & The Crucial Cool-Down (Time: 45 minutes | Intensity: Low)
Step 5: Shape and Score
Transfer the dough to your prepared loaf pan. With wet or oiled hands, press and smooth the dough evenly into the pan. To ensure an even rise and a professional look, take a sharp knife or a lame and make a shallow slash (about ¼ inch deep) down the center of the loaf lengthwise.
Step 6: Bake to Perfection
Place the loaf pan in the center of your preheated oven. Bake for 40-50 minutes. The bread is done when it is deeply golden brown on top, sounds hollow when tapped, and an instant-read thermometer inserted into the center of the loaf reads at least 200°F (95°C). The internal temperature is the most reliable indicator of doneness.
Step 7: The Non-Negotiable Cool-Down
This is the most critical step for achieving the perfect texture.
-
Remove from Pan: As soon as the bread comes out of the oven, use the parchment paper to lift it out of the hot loaf pan. If left in the pan, the residual heat will create steam and make the bottom and sides unpleasantly soggy.
-
Cool Completely: Place the loaf on a wire cooling rack. You must let it cool completely for at least 1-2 hours. The bread is still cooking internally from residual heat, and the protein structure is setting. Slicing into it while warm will result in a gummy, dense, and disappointing texture. Your patience will be rewarded with a firm, sliceable loaf.
Storage, Serving & Tips for Success
-
Storage: Once completely cool, store the loaf in an airtight container or a beeswax wrap at room temperature for 2-3 days. For longer storage, slice it and freeze the slices in a freezer bag for up to 3 months. You can pop frozen slices directly into the toaster.
-
Serving Suggestions:
-
Toast it! This bread toasts exceptionally well, developing a crisp exterior and a soft, warm interior.
-
Use it for sandwiches, avocado toast, or eggs Benedict.
-
Make grilled cheese or garlic bread.
-
-
Troubleshooting:
-
Bread is Dense/Gummy: The most likely cause is slicing it before it was completely cool. It could also be due to using a runny, low-fat yogurt or old baking powder.
-
Bread Didn’t Rise Much: Check the expiration date on your baking powder.
-
Tough Texture: The dough was likely over-kneaded. Mix just until combined.
-
Nutrition Information
*(Approximate values per slice, based on 12 slices per loaf. Calculated using full-fat Greek yogurt.)*
-
Calories: ~125 kcal
-
Total Fat: 4.5g
-
Saturated Fat: 2g
-
Cholesterol: 40mg
-
Total Carbohydrates: ~3g
-
Dietary Fiber: <1g
-
Sugars: 1g
-
Protein: 18g
-
Sodium: 280mg
Note: Nutritional information is an estimate and can vary significantly based on the specific brands of ingredients you use. This bread is high in protein and very low in net carbohydrates.