-
Prep Time: 15 minutes
-
Cook Time: 60-75 minutes
-
Cooling & Chilling Time: 4+ hours (essential)
-
Total Time: 5 hours 15 minutes – 5 hours 45 minutes
-
Servings: 6
-
Cuisine: Amish, American Traditional
-
Course: Dessert
-
Diet: Vegetarian
-
Skill Level: Beginner-Friendly (Requires careful technique, not complex skills)
-
Recipe Intensity: Low Intensity, High Patience (Simple steps, but attention to temperature and timing is key for perfect results).
Ingredients
-
4 large eggs
-
½ cup (100g) granulated sugar
-
¼ teaspoon fine sea salt
-
1 teaspoon pure vanilla extract
-
4 cups (946ml) whole milk, warmed
-
Freshly grated nutmeg, for garnish (traditional and highly recommended)
Kitchen Tools You’ll Need:
-
Medium mixing bowl
-
Whisk
-
Fine-mesh sieve (optional but recommended for ultra-smooth custard)
-
Deep 9-inch pie dish OR 6 individual (6 oz) ramekins
-
Large baking pan (for water bath)
-
Kettle or saucepan for boiling water
-
Aluminum foil
Step-by-Step Instructions
Step 1: Preheat & Prepare (10 minutes)
-
Position a rack in the center of your oven and preheat to 325°F (165°C). This lower temperature is crucial for gentle, even cooking.
-
Place your pie dish or ramekins inside a large, deep baking pan (like a 9×13-inch roasting pan). Begin heating a kettle or pot of water for the water bath.
Step 2: Warm the Milk (5 minutes)
-
In a saucepan or microwave-safe jug, warm the 4 cups of whole milk until it is just hot to the touch but not boiling (about 160°F / 70°C). Warming the milk helps it blend smoothly with the eggs and reduces overall baking time.
Step 3: Whisk the Base (5 minutes)
-
In your mixing bowl, whisk the 4 eggs lightly until the yolks and whites are just combined. Do not create foam.
-
Add the ½ cup of sugar and ¼ teaspoon of salt. Whisk again until the mixture is smooth and the sugar begins to dissolve.
-
Gently whisk in the 1 teaspoon of vanilla extract.
Step 4: Temper the Eggs (The Key Step)
-
This is the most important step to avoid scrambled eggs. While whisking the egg mixture constantly, very slowly drizzle in the warm milk in a thin, steady stream. Continue whisking until everything is fully incorporated. The goal is to raise the temperature of the eggs gradually.
Step 5: Strain & Pour (2 minutes)
-
For the smoothest possible custard, strain the mixture through a fine-mesh sieve into a large pouring jug. This catches any undissolved bits of egg or protein.
-
Carefully pour the custard into your prepared pie dish or divide evenly among the ramekins. Skim any tiny bubbles from the surface with a spoon. Grate a light dusting of fresh nutmeg over the top.
Step 6: The Water Bath & Baking (60-75 minutes)
-
Place the baking pan with the custard dish(es) on the pulled-out oven rack. Carefully pour the hot water from your kettle into the outer pan until it comes about halfway up the sides of the custard dish(es). This water bath ensures gentle, even heat.
-
Very loosely tent the entire pan with aluminum foil, leaving the corners open to allow some steam to escape.
-
Slide the rack carefully into the oven and bake.
-
For a single large dish: Bake for 60-75 minutes.
-
For individual ramekins: Bake for 45-55 minutes.
-
-
The custard is done when the edges are fully set, but the center still has a slight, gentle wobble—like Jell-O—when you tap the dish. A knife inserted near the center should come out clean. Do not overbake, as it will continue to set as it cools.
Step 7: The Essential Chill (4+ hours)
-
Immediately and carefully remove the custard dish(es) from the water bath using canning tongs or a sturdy spatula. Place them on a wire rack to cool to room temperature (about 1 hour).
-
Once cool, cover loosely with plastic wrap or a lid and refrigerate for at least 4 hours, but preferably overnight. This chilling period is non-negotiable; it completes the setting process and allows the flavors to meld beautifully, resulting in the classic, firm-yet-creamy texture.
Serving & Storing
-
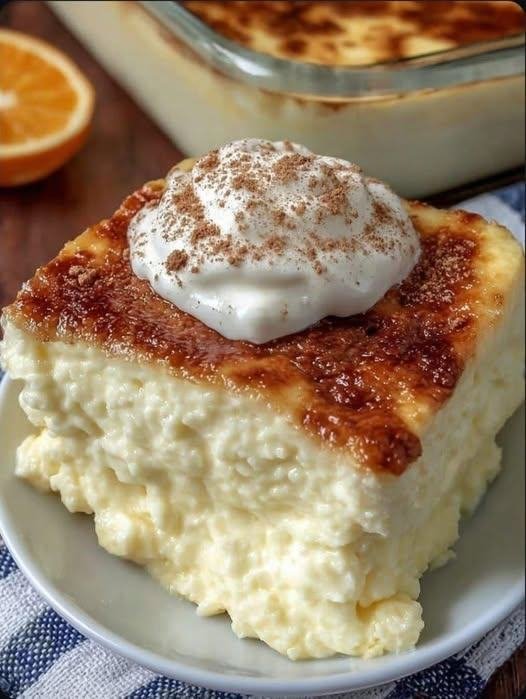
Serving: Serve chilled, directly from the dish. Spoon into bowls. The contrast between the soft custard and the firmer golden top is part of the charm.
-
Storing: Keep covered in the refrigerator for up to 4 days. This custard does not freeze well, as freezing will alter its delicate texture.
Nutrition Information
(Per serving, based on 6 servings, using whole milk. This is an estimate.)
-
Calories: ~215
-
Total Fat: 9g
-
Saturated Fat: 4.5g
-
Cholesterol: 140mg
-
Sodium: 180mg
-
Total Carbohydrates: 24g
-
Dietary Fiber: 0g
-
Sugars: 24g
-
Protein: 9g
-
Calcium: 180mg (18% DV)
-
Vitamin D: 3mcg (15% DV)
Note: Using 2% milk will reduce fat and calories slightly, but whole milk yields the classic, richest flavor and creamiest texture.
Baker’s Notes & Tips for Success
-
Gentleness is Key: Avoid vigorous whisking, which creates air bubbles. We want a dense, silken texture.
-
The Water Bath is Your Friend: Don’t skip it! It’s the secret to preventing curdling and ensuring an even, creamy set.
-
The Wobble Test: Trust it more than the clock. Ovens vary, so start checking for that perfect jiggle at the lower end of the time range.
-
Flavor Variations: Add a teaspoon of cinnamon or a dash of almond extract with the vanilla. Before pouring the custard, you can sprinkle the bottom of the dish with a light layer of brown sugar for a caramel-like twist.