-
Cook Time: 45 minutes
-
Total Time: 50 minutes
-
Course: Dessert
-
Cuisine: American
-
Diet: Vegetarian
-
Difficulty: Low Intensity – The easiest dessert you will ever make. No mixing, no beating, no fancy techniques. Perfect for beginners, kids helping in the kitchen, or anyone needing a stress-free treat.
-
Servings: 8
-
Yield: One 9×13 inch baking dish
Equipment
-
9×13 inch Baking Dish
-
Can Opener
-
Measuring Cups
Ingredients
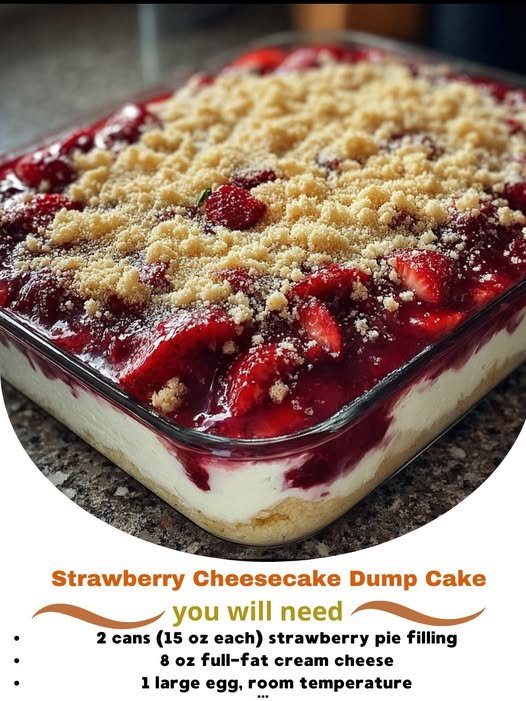
For the Filling:
-
2 (21 oz) cans strawberry pie filling
-
1 (8 oz) block full-fat cream cheese, softened and cut into ½-inch cubes
For the Topping:
-
1 (15.25 oz) box yellow or butter cake mix (DO NOT prepare the cake mix—use the dry powder straight from the box)
-
1 cup (2 sticks) unsalted butter, thinly sliced or melted
For Serving (Optional but Recommended):
-
Vanilla ice cream or whipped cream
-
Fresh mint for garnish
Instructions
Part 1: The “Dump” – Layering the Base
-
Preheat Oven: Begin by preheating your oven to 350°F (175°C). No need to grease the baking dish; the butter in the recipe will take care of that.
-
First Layer – Strawberries: Open the two cans of strawberry pie filling and pour them directly into the bottom of the 9×13 inch baking dish. Use a spatula or the back of a spoon to spread the filling into an even layer, ensuring it covers the entire bottom of the dish.
-
Second Layer – Cream Cheese: Evenly distribute the small, cubed pieces of softened cream cheese over the layer of strawberry pie filling. Do not mix or swirl. The goal is to have little pockets of cream cheese that will melt into creamy, tangy bursts throughout the dessert.
Part 2: The “Cake” – Creating the Topping
-
Third Layer – Cake Mix: Sprinkle the entire box of dry, unprepared yellow cake mix directly over the strawberry and cream cheese layers. Do not stir. Use your hands or a spoon to spread the powder into a uniform, even layer, covering the fruit and cheese completely.
-
The Butter Layer – The Key to Crispiness: This is the most crucial step for achieving the perfect texture.
-
Method 1 (Sliced Butter): Arrange the thin slices of cold butter evenly over the entire surface of the cake mix, placing them close together like tiles. This method creates lovely pockets of crisp and soft cake.
-
Method 2 (Melted Butter): For a more uniform, slightly denser topping, you can melt the two sticks of butter and drizzle it evenly over the cake mix.
-
Part 3: The Bake – Transforming into Dessert Magic
-
Bake: Place the baking dish in the preheated oven and bake for 40-50 minutes. The cake is done when the top is deep golden brown, the edges are bubbly, and the butter has been fully absorbed, creating a crisp, crumbly crust.
-
Cool Slightly: Remove the dump cake from the oven and place it on a wire rack. Allow it to cool for at least 15-20 minutes before serving. This resting period is essential as it allows the thick, bubbling fruit filling to set slightly, making it safer to eat and easier to serve. It will be served warm, not scalding hot.
Serving and Storage
-
To Serve: Scoop the warm dump cake into bowls. The ideal serving includes some of the juicy strawberry base, melty cheesecake pockets, and the crisp cake topping. Top with a generous scoop of vanilla ice cream or a dollop of whipped cream. The contrast of warm cake and cold ice cream is divine.
-
Storage: Cover any leftover dump cake with plastic wrap or transfer it to an airtight container. It can be stored in the refrigerator for up to 4 days.
-
Reheating: Reheat individual portions in the microwave for 30-60 seconds until warm. You can also reheat the entire dish, covered with foil, in a 300°F (150°C) oven for 15-20 minutes.
Nutrition Information
Please note: This is an estimate provided by an online nutrition calculator. Actual values will vary based on specific brands of ingredients used.
Serving Size: 1/8 of the recipe (without ice cream)
Calories: ~685
Total Fat: 35g (45% DV)
-
Saturated Fat: 21g (105% DV)
Cholesterol: 90mg (30% DV)
Sodium: 580mg (25% DV)
Total Carbohydrates: 90g (33% DV) -
Dietary Fiber: 2g (7% DV)
-
Sugars: 60g
Protein: 5g
Vitamin D: 1mcg (5% DV)
Calcium: 150mg (10% DV)
Iron: 2mg (10% DV)
Potassium: 180mg (4% DV)
Chef’s Notes & Tips for Success
-
The Cream Cheese is Key: Using full-fat, properly softened cream cheese is important. If it’s too cold, it won’t melt into creamy pockets and will remain too chunky. Cutting it into small, half-inch cubes ensures it distributes evenly and melts perfectly.
-
Don’t Mix!: The beauty of a dump cake is in the layers. Resist the urge to stir the ingredients together. The layered approach is what creates the distinct textural contrast between the fruity bottom and the cake-like top.
-
Butter Coverage is Crucial: For a perfectly cooked topping, try to get as much of the cake mix covered with butter as possible. Any dry patches of powder will remain uncooked and floury. If you notice a few dry spots after baking, you can drizzle a little more melted butter over them and return the dish to the oven for 5 minutes.
-
Get Creative with Flavors: This recipe is a fantastic template for endless variations.
-
Blueberry Cheesecake: Use two cans of blueberry pie filling.
-
Chery Cheesecake: Use cherry pie filling and a chocolate fudge cake mix.
-
Peach Cheesecake: Use two cans of peach pie filling and a spice cake mix.
-
-
Why is it Called a Dump Cake?: The name comes from the incredibly simple preparation method—you just “dump” the ingredients into the pan without any mixing or complicated steps. It’s a testament to how easy this dessert is to make!