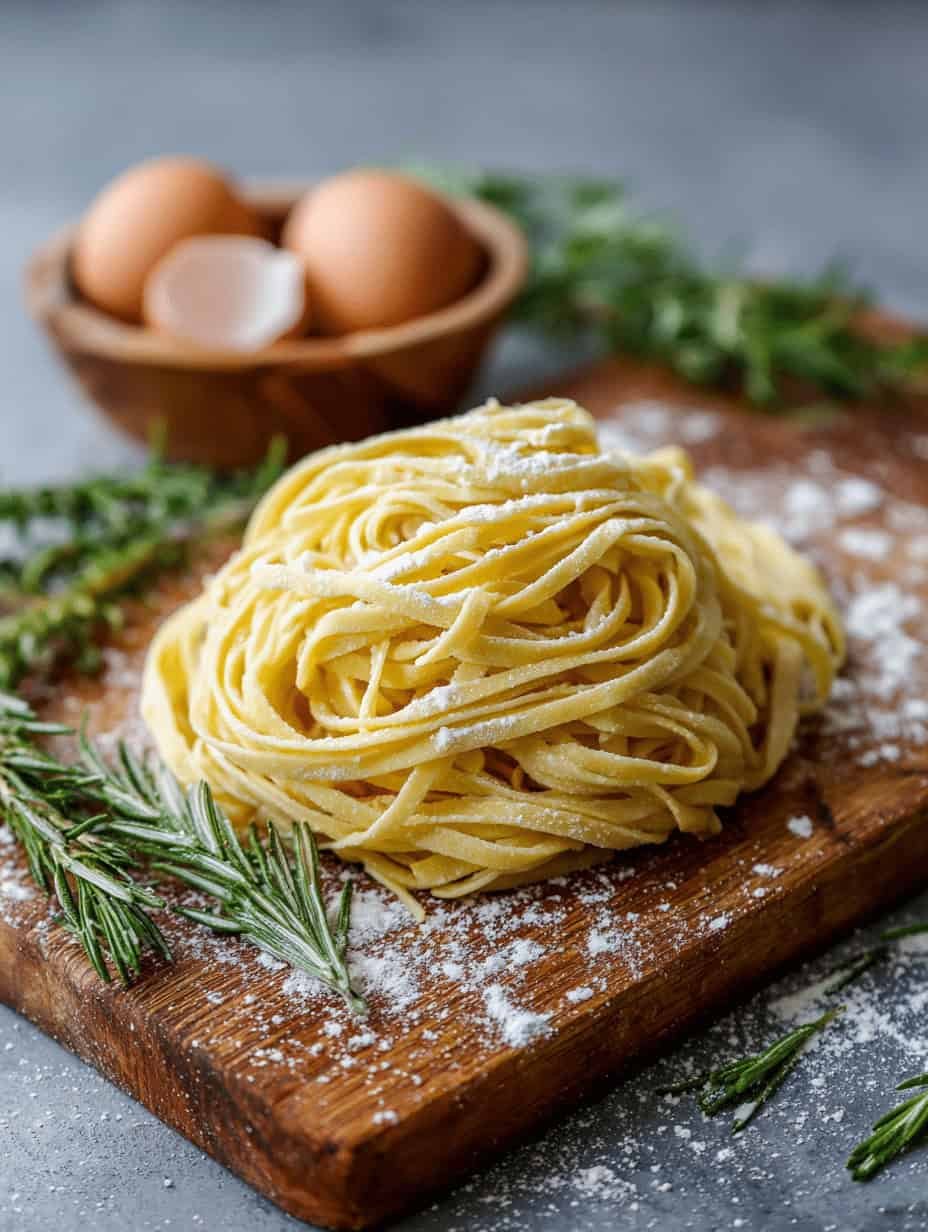
Discover the simple, soul-satisfying art of making Homemade Egg Noodles from scratch. With just 4 ingredients and no special equipment, you can create tender, rich, and satisfying noodles perfect for soups, stews, or buttered and herbed as a side. This is edible tradition in its purest form.
Introduction:
There is a profound difference between a store-bought dried noodle and one you’ve made by hand. It’s a difference you can taste, see, and feel. Homemade egg noodles are the epitome of culinary heritage—a simple, frugal recipe passed down through generations, transforming humble pantry staples into something magical. These noodles are not trying to be sleek Italian pasta; they are something else entirely. They are hearty, slightly chewy, and carry the rich, golden hue of egg yolks. They have substance. They stand up to the heartiest broths in chicken noodle soup and cradle thick stews like beef stroganoff with grace. This recipe demystifies the process, breaking it down into foolproof steps. It’s a tactile, rewarding kitchen project that connects you to countless home cooks before you and fills your kitchen with the incomparable, comforting aroma of fresh pasta dough. The reward is not just a noodle, but an experience and a taste of genuine, handmade goodness.
Recipe Details:
-
Prep Time: 30 minutes (including kneading)
-
Rest Time: 1 hour (crucial for relaxation)
-
Cook Time: 3-5 minutes
-
Total Project Time: ~2 hours (mostly hands-off resting)
-
Skill Level: Beginner (requires patience, not expertise)
-
Cooking Intensity: Low to Medium (kneading is the most active part)
-
Course: Side, Soup Component, Main (with sauce)
-
Servings: 4-6 (as a side or in soup)
-
Yield: About 1 lb of fresh noodles
Ingredients
-
2 cups (250g) all-purpose flour, plus more for dusting
-
3 large egg yolks + 1 whole large egg (or use 2 whole eggs for a slightly less rich noodle)
-
1 teaspoon fine sea salt
-
2-3 tablespoons water or milk, as needed
-
Optional: 1 tablespoon olive oil or melted butter (adds tenderness)
The Ingredient Philosophy: The magic ratio is roughly 1 cup of flour to 1 whole egg. Using extra yolks here adds richness, color, and a more tender bite. The salt is essential for flavoring the dough itself. Simple, high-quality ingredients are key.
Equipment
-
Large mixing bowl or clean countertop
-
Fork or dough whisk
-
Plastic wrap or a clean kitchen towel
-
Rolling pin
-
Sharp knife, pizza cutter, or pasta cutter
-
Baking sheet or drying rack for dusted noodles
Instructions
Phase 1: The Foundation – Making the Dough (Time: 15 minutes | Intensity: Medium)
-
The Mound Method: On a clean, dry countertop, mound the flour. Create a deep well in the center with your fingers, like a volcano. This well will hold your wet ingredients.
-
The Well Assembly: Into the well, carefully add the egg yolks, whole egg, and salt. If using oil or butter, add it now. Do not let the wet ingredients break the flour walls yet.
-
The Gentle Incorporation: Using a fork, begin to beat the eggs and salt together in the center. Slowly, gradually, start incorporating flour from the inner walls of the well into the egg mixture. Continue until a thick, pasty batter forms and about half the flour is incorporated. This controlled method helps prevent dry patches.
-
The Knead: Once it becomes too thick for the fork, use your hands or a bench scraper to bring the rest of the flour into the center. Knead the shaggy mass together. It will feel very dry at first. Knead for 8-10 minutes. The dough is ready when it is smooth, elastic, and all flour is incorporated. It should be firm, not sticky. If it remains crumbly and won’t come together, add water or milk, ½ tablespoon at a time, kneading thoroughly after each addition. If it’s sticky, add a small sprinkle of flour.
Phase 2: The Crucial Pause – Resting the Dough (Time: 1 hour | Intensity: None)
-
Shape and Wrap: Form the kneaded dough into a smooth ball. Wrap it tightly in plastic wrap or place it under a slightly damp, inverted bowl. Let it rest at room temperature for at least 1 hour. This is non-negotiable. It allows the gluten to relax, making the dough infinitely easier to roll out without springing back. It also ensures a more tender noodle.
Phase 3: The Transformation – Rolling & Cutting (Time: 15 minutes | Intensity: Low-Medium)
-
Divide and Conquer: After resting, unwrap the dough. Divide it into 4 equal portions. Work with one portion at a time, keeping the others covered to prevent drying.
-
Roll to Perfection: On a lightly floured surface, roll the first portion into a thin rectangle. For soup noodles, aim for about 1/16-inch thick (you should almost be able to see your hand through it). For wider, stroganoff-style noodles, 1/8-inch is perfect. Use consistent pressure and rotate the dough 90 degrees often to maintain an even shape and prevent sticking. Dust with minimal flour only as needed.
-
The Cut: Let the rolled sheet dry for just 2-3 minutes—this prevents sticking when cut. For thin soup noodles, loosely roll the sheet into a log (like a jelly roll). Using a very sharp knife, slice the log crosswise into desired widths (¼-inch for standard, ⅛-inch for fine). Unfurl the noodles immediately and toss them on a baking sheet dusted with flour or cornmeal to prevent sticking. For wide noodles, simply cut the flat sheet into strips with a knife or pizza cutter.
Phase 4: The Grand Finale – Cooking & Serving (Time: 5 minutes | Intensity: Low)
-
Cook Immediately or Dry: Fresh noodles can be cooked right away. Bring a large pot of well-salted water to a rolling boil. Add the noodles, stirring gently to separate.
-
The Quick Cook: Fresh noodles cook very quickly—typically in 2-4 minutes. Taste for doneness; they should be tender but still have a slight bite (al dente). They will float to the surface when nearly done.
-
Drain and Dress: Drain immediately. Do not rinse. Toss with a little butter or olive oil to prevent sticking if not saucing immediately.
-
To Dry for Storage: If not using immediately, let the cut noodles air-dry on floured baking sheets for 1-2 hours, tossing occasionally, until completely hard and brittle. Store in an airtight container at room temperature for up to a month. Cook dried homemade noodles for 8-12 minutes.
Notes & Culinary Mastery Tips
-
The Texture Touchstone: The dough should feel like firm Play-Doh—smooth, pliable, and not tacky. The kneading develops the gluten that gives the noodle its satisfying chew.
-
Rolling Pin Alternatives: No large rolling pin? Use a clean wine bottle. The key is even, patient pressure.
-
Cutting Consistency: For perfectly even noodles, use a ruler as a guide for your knife cuts. A fluted pastry wheel makes beautiful decorative edges for wider noodles.
-
Flavor Variations:
-
Herbed Noodles: Add 1 tablespoon of finely chopped fresh parsley, chives, or dill to the flour before mixing.
-
Spinach Noodles: Replace the water/milk with 2-3 tablespoons of pureed cooked spinach (squeezed very dry).
-
Whole Wheat: Substitute up to ½ cup of the all-purpose flour with whole wheat flour for a nuttier flavor and more fiber.
-
-
How to Use Your Noodles:
-
In Soup: Add directly to simmering broth for the last 5 minutes of cooking.
-
Buttered & Herbed: Toss with melted butter, parsley, and black pepper.
-
With a Creamy Sauce: The perfect base for a simple Alfredo or a rich mushroom sauce.
-
-
Storage: Fresh, uncooked noodles can be stored in the fridge on a floured tray, covered, for 1-2 days. They can also be frozen: lay portions on a parchment-lined sheet, freeze solid, then transfer to a freezer bag. Cook from frozen, adding 1-2 minutes to the cooking time.
Nutrition Information
(Per serving, based on 6 servings from the recipe as written. Estimate for cooked, plain noodles.)
-
Calories: ~220 kcal
-
Total Fat: 4g
-
Saturated Fat: 1.5g
-
-
Cholesterol: 105mg
-
Sodium: 220mg
-
Total Carbohydrates: 36g
-
Dietary Fiber: 1g
-
Sugars: 0g
-
Protein: 8g
-
Rich In: Selenium, Riboflavin (B2), Folate, Iron (from enriched flour).
This recipe is a bridge between the past and your present table. It requires no fancy gadgets, just your hands, a little time, and the simple desire to create something truly nourishing. The process is meditative, the result profoundly satisfying. These noodles carry the weight of tradition and the unmistakable signature of care. They transform a simple bowl of broth into a hug from the inside and turn a weeknight dinner into a small, handmade celebration. So, clear some counter space, and prepare to make memories—and the best noodles of your life.