Total Time: 1 hour 10 minutes (plus cooling) | Active Time: 15 minutes | Bake Time: 45-55 minutes
Difficulty: Incredibly Easy | Yield: One 9-inch pie (serves 8-10) | Cost: Low
Category: Dessert, Pie, Comfort Food
Imagine the very best part of a chocolate chip cookie—the soft, buttery, gooey center where the chocolate pools in molten pockets—but magnified to pie-sized proportions. That is the magic of Easy Chocolate Chip Cookie Pie. This is not a pie with a cookie crust; it’s a deep-dish, spoonable, warm cookie that bakes up with a golden-brown, slightly crisp top and a fabulously soft, almost fudge-like center. It’s the ultimate dessert for anyone who believes a cookie is a single-serving item and a pie is meant for sharing; this glorious hybrid satisfies both impulses. Deceptively simple to make with pantry staples and no fancy techniques, it’s the show-stopping dessert that looks and tastes like you fussed for hours, when in reality, it’s easier than rolling out cookie dough. Serve it warm with a scoop of vanilla ice cream, and prepare for it to become a legendary request.
The Science of the Gooey Center
What transforms a standard cookie dough into a pie that stays soft and gooey in the center, even after baking? The secret is threefold: ratios, pan size, and bake time. This recipe uses a higher ratio of brown sugar to white sugar. Brown sugar contains molasses, which attracts and retains moisture, ensuring a soft, chewy texture. Beating the eggs and sugars until thick and pale (a step often skipped in casual cookie-making) incorporates air and helps create structure without needing excess flour, which would lead to a cakey, dry texture. Baking it in a deep pie plate, rather than a shallow sheet, means the exterior sets and browns while the interior, protected by the outer ring of dough, remains lush and under-baked in the best possible way. The final product is a textural masterpiece: a crisp, sugary top, tender-crumbly edges, and a rich, gooey heart.
Ingredients
For the Cookie Pie Filling:
-
2 large eggs, at room temperature
-
½ cup (100g) granulated white sugar
-
½ cup (110g) packed light brown sugar
-
½ cup (113g / 1 stick) unsalted butter, melted and cooled slightly
-
1 tsp pure vanilla extract
-
½ cup (65g) all-purpose flour
-
¼ tsp baking powder (optional, for a slight lift)
-
¼ tsp fine sea salt
-
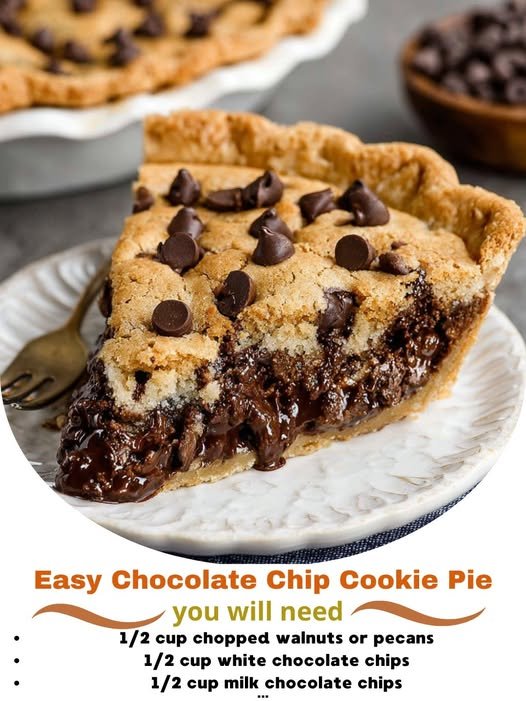
1 cup (170g) semi-sweet chocolate chips
-
½ cup (65g) chopped walnuts or pecans (optional, but recommended for texture)
For the Assembly:
-
1 unbaked 9-inch deep-dish pie crust, homemade or refrigerated
-
Optional: 1 tbsp all-purpose flour, for tossing with chocolate chips
For Serving (Non-Negotiable Enhancements):
-
Vanilla ice cream
-
Whipped cream
-
A drizzle of chocolate or caramel sauce
Essential Equipment
-
9-inch deep-dish pie plate
-
Electric hand mixer or stand mixer (can be mixed by hand with vigor)
-
Medium mixing bowl
-
Whisk
-
Rubber spatula
-
Measuring cups and spoons
Step-by-Step Instructions
Step 1: Prepare and Preheat
Preheat your oven to 325°F (165°C). This lower-than-usual cookie temperature is crucial for baking the pie evenly without burning the edges before the center sets. Place your unbaked pie crust in the pie plate, crimping the edges decoratively if desired. Do not prick the crust. Place the pie plate on a sturdy baking sheet; this makes handling easy and catches any potential bubble-overs.
Step 2: Create the Luscious Base
In a medium mixing bowl, combine the eggs, granulated sugar, and brown sugar. Using an electric mixer on medium-high speed, beat for 2-3 full minutes until the mixture is thick, pale in color, and forms a ribbon when the beaters are lifted. This step is the foundation of the pie’s texture—do not rush it. Scrape down the sides of the bowl.
Step 3: Incorporate Wet and Dry Ingredients
With the mixer on low speed, slowly drizzle in the slightly cooled, melted butter and the vanilla extract. Mix just until combined. The mixture will be glossy and smooth.
In a separate small bowl, whisk together the ½ cup of flour, baking powder (if using), and salt. Add this dry mixture to the wet ingredients. Mix on low speed just until the flour disappears, about 15-20 seconds. Overmixing develops gluten, which leads to toughness.
Step 4: Fold in the Goodies
If using, toss the chocolate chips (and nuts) with the optional 1 tablespoon of flour. This light coating helps prevent them from sinking to the bottom during baking. Using a rubber spatula, gently fold the chocolate chips and nuts into the batter until evenly distributed. The batter will be loose and liquid—this is correct.
Step 5: Bake to Perfection
Pour the batter into the unbaked pie crust. It will fill it nearly to the top. Smooth the top with the spatula. Carefully transfer the baking sheet with the pie to the center rack of the preheated oven.
Bake for 45 to 55 minutes. The pie is done when the top is a deep golden brown, the edges are set and slightly puffed, and the center still appears slightly soft and jiggles gently when shaken—like a brownie. A toothpick inserted 2 inches from the edge should come out with moist crumbs, but clean or with wet batter in the very center (about a 1-inch circle) is fine. Do not overbake. The residual heat will continue to cook the center as it cools.
Step 6: The Crucial Cooling Period
Remove the pie from the oven and place it (still on the baking sheet) on a wire cooling rack. This is the hardest step: Let the pie cool for at least 1.5 to 2 hours before slicing. If cut too soon, the deliciously gooey center will run everywhere. As it cools, it will deflate slightly and set perfectly, achieving the ideal sliceable-yet-fudgy texture.
Step 7: Serve with Flair
Slice the pie into wedges. Serve each piece slightly warm or at room temperature. Top immediately with a generous scoop of cold vanilla ice cream, which will begin to melt into the warm, gooey interior, creating the ultimate bite. Add a dollop of whipped cream and a drizzle of sauce for maximum effect.
Storage & Freshness
Store any leftover pie, covered loosely with foil or plastic wrap at room temperature, for up to 2 days. For longer storage, cover tightly and refrigerate for up to 4 days. The texture is best at room temperature or slightly warmed. To reheat, place individual slices in a microwave for 10-15 seconds. The pie can be frozen, tightly wrapped, for up to 2 months. Thaw overnight in the refrigerator and bring to room temperature or warm gently before serving.
Nutrition Information (Per slice, based on 10 slices, without ice cream or nuts)
-
Calories: ~380 kcal
-
Total Fat: 22g
-
Saturated Fat: 12g
-
Cholesterol: 65mg
-
Sodium: ~150mg (varies with pie crust)
-
Total Carbohydrates: 45g
-
Dietary Fiber: 2g
-
Sugars:* 32g
-
Protein: 4g
Note: Nutrition information is an estimate. Values can vary significantly based on the specific brand of pie crust, chocolate chips, and exact measurements used. Adding nuts increases healthy fats and protein.
Chef’s Notes & Flavor Adventures
-
Crust Options: A refrigerated pie crust works perfectly. For a next-level buttery flavor, use a homemade crust or even a shortbread cookie crust pressed into the plate.
-
Chocolate Choices: Use a mix of semi-sweet and milk chocolate chips, or chop up a high-quality chocolate bar for varied chunk sizes. Dark chocolate chips cater to a more adult palate.
-
The “Pizazz” Add-Ins:
-
Salted Caramel: Swirl ½ cup of thick caramel sauce into the batter before baking.
-
Candy Bar: Fold in ½ cup chopped peanut butter cups, toffee bits, or pretzel pieces.
-
Espresso: Add 1 tsp instant espresso powder to the dry ingredients for a mocha twist.
-
-
Gluten-Free Adaptation: Use a 1:1 gluten-free all-purpose flour blend and a certified GF pie crust. The texture may be slightly more delicate.
-
The Ice Cream Rule: The contrast of temperatures and textures (hot/cold, gooey/creamy) is fundamental to the experience. Premium vanilla bean ice cream is highly recommended.